
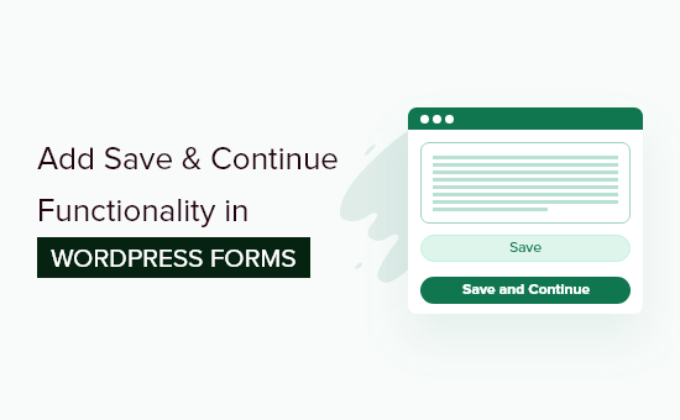
How to Add Save & Continue Functionality in WordPress Forms
Understanding the Need for Save & Continue
Users often abandon lengthy online forms due to various reasons, such as time constraints, distractions, or lack of required information at hand. This abandonment leads to lost leads, incomplete transactions, and a frustrating user experience. Implementing a “Save & Continue” feature addresses this issue by allowing users to save their progress and return later to complete the form. This not only improves the user experience but also increases form completion rates. By providing a way for users to save their work, you demonstrate consideration for their time and convenience, ultimately leading to better engagement and conversions.
Exploring Different Approaches to Implement Save & Continue
There are several methods to integrate Save & Continue functionality into WordPress forms, ranging from using dedicated plugins to custom coding solutions. Each approach has its advantages and disadvantages, depending on your technical expertise, budget, and the complexity of your form.
Using WordPress Form Plugins with Built-in Save & Continue Functionality
Many popular WordPress form plugins offer built-in Save & Continue features. These plugins provide a user-friendly interface to enable and configure the functionality without requiring any coding knowledge.
- Gravity Forms: Gravity Forms is a premium plugin with advanced features, including Save & Continue. It allows users to save their progress and receive a unique link to resume the form later.
- WPForms: WPForms, another popular premium option, offers a Save & Resume addon that enables users to save their form data and continue filling it out at their convenience.
- Formidable Forms: Formidable Forms provides Save Draft functionality that allows users to save incomplete forms and return to them later.
- Ninja Forms: While Ninja Forms core doesn’t have this feature, extensions exist that can add Save & Continue functionality.
These plugins generally handle the complexities of storing and retrieving form data, generating unique URLs, and managing user sessions. This approach is ideal for users who prefer a no-code or low-code solution and want to leverage the power of a robust form builder.
Implementing Save & Continue with Custom Code
For developers who prefer a more hands-on approach, implementing Save & Continue functionality with custom code offers greater flexibility and control. This method involves creating custom scripts to store form data in the database, generate unique identifiers, and retrieve the data when the user returns.
This approach requires a strong understanding of PHP, JavaScript, and database management. It also demands careful attention to security considerations to prevent data breaches and unauthorized access.
Hybrid Approach: Combining Plugins and Custom Code
A hybrid approach involves using a form plugin as a foundation and then extending its functionality with custom code to implement Save & Continue. This allows you to leverage the ease of use and features of the plugin while also customizing the Save & Continue functionality to meet specific requirements.
For example, you could use a plugin to handle the basic form building and submission process, and then write custom code to store the form data in a custom database table and generate unique URLs for resuming the form. This approach requires a moderate level of coding skills but offers a balance between ease of use and customization.
Detailed Guide: Implementing Save & Continue with WPForms (Save & Resume Addon)
This section provides a step-by-step guide on implementing Save & Continue functionality using WPForms and its Save & Resume addon. This method is relatively simple and doesn’t require any coding.
Step 1: Install and Activate WPForms and the Save & Resume Addon
* First, purchase and download the WPForms plugin and the Save & Resume addon from the WPForms website. You’ll need a Pro or Elite license to access the addon.
* Log in to your WordPress dashboard and navigate to Plugins > Add New.
* Click on the “Upload Plugin” button and upload the WPForms plugin file.
* Activate the WPForms plugin.
* Repeat the process to upload and activate the Save & Resume addon.
Step 2: Create a New Form or Edit an Existing Form
* Go to WPForms > Add New to create a new form. You can also edit an existing form by navigating to WPForms > All Forms and clicking on the form you want to modify.
* Use the drag-and-drop interface to add the necessary fields to your form.
Step 3: Enable the Save & Resume Feature
* In the form editor, navigate to Settings > General.
* Scroll down to the “Advanced” section and check the box labeled “Enable Save & Resume”.
* You can customize the following settings:
- Cookie Expiration: Set the number of days the saved form data will be stored in the user’s browser.
- Resume Button Text: Customize the text displayed on the button that allows users to resume their saved form.
- Save Button Text: Customize the text displayed on the button that saves the form progress.
* Click the “Save” button to save the form settings.
Step 4: Add the “Save” Button to Your Form
* Go back to the form builder and add an HTML field to your form.
* In the HTML field, add the following code snippet:
“`html
“`
* Adjust the button text to match your preference.
* Position the HTML field where you want the “Save” button to appear on your form.
Step 5: Configure Email Notifications (Optional)
* You can configure WPForms to send an email to the user with a link to resume their saved form.
* Navigate to Settings > Notifications in the form editor.
* Ensure that the “Enable Notifications” option is enabled.
* In the “Admin Email” section, configure the email settings as needed. You can add a custom message to the email body, including a link to the saved form. Use the `{entry_resume_link}` smart tag to insert the resume link into the email.
Step 6: Test the Save & Resume Functionality
* Embed the form on a page or post on your website.
* Fill out some fields in the form and click the “Save & Continue Later” button.
* Verify that the form data is saved and that you can resume the form by clicking the link provided (either via the resume button or the email).
Detailed Guide: Implementing Save & Continue with Custom Code (Simplified Example)
This section provides a simplified example of how to implement Save & Continue functionality with custom code. This example uses PHP and JavaScript to store form data in the user’s browser using local storage. This is a basic implementation and should be adapted and enhanced for production use.
Step 1: Create a Custom JavaScript File
* Create a new JavaScript file (e.g., `save-continue.js`) and add the following code:
“`javascript
jQuery(document).ready(function($) {
// Function to save form data to local storage
function saveFormData() {
var formData = {};
$(‘form input, form textarea, form select’).each(function() {
formData[$(this).attr(‘name’)] = $(this).val();
});
localStorage.setItem(‘formData’, JSON.stringify(formData));
alert(‘Form data saved!’);
}
// Function to load form data from local storage
function loadFormData() {
var formData = localStorage.getItem(‘formData’);
if (formData) {
formData = JSON.parse(formData);
$.each(formData, function(name, value) {
$(‘form [name=”‘ + name + ‘”]’).val(value);
});
alert(‘Form data loaded!’);
}
}
// Add a “Save” button to the form
$(‘form’).append(‘‘);
// Add a “Load” button to the form
$(‘form’).append(‘‘);
// Event listener for the “Save” button
$(‘#save-form-data’).click(function() {
saveFormData();
});
// Event listener for the “Load” button
$(‘#load-form-data’).click(function() {
loadFormData();
});
// Load saved form data on page load
loadFormData();
});
“`
* This code adds “Save” and “Load” buttons to the form. When the “Save” button is clicked, it gathers all the form data and stores it in local storage as a JSON string. When the “Load” button is clicked, it retrieves the data from local storage, parses it, and populates the form fields. It also loads the data when the page loads.
Step 2: Enqueue the JavaScript File in WordPress
* Open your theme’s `functions.php` file or create a custom plugin.
* Add the following code to enqueue the JavaScript file:
“`php
function enqueue_custom_scripts() {
wp_enqueue_script( ‘save-continue’, get_template_directory_uri() . ‘/js/save-continue.js’, array( ‘jquery’ ), ‘1.0’, true );
}
add_action( ‘wp_enqueue_scripts’, ‘enqueue_custom_scripts’ );
“`
* Replace `get_template_directory_uri() . ‘/js/save-continue.js’` with the correct path to your JavaScript file.
Step 3: Add a Form to Your WordPress Page or Post
* Create a simple HTML form in your WordPress page or post. For example:
“`html
“`
Step 4: Test the Save & Continue Functionality
* Open the page or post containing the form in your browser.
* Fill out some fields in the form and click the “Save & Continue Later” button.
* Refresh the page or close and reopen your browser.
* Click the “Load Saved Data” button. The form should be populated with the saved data.
Important Considerations for the Custom Code Example:
* Security: This is a simplified example and stores data in the user’s browser’s local storage. Local storage is not encrypted and should not be used for sensitive information. For production environments, consider storing the data on the server-side with appropriate security measures.
* Data Validation: This example doesn’t include data validation. You should add validation to ensure that the data is in the correct format before saving it.
* Error Handling: Add error handling to gracefully handle cases where data cannot be saved or loaded.
* Scalability: This method might not be suitable for large forms with many fields, as local storage has limited capacity.
Best Practices for Implementing Save & Continue
* Clear and Concise Instructions: Provide clear instructions on how to use the Save & Continue feature. Explain how the data is saved, how long it will be stored, and how users can resume their progress.
* User-Friendly Interface: Ensure that the Save & Continue functionality is easy to use and understand. The buttons and links should be clearly labeled and visually appealing.
* Secure Data Storage: Implement secure data storage mechanisms to protect user data from unauthorized access. Use encryption and other security measures to prevent data breaches. For storing sensitive data, server-side storage is highly recommended.
* Mobile Responsiveness: Ensure that the Save & Continue functionality works seamlessly on all devices, including desktops, tablets, and smartphones.
* Regular Testing: Thoroughly test the Save & Continue functionality to ensure that it works correctly and doesn’t introduce any bugs or issues. Test different scenarios, such as saving and resuming forms on different browsers and devices.
* Consider GDPR and Privacy: Be transparent about how you store and use saved form data. Comply with GDPR and other relevant privacy regulations. Provide users with the option to delete their saved data.
* Progress Indicators: For multi-step forms, use progress indicators to show users how far they have progressed and how much is left to complete. This can motivate them to continue filling out the form.
* Email Notifications: Send email notifications to users with a link to resume their saved form. This is especially helpful if they have abandoned the form for a significant period.
* Offer Guest Save & Continue: For forms that don’t require user registration, consider offering a guest Save & Continue option. This allows users to save their progress without creating an account.
Conclusion
Implementing Save & Continue functionality in WordPress forms can significantly improve user experience and increase form completion rates. Whether you choose to use a dedicated plugin or implement a custom solution, it’s essential to follow best practices to ensure secure data storage, user-friendliness, and compliance with privacy regulations. By providing users with a convenient way to save their progress and return later, you can create a more engaging and productive online experience.
- How to Add Keywords and Meta Descriptions in WordPress
- How to Add Links as Content Cards in WordPress (2 Methods)
- How to Limit the Number of WordPress Form Entries (4 Ways)
- 12 Most Useful WordPress Custom Post Types Tutorials
- How to Show Content Only to RSS Subscribers in WordPress
- How to Set Up WordPress Form Tracking in Google Analytics
- How to Create WordPress Forms With Dropdown Fields (Easy Method)