
How to Easily Enable WordPress Debug Mode to Fix Site Errors
Understanding WordPress Debug Mode
WordPress debug mode is a powerful tool that helps you identify and fix errors on your website. It’s like having a doctor examine your website’s code and point out exactly where things are going wrong. When enabled, debug mode displays PHP errors, notices, and warnings that are normally hidden from view. These messages can be invaluable in pinpointing the source of problems, whether they originate from your theme, a plugin, or the WordPress core itself.
Think of it as a detective giving you clues to solve a mystery. Instead of seeing a generic “There has been a critical error on your website” message, you’ll see specific error messages indicating which file and line of code are causing the issue. This allows you to efficiently troubleshoot problems and get your website back on track.
Debugging is crucial for maintaining a healthy and stable WordPress website. Without it, you’re essentially flying blind when something goes wrong. Debug mode provides the visibility needed to diagnose problems, preventing them from escalating into major issues that could impact your website’s performance and user experience.
Why You Should Use Debug Mode
There are several compelling reasons to use WordPress debug mode when troubleshooting issues on your site:
- Identify PHP Errors: Exposes PHP errors, notices, and warnings, which are usually hidden.
- Pinpoint the Source of Problems: Tells you exactly which file and line of code are causing the issue.
- Theme and Plugin Compatibility Issues: Helps identify conflicts between your theme, plugins, and the WordPress core.
- Improve Website Performance: By fixing errors, you can improve your website’s overall performance and stability.
- Enhance Security: Debugging can uncover potential security vulnerabilities that need to be addressed.
- Streamline Development: Makes it easier to develop and test new features or modifications to your website.
Ignoring errors can lead to a variety of problems, including:
- Website crashes
- Security vulnerabilities
- Poor user experience
- Loss of data
- SEO ranking decline
By proactively using debug mode, you can prevent these issues and ensure that your website remains healthy and performs optimally.
How to Enable WordPress Debug Mode: The wp-config.php Method
The most common and reliable way to enable WordPress debug mode is by modifying the `wp-config.php` file. This file is located in the root directory of your WordPress installation and contains important configuration settings for your website.
Here’s a step-by-step guide:
- Access your website’s files: You’ll need to access your website’s files using an FTP client (such as FileZilla) or a file manager provided by your hosting provider (usually accessible through your cPanel or similar hosting control panel).
- Locate the wp-config.php file: Navigate to the root directory of your WordPress installation. This is the directory that contains folders like `wp-content`, `wp-admin`, and `wp-includes`. You should find the `wp-config.php` file in this directory.
- Download a backup of wp-config.php: Before making any changes, it’s crucial to create a backup of the `wp-config.php` file. Download a copy to your computer. This will allow you to restore the original file if something goes wrong.
- Edit the wp-config.php file: Open the `wp-config.php` file using a text editor. Avoid using word processors like Microsoft Word, as they can add formatting that can break the file. Suitable text editors include Notepad++, Sublime Text, or VS Code.
- Find the line that says ‘That’s all, stop editing! Happy blogging.’: Scroll through the file and locate this line. You’ll be adding the debug code snippets *before* this line.
- Add the Debug Code: Add the following code snippets to your `wp-config.php` file *before* the line ‘That’s all, stop editing! Happy blogging.’:
“`php
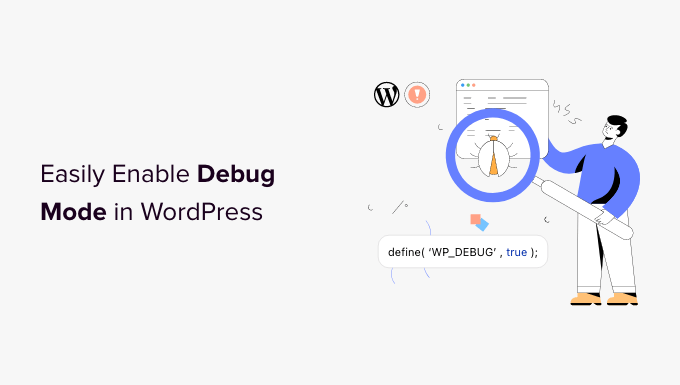
define( ‘WP_DEBUG’, true );
define( ‘WP_DEBUG_LOG’, true );
define( ‘WP_DEBUG_DISPLAY’, false );
define( ‘SCRIPT_DEBUG’, true );
“`* `WP_DEBUG`: This constant is the master switch for debug mode. Setting it to `true` enables debugging.
* `WP_DEBUG_LOG`: This constant enables the logging of debug messages to a file called `debug.log` located in the `wp-content` directory. Setting it to `true` ensures that errors are recorded for later review.
* `WP_DEBUG_DISPLAY`: This constant controls whether debug messages are displayed on your website. Setting it to `false` hides the messages from public view while still logging them to the `debug.log` file. This is recommended for live websites.
* `SCRIPT_DEBUG`: This constant forces WordPress to use the development versions of core CSS and JavaScript files. This can be helpful for identifying issues related to minified or concatenated files. - Save the changes: Save the modified `wp-config.php` file.
- Upload the modified wp-config.php file: Upload the saved file back to your website’s root directory, replacing the original file.
- Test your website: Visit different pages of your website and try to reproduce the error you’re trying to fix. If `WP_DEBUG_DISPLAY` is set to `true`, you’ll see error messages directly on the page. If it’s set to `false`, you’ll need to check the `debug.log` file in the `wp-content` directory.
Examining the debug.log file
The `debug.log` file, created when `WP_DEBUG_LOG` is set to `true`, is a valuable resource for tracking down errors. This file contains a chronological record of all PHP errors, notices, and warnings that occur on your website.
Here’s how to access and interpret the `debug.log` file:
- Access your website’s files: Use an FTP client or your hosting provider’s file manager to access your website’s files.
- Locate the debug.log file: Navigate to the `wp-content` directory. You should find the `debug.log` file in this directory. If the file doesn’t exist, double-check that `WP_DEBUG_LOG` is set to `true` in your `wp-config.php` file and that errors have occurred since enabling logging.
- Download and open the debug.log file: Download the `debug.log` file to your computer and open it with a text editor.
- Analyze the error messages: The `debug.log` file will contain a list of error messages, each including:
* Date and Time: The timestamp indicating when the error occurred.
* Error Type: The type of error (e.g., Notice, Warning, Fatal error).
* Error Message: A description of the error.
* File and Line Number: The path to the file and the line number where the error occurred. - Example Error Message:
“`
[27-Oct-2023 10:00:00 UTC] PHP Notice: Undefined variable: my_variable in /var/www/html/wp-content/themes/my-theme/functions.php on line 10
“`This message indicates that the variable `$my_variable` is being used without being defined in the `functions.php` file of the `my-theme` theme on line 10.
By carefully analyzing the error messages in the `debug.log` file, you can pinpoint the exact location of problems and begin troubleshooting them.
Alternative Methods to Enable Debug Mode
While modifying the `wp-config.php` file is the most common method, there are alternative ways to enable WordPress debug mode.
- Using a Plugin: There are several plugins available that simplify the process of enabling debug mode. These plugins often provide a user-friendly interface for toggling debug settings without requiring you to directly edit the `wp-config.php` file. Some popular plugins include “Debug Bar” and “Query Monitor”. These plugins also often provide additional debugging tools.
- Using WP-CLI: WP-CLI (WordPress Command Line Interface) is a powerful tool for managing WordPress websites from the command line. You can use WP-CLI to enable debug mode with a simple command: `wp config set WP_DEBUG true –raw`. This method is suitable for developers and users comfortable with using the command line.
Important Considerations When Using Debug Mode
While debug mode is a valuable tool, it’s essential to use it responsibly and be aware of its potential impact on your website.
- Never Enable Debug Mode on a Live Website (With `WP_DEBUG_DISPLAY` set to true): Displaying error messages on a live website can expose sensitive information to visitors, including file paths and potential security vulnerabilities. It can also create a negative user experience. Always set `WP_DEBUG_DISPLAY` to `false` on a live website, or better yet, perform debugging on a staging environment.
- Use a Staging Environment: A staging environment is a copy of your live website that you can use for testing and development without affecting the live site. It’s the ideal place to enable debug mode and troubleshoot issues.
- Disable Debug Mode After Troubleshooting: Once you’ve identified and fixed the errors, remember to disable debug mode by setting `WP_DEBUG` to `false` in your `wp-config.php` file. Leaving debug mode enabled can negatively impact your website’s performance and security.
- Check for Sensitive Information in Error Messages: Be mindful of the information displayed in error messages. Avoid exposing sensitive data like passwords, API keys, or database credentials.
Common WordPress Errors and How Debug Mode Helps
Here are some common WordPress errors and how debug mode can assist in resolving them:
- “White Screen of Death”: This is a generic error that indicates a fatal error in your WordPress code. Debug mode can help identify the specific file and line of code causing the error.
- “Internal Server Error (500)”: This error usually indicates a problem with your server configuration or a PHP error. Debug mode can help pinpoint the source of the PHP error.
- “Error Establishing a Database Connection”: This error indicates a problem connecting to your WordPress database. While debug mode may not directly solve this issue, it can provide clues about the cause, such as incorrect database credentials.
- Plugin Conflicts: Debug mode can help identify conflicts between plugins by displaying error messages related to specific plugins.
- Theme Errors: Debug mode can help identify errors in your theme’s code, such as syntax errors or undefined variables.
Troubleshooting Common Debug Mode Issues
Sometimes, enabling debug mode might not work as expected, or you might encounter issues. Here are some common problems and their solutions:
- Debug mode is enabled, but no errors are displayed:
* Check WP_DEBUG_DISPLAY: Ensure that `WP_DEBUG_DISPLAY` is set to `true` if you want to see errors on the screen.
* Check error_reporting level: Make sure your server’s `error_reporting` level is set to display all errors. You can set this in your `php.ini` file or using `.htaccess`.
* Clear your browser cache: Sometimes, cached versions of your website can prevent error messages from being displayed. - The debug.log file is not being created:
* Check WP_DEBUG_LOG: Ensure that `WP_DEBUG_LOG` is set to `true`.
* Check file permissions: Make sure the `wp-content` directory has write permissions.
* Check for errors during logging: There might be errors preventing the log file from being created. Check your server’s error logs for more information. - Error messages are too technical or confusing:
* Consult the WordPress documentation: The WordPress documentation provides detailed information about common errors and how to fix them.
* Search online forums and communities: Many WordPress users have encountered similar errors and shared their solutions online.
* Hire a WordPress developer: If you’re unable to resolve the errors yourself, consider hiring a WordPress developer to assist you.
By understanding these common issues and their solutions, you can ensure that debug mode works effectively and helps you troubleshoot your WordPress website.
- WordPress Quick Edit Not Working? Here’s How to Fix It in No Time
- How to Fix Error Too Many Redirects Issue in WordPress
- How to Fix WordPress Search Not Working (5 Common Errors)
- How to Fix Missing Theme Customizer in WordPress Admin
- How to Fix “The Link You Followed Has Expired” Error in WordPress
- How to Fix Pluggable.php File Errors in WordPress
- How to Fix Post-Processing of Image Failed Error in WordPress