
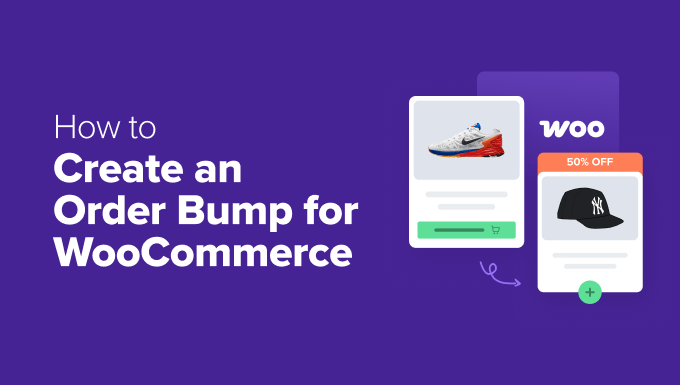
How to Create an Order Bump for WooCommerce (Step by Step)
## How to Create an Order Bump for WooCommerce (Step by Step)
An order bump, also known as a pre-purchase offer, is a strategic upselling technique used in WooCommerce to encourage customers to add an additional product to their cart right before they complete their purchase. These offers are displayed on the checkout page and are designed to be highly relevant and irresistible, leading to increased average order value (AOV) and overall revenue. This article will guide you through the process of creating effective order bumps in WooCommerce, step-by-step.
## Understanding Order Bumps and Their Benefits
Before diving into the technical aspects, let’s clarify what makes order bumps so effective. They capitalize on the “impulse buy” mentality that many shoppers experience when they’re already committed to making a purchase. Because the customer is already at the checkout page, the perceived effort to add another item is significantly lower than browsing the entire store.
Here are some key benefits of using order bumps:
* Increased Average Order Value (AOV): By adding an extra item to the cart, customers spend more per transaction.
* Improved Revenue: A direct result of higher AOV, leading to increased overall sales.
* Enhanced Customer Experience: When the order bump is genuinely relevant and beneficial, it can improve the customer’s experience by offering them something they need or want.
* Efficient Upselling: Order bumps are a less intrusive way to upsell compared to pop-ups or post-purchase offers.
* Higher Conversion Rates: A well-crafted offer can significantly boost the likelihood of a customer completing the purchase with the added item.
* Reduced Cart Abandonment: Sometimes, a relevant order bump can provide a solution the customer didn’t realize they needed, solidifying their decision to complete the purchase.
## Planning Your Order Bump Strategy
The success of an order bump hinges on its relevance and perceived value. Therefore, meticulous planning is crucial. Consider these factors when crafting your order bump strategy:
* **Product Relevance:** Choose products that complement the items already in the customer’s cart. A classic example is offering batteries with a toy or a screen protector with a phone.
* **Price Point:** Keep the price of the order bump relatively low compared to the main purchase. This makes it easier for customers to justify adding it to their order. Aim for a price point that feels like a “no-brainer” add-on.
* **Compelling Offer:** Create a sense of urgency or scarcity to encourage immediate action. Use phrases like “Limited Time Offer,” “50% Off Today Only,” or “While Supplies Last.”
* **Clear and Concise Messaging:** Use short, benefit-driven headlines and descriptions. Customers should instantly understand the value proposition.
* **Visual Appeal:** Use high-quality product images that clearly showcase the order bump item.
* **Target Audience:** Consider segmenting your audience and displaying different order bumps based on their purchase history or demographics. This requires more advanced plugin features.
* **Testing and Optimization:** Continuously test different order bumps and offers to see what performs best. A/B testing is your friend.
## Choosing a WooCommerce Order Bump Plugin
While WooCommerce doesn’t natively offer order bump functionality, several plugins can seamlessly integrate this feature into your store. Here are some popular options:
* **WooCommerce Order Bump by CartFlows:** A highly popular and user-friendly option with a drag-and-drop interface. It’s often bundled with the CartFlows plugin, which is designed for creating custom checkout flows.
* **Order Bump for WooCommerce by Addify:** A feature-rich plugin with advanced targeting options and reporting capabilities.
* **WooCommerce One Click Upsell Funnel by MakeWebBetter:** While focusing on upsells, this plugin also supports order bumps and offers extensive funnel-building features.
* **Checkout Suite for WooCommerce by Brainstorm Force:** A comprehensive checkout customization plugin that includes order bump functionality.
For this tutorial, we will focus on using **WooCommerce Order Bump by CartFlows**, due to its ease of use and widespread adoption. However, the general principles apply to other plugins as well.
## Step-by-Step Guide: Creating an Order Bump with CartFlows
1. **Install and Activate CartFlows:**
* Navigate to your WordPress dashboard.
* Go to Plugins > Add New.
* Search for “CartFlows.”
* Install and activate the plugin.
2. **Create a New Flow (Optional but Recommended):**
* While order bumps can be added to the default WooCommerce checkout page, creating a custom flow with CartFlows allows for more control and customization.
* In your WordPress dashboard, go to CartFlows > Flows.
* Click “Add New.”
* You can choose to import a pre-designed template or start from scratch. For this tutorial, let’s start from scratch.
* Name your flow (e.g., “Standard Checkout Flow”) and click “Create.”
3. **Add a Checkout Step:**
* In your newly created flow, click “Add New Step.”
* Select “Checkout” as the step type.
* Name your checkout step (e.g., “Checkout Page”).
* Click “Create Step.”
4. **Design Your Checkout Page:**
* Click on the “Design” tab of your checkout step.
* CartFlows typically integrates with page builders like Elementor, Beaver Builder, Divi, and Gutenberg. Choose your preferred page builder.
* Use the page builder to customize the appearance of your checkout page. The specifics of this process depend on the page builder you’re using. Ensure the standard checkout fields (billing, shipping, order summary) are present. CartFlows offers dedicated widgets/blocks for these elements.
5. **Add the Order Bump:**
* Navigate to the “Order Bump” tab within your checkout step settings in CartFlows.
* Toggle the “Enable Order Bump” option to “On.”
6. **Configure Order Bump Settings:**
* **Product:** Select the product you want to offer as an order bump.
* **Order Bump Template:** Choose a pre-designed template for your order bump or customize the appearance manually. CartFlows provides various templates with different layouts and styling.
* **Headline:** Write a compelling headline that grabs the customer’s attention (e.g., “Add Premium Phone Insurance for Just $9.99!”).
* **Description:** Provide a brief description of the product and its benefits (e.g., “Protect your new phone from accidental damage and screen cracks with our comprehensive insurance plan.”).
* **Image:** Upload a high-quality image of the product.
* **Quantity Field:** Choose whether to show a quantity field for the order bump.
* **Discount:** Offer a discount on the order bump product. You can set a percentage discount or a fixed price.
* **Accepted Text:** Customize the text for the “Add to Order” button (e.g., “Yes, Add to My Order!”).
* **Declined Text:** Customize the text for the “No Thanks” button (e.g., “No Thanks, I’ll Pass.”).
* **Position:** Choose where to display the order bump on the checkout page. Common positions include:
* Before Checkout Form
* After Checkout Form
* Before Order Summary
* After Order Summary
* **Skin:** Select a skin (style) for the order bump. This allows you to match the styling to your overall website design.
* **Visual Settings:** Customize the colors, fonts, and other visual elements of the order bump to match your brand.
7. **Set Order Bump Conditions (Optional):**
* CartFlows allows you to set conditions for displaying the order bump based on the products in the customer’s cart. This ensures that the order bump is only shown to customers who are likely to be interested in it.
* In the “Conditions” tab, you can add rules based on:
* Products in Cart: Show the order bump only if specific products are present in the cart.
* Cart Total: Show the order bump only if the cart total exceeds a certain amount.
* Product Categories: Show the order bump only if the cart contains products from specific categories.
8. **Publish and Test Your Order Bump:**
* Click the “Update” or “Publish” button to save your changes.
* Visit your website and add a product to your cart that meets the conditions you set for the order bump.
* Proceed to the checkout page to see your order bump in action.
* Test the functionality by adding and removing the order bump product from the cart.
## Advanced Order Bump Strategies
Once you’ve mastered the basics, you can explore more advanced strategies to further optimize your order bumps:
* **A/B Testing:** Experiment with different headlines, descriptions, images, discounts, and product offerings to see what resonates best with your audience. Use A/B testing tools within CartFlows or other testing plugins.
* **Dynamic Order Bumps:** Implement dynamic order bumps that change based on the products in the customer’s cart. This requires more advanced plugin features or custom coding.
* **Multi-Product Order Bumps:** Offer multiple order bumps on the checkout page, but be careful not to overwhelm customers. Use this strategy sparingly and only if the products are highly relevant.
* **Seasonal Order Bumps:** Offer order bumps that are relevant to specific holidays or seasons (e.g., offering gift wrapping during the holiday season).
* **Bundle and Save:** Offer a discount on the order bump product when purchased as part of a bundle with the main product.
## Common Mistakes to Avoid
* **Irrelevant Offers:** Offering an order bump that has no connection to the products in the cart.
* **High Price Point:** Making the order bump too expensive compared to the original purchase.
* **Poor Quality Images:** Using blurry or unprofessional images of the order bump product.
* **Confusing Messaging:** Using unclear or ambiguous language that doesn’t clearly communicate the value proposition.
* **Overwhelming Customers:** Showing too many order bumps or making the checkout page too cluttered.
* **Ignoring Mobile Optimization:** Failing to ensure that the order bump looks good and functions properly on mobile devices.
## Monitoring and Analyzing Order Bump Performance
It’s essential to track the performance of your order bumps to see what’s working and what’s not. Monitor metrics such as:
* **Order Bump Acceptance Rate:** The percentage of customers who add the order bump product to their cart.
* **Order Bump Revenue:** The total revenue generated from order bump sales.
* **Average Order Value (AOV):** The increase in AOV resulting from the use of order bumps.
* **Conversion Rate:** The overall conversion rate of your checkout page with and without order bumps.
Use this data to make informed decisions about which order bumps to keep, which to modify, and which to remove. CartFlows and other order bump plugins often provide built-in reporting features to help you track these metrics.
By following the steps outlined in this article and continuously optimizing your strategy, you can effectively leverage order bumps to increase revenue, enhance the customer experience, and boost your WooCommerce store’s overall performance.