
How to Add CAPTCHA in WordPress Login and Registration Form
Understanding CAPTCHA and its Importance in WordPress
CAPTCHA (Completely Automated Public Turing test to tell Computers and Humans Apart) is a type of challenge-response test used in computing to determine whether or not the user is human. Its primary purpose is to prevent automated scripts (bots) from performing actions such as submitting forms, creating accounts, or posting comments. In the context of WordPress, CAPTCHA plays a crucial role in protecting login pages and registration forms from abuse.
WordPress websites are frequently targeted by malicious bots attempting to gain unauthorized access through brute-force attacks. These attacks involve repeatedly trying different username and password combinations until the correct one is found. CAPTCHA adds a layer of security that makes it significantly more difficult for bots to succeed. Similarly, registration forms are often exploited by bots creating fake accounts for spamming or other nefarious purposes. CAPTCHA helps to minimize the creation of these unwanted accounts, improving the overall security and user experience of your WordPress site.
Choosing the Right CAPTCHA Plugin for Your Needs
Several CAPTCHA plugins are available for WordPress, each with its own set of features and functionalities. Selecting the right one depends on your specific requirements and preferences. Here’s a look at some popular options:
- reCAPTCHA by Google: One of the most widely used CAPTCHA solutions, offering versions like reCAPTCHA v2 (checkbox and image challenges) and reCAPTCHA v3 (invisible score-based protection).
- Advanced noCaptcha & invisible Captcha: This plugin supports multiple CAPTCHA providers, including Google reCAPTCHA, hCaptcha, and Cloudflare Turnstile, offering flexibility and redundancy.
- Really Simple CAPTCHA: A lightweight and easy-to-use plugin that generates simple image-based CAPTCHAs. It primarily works with Contact Form 7 but can be integrated into other forms.
- hCaptcha for WordPress: This plugin uses hCaptcha, a privacy-focused alternative to reCAPTCHA, offering similar functionality with a greater emphasis on user privacy.
- Login Lockdown: While not strictly a CAPTCHA plugin, Login Lockdown limits the number of failed login attempts from a specific IP address, offering a complementary security measure.
When choosing a plugin, consider the following factors:
- Ease of Use: Look for a plugin that is easy to install, configure, and manage.
- Effectiveness: Ensure that the plugin effectively blocks bots without hindering legitimate users.
- Performance Impact: Choose a plugin that doesn’t significantly slow down your website’s loading speed.
- Compatibility: Verify that the plugin is compatible with your WordPress version and other installed plugins.
- Features: Consider features such as support for multiple CAPTCHA types, customizable appearance, and integration with other forms.
- Privacy: Evaluate the privacy implications of the CAPTCHA provider, especially concerning data collection and usage.
Implementing reCAPTCHA by Google in WordPress
reCAPTCHA by Google is a popular and effective choice for protecting your WordPress website. It comes in two primary versions:
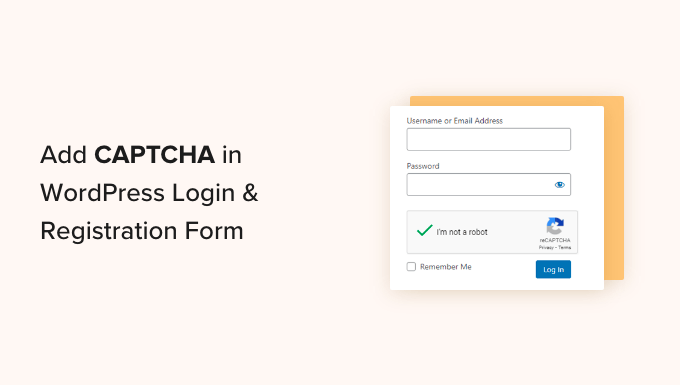
- reCAPTCHA v2 (“I’m not a robot” Checkbox): This version requires users to click a checkbox to confirm that they are human. It may also present image challenges if the system suspects bot activity.
- reCAPTCHA v3 (Invisible reCAPTCHA): This version works in the background without requiring any user interaction. It analyzes user behavior and assigns a score indicating the likelihood that the user is human. You can then configure your website to take different actions based on the score.
Here’s how to implement reCAPTCHA v2:
- Install and Activate the reCAPTCHA Plugin: From your WordPress dashboard, go to “Plugins” -> “Add New” and search for “reCAPTCHA by Google.” Install and activate the plugin.
- Obtain reCAPTCHA API Keys: Go to the Google reCAPTCHA website (google.com/recaptcha) and create a new reCAPTCHA site. Choose reCAPTCHA v2 as the type. You’ll need to provide a label for your site, select the reCAPTCHA type (e.g., “I’m not a robot” Checkbox), and enter your website’s domain(s). Google will then provide you with a Site Key and a Secret Key.
- Configure the Plugin: In your WordPress dashboard, go to the settings page for the reCAPTCHA plugin. Enter the Site Key and Secret Key that you obtained from Google.
- Enable reCAPTCHA on Login and Registration Forms: Within the plugin settings, you can choose to enable reCAPTCHA on the WordPress login form, registration form, and comment form. Select the appropriate options to protect these forms.
- Test the Implementation: Visit your login and registration pages to verify that the reCAPTCHA widget is displayed correctly. Try logging in or registering to ensure that the CAPTCHA is functioning as expected.
Here’s how to implement reCAPTCHA v3:
- Install and Activate the reCAPTCHA Plugin: From your WordPress dashboard, go to “Plugins” -> “Add New” and search for “reCAPTCHA by Google.” Install and activate the plugin.
- Obtain reCAPTCHA API Keys: Go to the Google reCAPTCHA website (google.com/recaptcha) and create a new reCAPTCHA site. Choose reCAPTCHA v3 as the type. You’ll need to provide a label for your site, enter your website’s domain(s), and accept the reCAPTCHA terms of service. Google will then provide you with a Site Key and a Secret Key.
- Configure the Plugin: In your WordPress dashboard, go to the settings page for the reCAPTCHA plugin. Enter the Site Key and Secret Key that you obtained from Google.
- Set a Threshold Score: reCAPTCHA v3 returns a score between 0.0 and 1.0, with 1.0 being the most likely to be a human interaction. You’ll need to configure a threshold score in the plugin settings. This score determines the level of suspicion required to trigger further actions. For example, you might set the threshold to 0.5.
- Enable reCAPTCHA on Login and Registration Forms: Within the plugin settings, you can choose to enable reCAPTCHA on the WordPress login form, registration form, and comment form. Select the appropriate options to protect these forms.
- Implement Actions Based on the Score: With reCAPTCHA v3, you’ll need to decide what actions to take based on the score. For example, if the score is below the threshold, you might display a CAPTCHA challenge, block the request, or flag the user for further review. This often requires custom code or integration with other plugins. The reCAPTCHA by Google plugin might provide basic actions, but more complex logic often requires custom development.
- Test the Implementation: Visit your login and registration pages to verify that reCAPTCHA v3 is running in the background. Monitor your website logs to see the scores being returned by reCAPTCHA v3 and adjust the threshold and actions as needed.
Integrating Advanced noCaptcha & invisible Captcha
The Advanced noCaptcha & invisible Captcha plugin offers flexibility by supporting multiple CAPTCHA providers. Here’s how to integrate it with reCAPTCHA:
- Install and Activate the Plugin: From your WordPress dashboard, go to “Plugins” -> “Add New” and search for “Advanced noCaptcha & invisible Captcha.” Install and activate the plugin.
- Obtain reCAPTCHA API Keys: If you haven’t already, go to the Google reCAPTCHA website (google.com/recaptcha) and create a new reCAPTCHA site. Obtain the Site Key and Secret Key.
- Configure the Plugin: In your WordPress dashboard, go to the “Advanced noCaptcha” settings page. Choose “Google reCAPTCHA” as the CAPTCHA type. Enter the Site Key and Secret Key.
- Enable reCAPTCHA on Login and Registration Forms: Within the plugin settings, select the forms where you want to enable reCAPTCHA, such as the login form and registration form.
- Customize Settings (Optional): The plugin offers various customization options, such as the theme, size, and language of the CAPTCHA widget. Adjust these settings to match your website’s design.
- Test the Implementation: Visit your login and registration pages to verify that the reCAPTCHA widget is displayed correctly. Try logging in or registering to ensure that the CAPTCHA is functioning as expected.
This plugin also supports other CAPTCHA providers like hCaptcha and Cloudflare Turnstile. The configuration process is similar, requiring you to obtain API keys from the respective provider and configure the plugin settings accordingly.
Using Really Simple CAPTCHA with Contact Form 7
Really Simple CAPTCHA is primarily designed for use with the Contact Form 7 plugin, but can be adapted for login and registration forms with custom coding.
- Install and Activate the Plugin: From your WordPress dashboard, go to “Plugins” -> “Add New” and search for “Really Simple CAPTCHA.” Install and activate the plugin.
- Install and Activate Contact Form 7: If you haven’t already, install and activate the Contact Form 7 plugin.
- Integrate with Contact Form 7: When creating or editing a contact form in Contact Form 7, you can add a CAPTCHA field by inserting the `[captcha]` and `[captcha* your-captcha]` tags into your form code. You’ll also need to add the corresponding `[captchar]` and `[captchar* your-captcha]` tags to display the CAPTCHA image and input field.
- Custom Integration for Login/Registration (Advanced): To integrate Really Simple CAPTCHA with the WordPress login or registration forms, you’ll need to use custom coding. This involves modifying the login and registration form templates to include the CAPTCHA image and input field, and then writing PHP code to validate the CAPTCHA submission. This requires advanced knowledge of WordPress theming and plugin development. It is less common to use this plugin directly on the login/registration forms.
Best Practices for CAPTCHA Implementation
To ensure that your CAPTCHA implementation is effective and user-friendly, follow these best practices:
- Choose the Right CAPTCHA Type: Select a CAPTCHA type that balances security and user experience. reCAPTCHA v3 is generally preferred for its invisible protection, but reCAPTCHA v2 may be more suitable for situations where stronger security is required.
- Placement: Position the CAPTCHA widget strategically on your forms to ensure that it is visible and easy to interact with.
- Mobile Optimization: Ensure that the CAPTCHA widget is responsive and works correctly on mobile devices.
- Accessibility: Choose a CAPTCHA provider that offers accessibility features for users with disabilities.
- Monitor Performance: Regularly monitor your website’s performance to ensure that the CAPTCHA is not slowing down your site.
- Test Regularly: Periodically test your CAPTCHA implementation to ensure that it is still functioning correctly and effectively blocking bots.
- Consider Alternatives: In some cases, alternative security measures such as rate limiting or two-factor authentication may be more effective than CAPTCHA. Consider using a combination of security measures to protect your website.
- User Experience: Avoid overly complex or frustrating CAPTCHA challenges that may deter legitimate users.
By following these guidelines, you can effectively protect your WordPress login and registration forms from bots while maintaining a positive user experience. Properly implemented CAPTCHA contributes significantly to the overall security and integrity of your website.
- How to Protect Your WordPress Site From Brute Force Attacks
- Ecommerce Security Tips: How to Secure Your WordPress Store
- How to Redact Text in WordPress (The Easy Way)
- How to Reset Passwords for All Users in WordPress
- How to Block IP Addresses in WordPress (& Why)
- 14 Vital Tips to Protect Your WordPress Admin Area (Updated)
- How to Remove the Login Shake Effect in WordPress (Updated)