
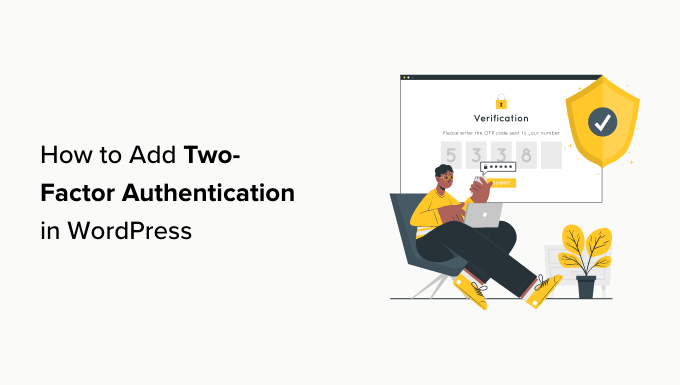
How to Add Two-Factor Authentication in WordPress (Free Method)
Introduction to Two-Factor Authentication (2FA)
Two-Factor Authentication (2FA) adds an extra layer of security to your WordPress website, significantly reducing the risk of unauthorized access. It works by requiring users to provide two different authentication factors to verify their identity before logging in. The first factor is typically something they know, like their password. The second factor is something they have, like a code generated by an app on their smartphone or a security key. Even if a hacker manages to obtain a user’s password, they still won’t be able to log in without the second factor. This makes 2FA a crucial security measure for protecting sensitive data and preventing account takeovers.
Why Two-Factor Authentication is Essential for WordPress
WordPress websites are frequent targets for hackers due to their popularity and the vast amount of sensitive data they often store, including user information, financial details, and confidential business data. A compromised WordPress site can lead to serious consequences, such as data breaches, financial losses, damage to reputation, and legal liabilities.
Here’s why 2FA is essential:
- Protects against password breaches: Even if a password is stolen or guessed, 2FA prevents unauthorized access.
- Reduces the risk of brute-force attacks: Hackers often use automated tools to try different password combinations. 2FA makes these attacks ineffective.
- Complies with security standards: Many regulations and compliance frameworks require 2FA for sensitive data.
- Enhances user trust: Implementing 2FA demonstrates a commitment to security and builds trust with users.
- Safeguards sensitive data: Protects user accounts, financial information, and confidential business data from unauthorized access.
Free Two-Factor Authentication Options for WordPress
While premium security plugins often include advanced 2FA features, several free and reliable options are available for WordPress users. These plugins provide effective protection without requiring any financial investment. This article focuses on one of the most popular and user-friendly free 2FA plugins: Google Authenticator.
Installing and Configuring the Google Authenticator Plugin
The Google Authenticator plugin is a widely used and highly regarded free 2FA solution for WordPress. It integrates seamlessly with the Google Authenticator mobile app (available for both Android and iOS) to generate verification codes. Here’s a step-by-step guide to installing and configuring the plugin:
Step 1: Install the Google Authenticator Plugin
1. Log in to your WordPress admin dashboard.
2. Navigate to “Plugins” -> “Add New.”
3. In the search bar, type “Google Authenticator.”
4. Find the plugin developed by Henrik Schack and click “Install Now.”
5. Once the installation is complete, click “Activate.”
Step 2: Configure the Plugin for Your User Account
1. Go to “Users” -> “Your Profile” (or “Profile” if you are not the administrator).
2. Scroll down to the “Google Authenticator Settings” section.
3. You’ll see the following options:
- Active: Check this box to enable 2FA for your account.
- Secret Key: This is a unique key that will be used to generate verification codes. You’ll need to scan this key with your Google Authenticator app.
- Show/Hide QR Code: Clicking this will display a QR code that you can scan with the Google Authenticator app for easier setup.
- Description: This field allows you to add a description for your account in the Google Authenticator app, e.g., “My WordPress Site.”
- Tolerance: This setting determines how many “time windows” (typically 30 seconds) the plugin will tolerate for code generation. A higher tolerance can help if your server’s time is slightly out of sync. The default value (3) is usually sufficient.
- Disable Google Authenticator: This button allows you to disable 2FA for your account if you need to.
Step 3: Install and Set Up the Google Authenticator App on Your Smartphone
1. Download the Google Authenticator app from the App Store (iOS) or Google Play Store (Android).
2. Open the Google Authenticator app.
3. Tap the “+” button to add a new account.
4. Choose “Scan a barcode” (or “Enter setup key” if you prefer to manually enter the secret key).
5. Scan the QR code displayed on your WordPress profile page (or enter the secret key manually).
6. The Google Authenticator app will now generate a six-digit verification code that changes every 30 seconds.
Step 4: Test the 2FA Setup
1. Log out of your WordPress account.
2. Log back in using your username and password.
3. You will be prompted to enter the verification code generated by the Google Authenticator app.
4. Enter the current code and click “Log In.”
5. If the code is correct, you will be successfully logged in.
Understanding Google Authenticator Plugin Settings
The Google Authenticator plugin offers several settings that you can adjust to customize the 2FA experience:
- Active: This checkbox enables or disables 2FA for a specific user account.
- Secret Key: This unique key is used to generate the verification codes. It’s crucial to keep this key safe and secure. If you lose access to your Google Authenticator app, you’ll need this key to reconfigure 2FA.
- Show/Hide QR Code: This button displays or hides the QR code, making it easier to scan with the Google Authenticator app.
- Description: This field allows you to add a description to your account in the Google Authenticator app, helping you identify which account the codes belong to.
- Tolerance: This setting controls the time window tolerance for code generation. Increasing the tolerance can help if your server’s time is slightly out of sync, but it also slightly reduces security.
- Disable Google Authenticator: This button provides a quick way to disable 2FA for your account if needed.
Troubleshooting Common Google Authenticator Issues
While the Google Authenticator plugin is generally reliable, you may encounter some issues during setup or use. Here are some common problems and their solutions:
- Incorrect Code: Make sure the code you’re entering is the current code displayed in the Google Authenticator app. Also, ensure that the time on your smartphone and your server are synchronized. If your server’s time is significantly off, you may need to contact your hosting provider to fix it. Adjusting the “Tolerance” setting can sometimes help with minor time discrepancies.
- Lost Access to Google Authenticator App: If you lose access to your Google Authenticator app (e.g., due to a lost phone or app uninstall), you will need the secret key to reconfigure 2FA. This is why it’s crucial to store the secret key in a safe place when you initially set up 2FA. If you don’t have the secret key, you’ll need to disable 2FA for your account via the database (see below).
- QR Code Not Scanning: Ensure that the QR code is displayed clearly on your screen and that your smartphone’s camera is focused correctly. You can also try manually entering the secret key into the Google Authenticator app.
- Login Loop: In rare cases, you might get stuck in a login loop after enabling 2FA. This can be caused by plugin conflicts or caching issues. Try clearing your browser’s cache and cookies or temporarily deactivating other plugins to see if that resolves the issue.
Disabling Two-Factor Authentication Without Access to the App
If you lose access to your Google Authenticator app and don’t have the secret key, you’ll need to disable 2FA for your account via the WordPress database. This requires access to your hosting account’s database management tool (usually phpMyAdmin).
Step 1: Access Your WordPress Database
1. Log in to your hosting account’s control panel (e.g., cPanel, Plesk).
2. Find the database management tool (usually phpMyAdmin) and open it.
3. Select your WordPress database from the list.
Step 2: Locate the User’s Meta Data
1. In phpMyAdmin, find the `wp_usermeta` table (the prefix `wp_` might be different depending on your WordPress installation).
2. Browse the table to find the row corresponding to the user account for which you want to disable 2FA. You can identify the correct row by looking at the `user_id` column and matching it to the user’s ID in the `wp_users` table.
Step 3: Disable Google Authenticator
1. Once you’ve found the correct row, look for the `meta_key` column with the value `_ga_secret`.
2. Delete this row.
3. Also, look for the `meta_key` column with the value `_ga_active`.
4. Delete this row as well.
By deleting these two rows, you’ve effectively disabled Google Authenticator for the specified user account.
Step 4: Log In and Reconfigure
1. Log back into your WordPress account. You should now be able to log in using only your username and password.
2. Go to “Users” -> “Your Profile” and reconfigure the Google Authenticator plugin. Make sure to store the new secret key in a safe place.
Best Practices for Using Two-Factor Authentication in WordPress
To maximize the security benefits of 2FA, follow these best practices:
- Enable 2FA for all user accounts: Encourage all users, especially administrators, to enable 2FA.
- Store the secret key securely: Keep the secret key in a safe place in case you lose access to your Google Authenticator app. Consider using a password manager to store it securely.
- Keep your smartphone and app updated: Ensure that your smartphone and the Google Authenticator app are running the latest versions to benefit from security updates and bug fixes.
- Educate users about 2FA: Explain to users how 2FA works and why it’s important to protect their accounts.
- Regularly review security settings: Periodically review your WordPress security settings and ensure that 2FA is still enabled and configured correctly.
- Consider a backup authentication method: While Google Authenticator is reliable, having a backup authentication method (e.g., backup codes) can provide an extra layer of security in case of unforeseen issues. Some premium 2FA plugins offer this functionality.
Conclusion (Article Content Only)
Implementing Two-Factor Authentication using the free Google Authenticator plugin is a straightforward and effective way to significantly enhance the security of your WordPress website. By following the steps outlined in this article and adhering to the best practices, you can protect your site and your users from unauthorized access and potential security breaches. Remember to prioritize security and take proactive measures to safeguard your valuable data.