
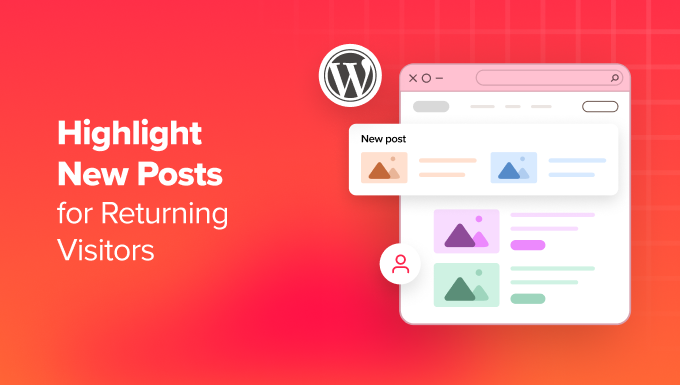
How to Highlight New Posts for Returning Visitors in WordPress
Introduction: Welcoming Back Your Readers and Showing What’s New
Returning visitors are the lifeblood of any successful WordPress website. They’ve already shown an interest in your content, and fostering that loyalty is crucial for long-term growth. One effective way to keep them engaged is to make it immediately obvious what new content they haven’t seen yet. By highlighting new posts for returning visitors, you provide a seamless and personalized experience that encourages them to explore, stay longer, and come back for more.
This article explores several methods for achieving this, ranging from simple plugins to more advanced code-based solutions, enabling you to choose the approach that best suits your technical skills and website needs.
Why Highlight New Content? The Benefits Unveiled
Highlighting new content for returning visitors offers a multitude of benefits:
- Improved User Experience: Visitors instantly see what they’ve missed, saving them time and effort. This contributes to a more enjoyable and efficient browsing experience.
- Increased Engagement: By showcasing fresh content, you entice visitors to click through and read, leading to longer time on site and reduced bounce rates.
- Enhanced Website Loyalty: Providing a personalized experience makes visitors feel valued and encourages them to return regularly. They know they won’t miss out on the latest updates.
- Boosted Page Views: Clear visibility of new posts naturally drives more traffic to your recent content, increasing overall page views and advertising revenue (if applicable).
- Simplified Content Discovery: Helps readers easily find content relevant to them, especially useful for sites with a high volume of posts.
Method 1: Leveraging WordPress Plugins for Simplicity
For those who prefer a code-free approach, several WordPress plugins offer excellent functionality for highlighting new posts. These plugins typically use cookies or local storage to track visitor activity and identify which posts have already been viewed.
Recommended Plugins
Here are a few popular and reliable plugins:
- New Post Highlighter: A simple plugin specifically designed for this purpose. It offers options to highlight posts with custom text, icons, or backgrounds.
- WordPress Popular Posts: While primarily focused on popular posts, this plugin also offers features to highlight recently published content.
- Jetpack: Includes modules that, while not explicitly designed for highlighting new posts, can be configured to show recent activity and updates in prominent ways.
Using the New Post Highlighter Plugin: A Step-by-Step Guide
- Install and Activate: Navigate to the “Plugins” section in your WordPress dashboard, search for “New Post Highlighter,” install, and activate the plugin.
- Configure Settings: Go to the plugin’s settings page (usually found under the “Settings” menu). Here, you can customize the highlighting options.
- Choose Highlighting Style: Select the highlighting method you prefer. Options might include adding a “New” label, changing the background color, or using a small icon.
- Set Cookie Expiration: Define how long a post should be considered “new” for a returning visitor. This is usually determined by the cookie expiration time.
- Test the Functionality: Visit your website as a logged-out user (or in a private browsing window), view a few posts, and then revisit the homepage. The previously viewed posts should not be highlighted, while the new ones should be.
Method 2: Cookie-Based Highlighting: A Code-Centric Approach
For those comfortable with PHP and WordPress theme customization, a code-based approach offers greater flexibility and control. This method involves setting cookies to track viewed posts and then modifying your theme’s template files to highlight new content accordingly.
Setting the Cookie: The First Step
Add the following code snippet to your theme’s `functions.php` file:
function set_viewed_post_cookie() {
  if (is_single()) {
    global $post;
    $post_id = $post->ID;
    $cookie_name = 'viewed_posts';

    if (isset($_COOKIE[$cookie_name])) {
      $viewed_posts = explode(',', $_COOKIE[$cookie_name]);
      if (!in_array($post_id, $viewed_posts)) {
        $viewed_posts[] = $post_id;
        setcookie($cookie_name, implode(',', $viewed_posts), time() + (86400 * 30), COOKIEPATH, COOKIE_DOMAIN); // Cookie expires in 30 days
      }
    } else {
      setcookie($cookie_name, $post_id, time() + (86400 * 30), COOKIEPATH, COOKIE_DOMAIN); // Cookie expires in 30 days
    }
  }
}
add_action('wp_head', 'set_viewed_post_cookie');
This code checks if the user is viewing a single post. If so, it retrieves the post ID and adds it to a cookie named `viewed_posts`. The cookie expires after 30 days. Adjust the expiration time as needed.
Highlighting New Posts: Modifying Your Theme Templates
Next, you’ll need to modify your theme’s template files (e.g., `index.php`, `archive.php`, `category.php`) to check for the `viewed_posts` cookie and highlight new posts accordingly. The exact location will depend on your theme structure.
Here’s an example of how to highlight new posts with a simple “New!” label:
<?php
$cookie_name = 'viewed_posts';
$viewed_posts = isset($_COOKIE[$cookie_name]) ? explode(',', $_COOKIE[$cookie_name]) : array();

if (!in_array(get_the_ID(), $viewed_posts)) {
  echo '<span class="new-post">New!</span>';
}
?>
This code snippet should be placed within the loop that displays your posts, ideally before the post title. It checks if the current post’s ID is present in the `viewed_posts` cookie. If not, it displays the “New!” label. You can customize the styling of the `.new-post` class in your theme’s CSS file.
Customizing the Highlighting Style
You can modify the highlighting style by changing the HTML within the `if` statement and adding corresponding CSS rules. For example:
- Background Color: Add a class to the post container and change the background color using CSS.
- Border: Add a border around new posts using CSS.
- Icon: Use an icon font (e.g., Font Awesome) or an image to visually indicate new posts.
Method 3: Leveraging Local Storage for a Modern Approach
Local storage offers a more modern alternative to cookies. It allows you to store data directly in the user’s browser, providing potentially better performance and storage capacity. However, it requires JavaScript to manage the data.
Implementing Local Storage with JavaScript
First, add the following JavaScript code to your theme’s `footer.php` file (or enqueue it properly using `wp_enqueue_script`):
<script>
jQuery(document).ready(function($) {
  function markPostAsViewed(postId) {
    let viewedPosts = localStorage.getItem('viewedPosts') ? JSON.parse(localStorage.getItem('viewedPosts')) : [];
    if (!viewedPosts.includes(postId)) {
      viewedPosts.push(postId);
      localStorage.setItem('viewedPosts', JSON.stringify(viewedPosts));
    }
  }

  $('.post').each(function() { // Assuming each post is wrapped in a div with class "post"
    let postId = $(this).data('post-id'); // Assuming you have a data-post-id attribute on each post

    $(this).click(function() { // When the post is clicked
      markPostAsViewed(postId);
    });

    let viewedPosts = localStorage.getItem('viewedPosts') ? JSON.parse(localStorage.getItem('viewedPosts')) : [];
    if (viewedPosts.includes(postId)) {
      $(this).addClass('viewed'); // Add a class to mark the post as viewed
    }
  });
});
</script>
This code does the following:
- Retrieves Viewed Posts: It retrieves the `viewedPosts` array from local storage. If it doesn’t exist, it initializes an empty array.
- Marks Post as Viewed: It attaches a click event to each post. When a post is clicked, its ID is added to the `viewedPosts` array in local storage.
- Adds “viewed” Class: It checks if each post’s ID is in the `viewedPosts` array. If so, it adds the class “viewed” to the post’s container.
Adding the `data-post-id` Attribute and CSS Styling
You’ll need to add a `data-post-id` attribute to each post container in your theme’s template files:
<div class="post" data-post-id="<?php the_ID(); ?>">
  <!-- Post content here -->
</div>
Finally, add CSS rules to style the `.viewed` class:
.post.viewed {
  opacity: 0.6; /* Example: Reduce opacity of viewed posts */
}
Considerations and Best Practices
Before implementing any of these methods, consider the following:
- Performance Impact: Code-based solutions, if not optimized, can potentially impact website performance. Test thoroughly to ensure no significant slowdown.
- Cookie Consent: If using cookies, ensure you comply with relevant data privacy regulations (e.g., GDPR) and obtain user consent if necessary.
- User Experience: Choose a highlighting style that is subtle and informative, rather than distracting or overwhelming.
Conclusion: Creating a Personalized Experience for Returning Visitors
Highlighting new posts for returning visitors is a valuable strategy for improving user engagement, fostering loyalty, and driving more traffic to your latest content. Whether you choose a simple plugin or a more advanced code-based solution, the key is to provide a seamless and personalized experience that keeps your readers coming back for more.
- How to Notify Users When Their Comment is Approved in WordPress
- WordPress Quick Edit Not Working? Here’s How to Fix It in No Time
- 13 Plugins and Tips to Improve WordPress Admin Area
- How to Display Random Posts in WordPress (Easy Tutorial)
- How to Improve User Experience in WordPress (13 Practical Tips)
- How to Easily Add Box Shadow in WordPress (4 Ways)
- How to Remove Date and Time From WordPress Comments