
How to Pass Payment Processing Fees to Customers in WordPress
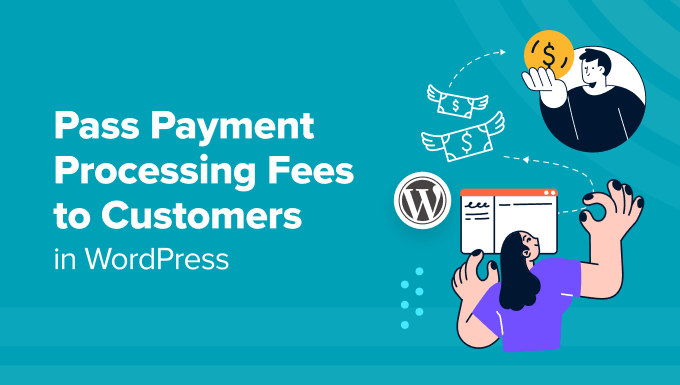
How to Pass Payment Processing Fees to Customers in WordPress
Understanding the Landscape of Payment Processing Fees
Accepting online payments through your WordPress website opens up a world of opportunities for your business. However, it’s crucial to understand that payment processors like Stripe, PayPal, and others charge fees for their services. These fees, typically a percentage of the transaction plus a fixed amount, can eat into your profit margins if not managed effectively. There are several strategies businesses employ to deal with these fees, including absorbing them, increasing product prices to cover them, or passing them on to the customer. This article will explore the latter option, focusing on how to implement fee surcharging in your WordPress environment.
Before diving into the technical aspects, it’s important to be aware of the legal and ethical considerations. Some regions have regulations regarding surcharging, so ensure you’re compliant with all applicable laws in your area and in your customers’ locations. Transparency is key – clearly communicate the surcharge to your customers before they complete their purchase to avoid surprises and maintain trust.
Legality and Ethical Considerations for Surcharging
Navigating the legality of surcharging requires careful consideration. While some countries and states allow businesses to pass on payment processing fees, others have strict regulations or outright bans. Failing to comply can result in fines, legal action, and damage to your brand reputation.
Here are key points to consider:
- Research the laws in your region and in your customers’ regions.
- Understand the specific rules for different payment methods (e.g., credit cards, debit cards, PayPal).
- Ensure your pricing and surcharge policies are clearly stated on your website.
Beyond the legal aspects, consider the ethical implications. Transparency is paramount. Customers should be fully aware of the surcharge before committing to the purchase. Avoid hidden fees or last-minute surprises, as these can lead to negative customer experiences. Clearly explain why the surcharge is being applied, emphasizing that it’s directly related to the payment processing costs.
Exploring Options: Plugins vs. Custom Code
When it comes to implementing fee surcharging in WordPress, you generally have two main paths: utilizing existing plugins or developing custom code. Each approach has its pros and cons, depending on your technical skills, budget, and desired level of customization.
Plugins: WordPress plugins offer a convenient and often cost-effective way to add functionality to your website without requiring extensive coding knowledge. There are several plugins available specifically designed for adding fees or surcharges to WooCommerce orders. These plugins typically provide user-friendly interfaces for configuring surcharge rules based on payment method, order total, or other criteria.
Custom Code: If you have coding experience or are willing to hire a developer, custom code provides the greatest flexibility and control. This approach allows you to tailor the surcharge logic to your exact needs and integrate it seamlessly with your existing WooCommerce setup. However, it requires a deeper understanding of WordPress and WooCommerce APIs.
Choosing the Right Plugin for WooCommerce Surcharges
Selecting the appropriate plugin is crucial for a successful implementation. Consider the following factors when evaluating your options:
- Features: Does the plugin support the payment methods you accept? Can you define surcharges based on various criteria (e.g., payment gateway, order total, shipping country)? Does it offer features like displaying the surcharge amount clearly to the customer?
- Ease of Use: Is the plugin easy to configure and manage? Does it provide a clear and intuitive interface? Look for plugins with good documentation and support.
- Compatibility: Is the plugin compatible with your version of WooCommerce and other plugins you use? Check the plugin’s compatibility information before installing it.
Some popular WooCommerce surcharge plugins include:
- YITH WooCommerce Additional Fees: A comprehensive plugin offering a wide range of features for adding fees and surcharges.
- WooCommerce Fees and Discounts: A flexible plugin that allows you to create custom fees and discounts based on various conditions.
- Advanced WooCommerce Fees: A more advanced plugin with options for complex fee calculations and conditional logic.
Before committing to a plugin, try out the free version (if available) or check for a demo to ensure it meets your requirements. Read reviews from other users to get insights into its performance and reliability.
Step-by-Step Guide: Implementing Surcharges with a Plugin
Let’s walk through the general steps involved in implementing surcharges using a WooCommerce plugin. While the specific steps may vary depending on the plugin you choose, the following provides a general overview:
- Install and Activate the Plugin: Navigate to the Plugins section in your WordPress dashboard and install the chosen surcharge plugin. Activate the plugin after installation.
- Configure the Plugin Settings: Access the plugin’s settings page, typically found under the WooCommerce menu or a dedicated settings section.
- Create Surcharge Rules: Define the rules for applying surcharges. This typically involves specifying the payment method for which the surcharge applies, the surcharge amount (either a fixed amount or a percentage), and any other conditions (e.g., minimum order total).
- Set Display Options: Configure how the surcharge amount is displayed to the customer on the cart page, checkout page, and order confirmation.
- Test the Implementation: Place a test order to ensure the surcharge is being applied correctly and that the customer sees the accurate amount.
Remember to consult the plugin’s documentation for detailed instructions and specific configuration options.
Developing Custom Code for WooCommerce Surcharges
For those comfortable with coding, creating custom code for handling WooCommerce surcharges offers maximum flexibility. This involves using WooCommerce hooks and filters to modify the cart and checkout process. Here’s a general outline of the process:
- Identify the Relevant WooCommerce Hooks: The
woocommerce_cart_calculate_feeshook is commonly used to add fees to the cart. Thewoocommerce_checkout_create_orderhook can be used to add fees to the order object before it’s saved. - Create a Custom Function: Write a custom function that calculates the surcharge based on the payment method selected by the customer. You can access the selected payment method using the
WC()->session->get('chosen_payment_method')function. - Add the Function to the Hook: Use the
add_action()function to attach your custom function to the appropriate WooCommerce hook. - Display the Surcharge to the Customer: Ensure the surcharge amount is displayed clearly to the customer on the cart and checkout pages. You can use WooCommerce’s template system to modify the display.
- Handle Order Processing: Make sure the surcharge is properly included in the order total and that it’s reflected in your accounting system.
Here’s a simplified example of custom code (please note: this is a basic example and may require adjustments based on your specific needs):
add_action( 'woocommerce_cart_calculate_fees', 'add_payment_gateway_fee' );
function add_payment_gateway_fee( $cart ) {
  if ( is_admin() && ! defined( 'DOING_AJAX' ) )
    return;

  if ( did_action( 'woocommerce_cart_calculate_fees' ) >= 2 )
    return;

  $chosen_gateway = WC()->session->get( 'chosen_payment_method' );

  if ( $chosen_gateway == 'stripe' ) {
    $fee = $cart->get_subtotal() * 0.03; // 3% fee for Stripe
    $cart->add_fee( 'Stripe Fee', $fee );
  }
}
Remember to add this code to your theme’s functions.php file or a custom plugin. Thorough testing is crucial when implementing custom code.
Communicating Surcharges to Your Customers
Transparency is paramount when passing payment processing fees to customers. Clearly communicate the surcharge policy on your website and at each stage of the checkout process.
Consider these strategies:
- Display a Clear Message on the Product Page: Inform customers upfront that a surcharge may apply depending on the payment method chosen.
- Show the Surcharge on the Cart Page: Clearly display the surcharge amount as a separate line item in the cart.
- Explain the Surcharge on the Checkout Page: Provide a brief explanation of why the surcharge is being applied (e.g., “A 3% surcharge is added to cover payment processing fees for credit card transactions.”).
Use clear and concise language to avoid confusion. Be upfront about the reasons for the surcharge and how it benefits your business (e.g., allowing you to maintain competitive pricing). Provide a link to a detailed explanation of your surcharge policy on your website.
Testing and Monitoring Your Implementation
After implementing surcharge functionality, thorough testing is essential to ensure it works correctly. Test various scenarios, including different payment methods, order totals, and shipping locations. Verify that the surcharge is being calculated accurately and displayed correctly to the customer. Monitor your website’s performance after implementing the surcharge to identify any potential issues or negative impacts on conversion rates. Continuously analyze customer feedback to fine-tune your surcharge policy and communication.