
How to Add Custom Fields Automatically on Post Publish in WordPress
Introduction: Automating Custom Fields in WordPress
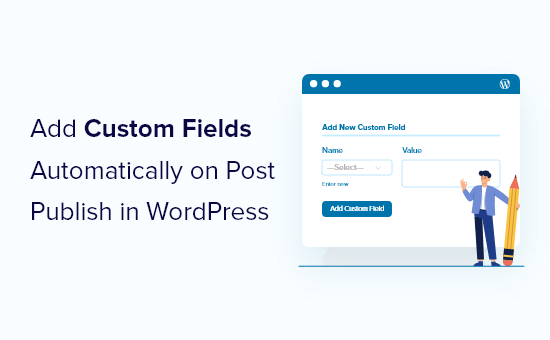
WordPress, the world’s most popular content management system, offers incredible flexibility thanks to its vast ecosystem of plugins and themes. One of the key features that contributes to this flexibility is the ability to add custom fields to posts, pages, and other content types. Custom fields allow you to store additional data associated with your content, such as product prices, movie ratings, or event dates. While you can manually add custom fields each time you create or edit a post, automating this process can significantly streamline your workflow and reduce the risk of errors.
This article will guide you through the process of automatically adding custom fields to your WordPress posts upon publication. We’ll explore different methods, including using code snippets, plugins, and considerations for different use cases.
Understanding the WordPress Post Publication Process
Before diving into the implementation, it’s crucial to understand the various stages of post publication in WordPress. When you click the “Publish” button (or schedule a post), WordPress goes through a series of actions. Key among these are:
- Saving the post data: This includes the title, content, excerpt, categories, and tags.
- Running hooks: Hooks are points in the WordPress code where you can “hook” in your own custom functions.
- Updating the database: The post and its associated data are saved in the WordPress database.
We’ll be leveraging the WordPress hook system to automatically add our custom fields during this publication process. Specifically, we’ll be looking at the save_post hook.
The save_post Hook: Your Automation Tool
The save_post hook is triggered whenever a post is saved, whether it’s a new post being published or an existing post being updated. This hook provides access to the post ID and the post object, allowing you to modify the post’s data, including custom fields. Using this hook, you can automatically add or update custom fields whenever a post is published.
Method 1: Using Code Snippets in functions.php
The most direct way to automatically add custom fields is by adding code snippets to your theme’s functions.php file or a custom plugin. This method offers the most control but requires some familiarity with PHP and WordPress development.
Here’s a basic example of how to use the save_post hook to add a custom field:
function add_custom_field_on_publish( $post_id ) {

    // Verify that the post type is 'post'
    if ( get_post_type( $post_id ) == 'post' ) {

        // Check if the custom field already exists
        if ( ! get_post_meta( $post_id, 'your_custom_field', true ) ) {

            // Add the custom field with a default value
            update_post_meta( $post_id, 'your_custom_field', 'default_value' );
        }
    }
}

add_action( 'save_post', 'add_custom_field_on_publish' );
Explanation:
add_custom_field_on_publish( $post_id ): This is the function we’re defining to handle the custom field addition. It takes the post ID as an argument.get_post_type( $post_id ) == 'post': This condition ensures that the code only runs for posts (and not pages or other custom post types). Adjust this if you need to add the custom field to other content types.get_post_meta( $post_id, 'your_custom_field', true ): This checks if the custom field already exists for the post. This is important to prevent overwriting existing values when the post is updated.update_post_meta( $post_id, 'your_custom_field', 'default_value' ): This adds or updates the custom field with a default value. Replace'your_custom_field'with the actual name of your custom field and'default_value'with the desired default value.add_action( 'save_post', 'add_custom_field_on_publish' ): This line hooks our function into thesave_postaction, telling WordPress to run our function whenever a post is saved.
Important considerations:
- Replace
'your_custom_field'and'default_value'with your actual custom field name and desired default value. - Consider adding nonce verification for security if the custom field value is coming from user input.
- If you’re adding multiple custom fields, group them within the same function for better organization.
Method 2: Using Plugins for Simplified Automation
For users who prefer a more user-friendly approach, several plugins can help automate the process of adding custom fields. These plugins often provide a visual interface for defining custom fields and setting rules for when they should be added.
Here are some popular plugins for managing custom fields in WordPress:
- Advanced Custom Fields (ACF): A powerful and widely used plugin that allows you to create custom field groups and display them on various post types. While ACF primarily focuses on providing an interface for managing custom fields, you can use its API to automate their addition on post publish.
- Meta Box: Another popular plugin with a focus on performance and flexibility. It offers a similar feature set to ACF and can also be used to automate custom field addition.
- Custom Field Suite: A lightweight and developer-friendly plugin that allows you to define custom fields directly in your theme or plugin code.
While the specific implementation will vary depending on the plugin you choose, the general process involves:
- Installing and activating the plugin.
- Creating a custom field group or defining a custom field set.
- Configuring the plugin to automatically add the custom fields to posts upon publication. This often involves using the plugin’s settings or API to hook into the
save_postaction.
Using a plugin offers several advantages:
- Ease of use: Plugins provide a visual interface, making it easier to manage custom fields without writing code.
- Reduced risk of errors: Plugins handle the underlying code complexity, reducing the risk of making mistakes.
- Regular updates and support: Popular plugins are typically well-maintained and come with support in case you encounter any issues.
Method 3: Hybrid Approach: Plugin + Custom Code
Sometimes, the best solution is a combination of using a plugin for general management and adding custom code for specific automation needs. For example, you might use Advanced Custom Fields (ACF) to define the fields and their display logic, but then use the save_post hook in your functions.php file to programmatically populate those fields with data based on certain conditions upon post publication. This allows you to leverage the strengths of both approaches.
Example: Let’s say you have an ACF field called “author_nickname” and you want to automatically populate it with the first name of the author when the post is published. Here’s how you might do it:
function populate_author_nickname( $post_id ) {
    if ( get_post_type( $post_id ) == 'post' ) { // or your desired post type
        $author_id = get_post_field( 'post_author', $post_id );
        $author_first_name = get_user_meta( $author_id, 'first_name', true );

        if ( $author_first_name ) {
            update_post_meta( $post_id, 'author_nickname', $author_first_name );
        }
    }
}
add_action( 'save_post', 'populate_author_nickname' );
Explanation:
- This code fetches the author’s ID, retrieves their first name from the user meta, and then updates the ACF custom field “author_nickname” with that value.
- Remember to replace
'author_nickname'with the actual name of your ACF field.
Important Considerations and Best Practices
When automatically adding custom fields, keep the following best practices in mind:
- Performance: Avoid performing complex calculations or database queries within the
save_posthook, as this can slow down the post saving process. Consider using caching or asynchronous tasks for time-consuming operations. - Security: If you’re allowing users to input data that affects the custom field values, be sure to sanitize and validate the input to prevent security vulnerabilities.
- Conditional Logic: Use conditional statements to ensure that the custom fields are only added when necessary. For example, only add a “review_score” custom field if the post is categorized as a “review.”
- Error Handling: Implement error handling to gracefully handle situations where the custom field addition fails. Log errors for debugging purposes.
- Testing: Thoroughly test your code or plugin before deploying it to a live site. Use a staging environment to identify and fix any issues.
- Documentation: Document your code or plugin so that you and other developers can understand how it works in the future.
Conclusion: Streamlining Your Workflow
Automating the process of adding custom fields to your WordPress posts can significantly improve your workflow and reduce the risk of errors. Whether you choose to use code snippets, plugins, or a hybrid approach, understanding the save_post hook and best practices is essential for implementing a robust and efficient solution. By carefully planning your implementation and considering the performance and security implications, you can create a seamless experience for your users and streamline your content management process.
- How to Create a Local WordPress Site Using XAMPP
- How to Set A Fallback Featured Image Based on Post Category in WordPress
- How to Create a Custom Page in WordPress
- How to: Related Posts with Thumbnails in WordPress without Plugins
- How to Add Custom Fields to Comments Form in WordPress
- How to Add Your Plugin to the WordPress Plugin Directory
- How to Create a Recent Comments Page in WordPress (2 Ways)