
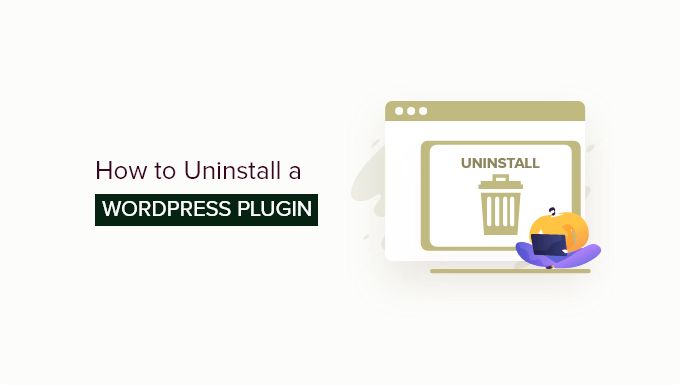
How to Properly Uninstall a WordPress Plugin (Beginner’s Guide)
Why Properly Uninstalling WordPress Plugins Matters
Installing plugins is one of the most powerful aspects of WordPress. They extend the functionality of your website, allowing you to add features like contact forms, e-commerce capabilities, SEO optimization, and much more. However, just as important as installing plugins is knowing how to uninstall them properly. Simply deleting a plugin through the WordPress dashboard might seem like the quickest way, but it can leave behind unnecessary files and database entries that can clutter your site and potentially cause problems down the line.
This guide is designed for beginners and will walk you through the correct steps for completely uninstalling a WordPress plugin, ensuring a clean and efficient website.
The Wrong Way: Simply Deactivating and Deleting
Many beginners make the mistake of only deactivating and then deleting a plugin through the WordPress admin panel. While this removes the plugin files, it often leaves behind remnants in your database, such as tables, options, and other data. Over time, these leftover bits can accumulate and lead to several issues:
- Database bloat, slowing down your website’s performance.
- Conflicts with other plugins or future installations.
- Potential security vulnerabilities if the plugin contained flaws that are now dormant but still present in your database.
The Right Way: A Step-by-Step Guide to Complete Uninstall
Here’s a detailed guide on how to uninstall a WordPress plugin completely and correctly:
Step 1: Backup Your Website
Before making any changes to your website, it’s crucial to create a backup. This includes both your website files and your database. This ensures that if anything goes wrong during the uninstall process, you can easily restore your website to its previous state. You can use a WordPress backup plugin like UpdraftPlus, BackWPup, or BlogVault, or you can manually backup your files and database through your hosting control panel (e.g., cPanel or Plesk).
Step 2: Deactivate the Plugin
The first step is to deactivate the plugin. This stops the plugin from running and affecting your website. To deactivate a plugin:
- Log in to your WordPress dashboard.
- Navigate to Plugins > Installed Plugins.
- Find the plugin you want to uninstall.
- Click the Deactivate link below the plugin name.
Step 3: Delete the Plugin
After deactivating the plugin, you can now delete it. This removes the plugin’s files from your server.
- Stay on the Plugins > Installed Plugins page.
- Find the deactivated plugin.
- Click the Delete link below the plugin name.
- A confirmation message will appear. Click OK to confirm the deletion.
Step 4: Check the Plugin’s Documentation (Important!)
This is a crucial step that many people skip. Before moving on, check the plugin’s documentation on the developer’s website. Some plugins provide specific instructions for complete removal, including database cleanup steps. Look for phrases like “uninstall instructions,” “remove plugin data,” or “database cleanup.” Following these instructions will ensure that you remove all traces of the plugin.
Step 5: Clean Up the Database (Manual Method)
If the plugin’s documentation doesn’t provide specific instructions, you can manually clean up the database. Caution: This step requires some technical knowledge and should be done carefully. Incorrectly modifying your database can break your website. If you’re not comfortable with this, consider using a plugin (see Step 6).
- Access your database through your hosting control panel (usually phpMyAdmin).
- Backup your database again before making any changes.
- Look for tables related to the plugin. These tables usually have the plugin’s name or abbreviation in their names (e.g., “wp_pluginname_options”).
- Carefully drop (delete) these tables. Double-check that you are deleting the correct tables!
- Also, check the
wp_optionstable for options related to the plugin. Search for the plugin’s name or abbreviation in theoption_namecolumn. - Delete the options that are clearly related to the plugin.
Step 6: Use a Database Cleanup Plugin (Easier Method)
If you’re not comfortable manually editing your database, you can use a plugin designed to clean up orphaned database tables and options. Some popular options include:
- WP-Optimize
- Advanced Database Cleaner
- Plugins Garbage Collector
These plugins scan your database for orphaned tables and options and allow you to safely remove them. Before using any of these plugins, make sure to read the documentation and create a database backup. Always proceed with caution when making changes to your database.
Step 7: Clear Your Website Cache
After uninstalling the plugin and cleaning up the database, it’s a good idea to clear your website’s cache. This ensures that any cached data related to the plugin is removed. If you’re using a caching plugin (like WP Rocket, W3 Total Cache, or LiteSpeed Cache), clear the cache through the plugin’s settings. If you’re using server-side caching, you may need to clear the cache through your hosting control panel.
Step 8: Test Your Website
Finally, thoroughly test your website to ensure that everything is working correctly. Check all pages, features, and functionalities to identify any potential issues caused by the plugin uninstall. If you encounter any problems, restore your website from the backup you created in Step 1 and try the uninstall process again, paying close attention to the plugin’s documentation and the database cleanup steps.
Things to Consider Before Installing Plugins
Preventing problems is better than fixing them. Before installing any plugin, consider the following:
- Plugin Reviews and Ratings: Check the plugin’s reviews and ratings to see what other users have experienced. A plugin with many positive reviews and a high rating is generally a safer choice.
- Last Updated Date: Make sure the plugin is actively maintained and regularly updated. A plugin that hasn’t been updated in a long time may have security vulnerabilities or compatibility issues.
- Plugin Compatibility: Ensure the plugin is compatible with your current version of WordPress.
- Support: Check if the plugin developer provides support. If you run into problems, it’s helpful to have access to support resources.
- Number of Active Installations: A plugin with a large number of active installations is usually a sign that it’s well-tested and reliable.
When Manual Database Cleaning is Absolutely Necessary
While plugins can automate the database cleanup process, there are situations where manual intervention is necessary. This often happens when:
- The plugin is poorly coded and leaves behind a significant amount of data.
- The automated database cleanup plugins fail to remove all traces of the plugin.
- You suspect that the plugin might have introduced security vulnerabilities that need to be addressed directly in the database.
In these cases, it’s best to consult with a WordPress developer or database expert who can safely and effectively clean up your database.
Conclusion
Properly uninstalling WordPress plugins is essential for maintaining a clean, efficient, and secure website. By following the steps outlined in this guide, you can ensure that you remove all traces of a plugin, preventing potential problems and optimizing your website’s performance. Remember to always back up your website before making any changes and to exercise caution when editing your database. By taking these precautions, you can keep your WordPress website running smoothly for years to come.