
How to Add a Login Form in Your WordPress Sidebar
Introduction: Why Add a Login Form to Your WordPress Sidebar?
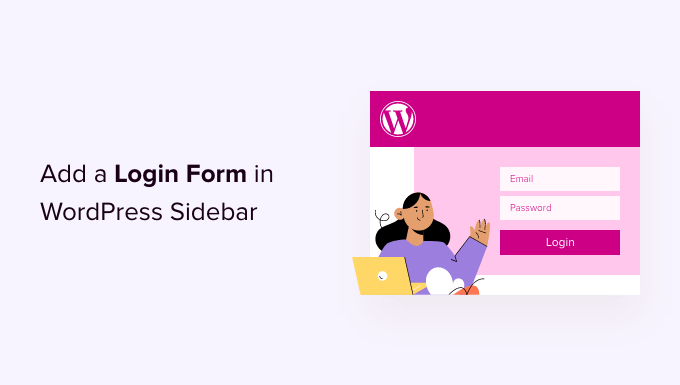
Adding a login form directly to your WordPress sidebar offers a convenient and user-friendly experience for returning visitors. Instead of navigating to a separate login page (usually `wp-login.php`), users can quickly authenticate from any page on your site where the sidebar is visible. This can significantly improve user engagement and streamline the login process. It’s especially beneficial for membership sites, online courses, or any website where frequent user logins are common. Furthermore, a sidebar login form can contribute to a cleaner and more professional website design.
Choosing the Right Method: Plugins vs. Code
There are generally two approaches to adding a login form to your WordPress sidebar: using a plugin or manually coding the solution.
* **Plugins:** This is often the easiest and most beginner-friendly method. Plugins provide a ready-made solution with customizable options, allowing you to quickly add a login form without writing any code. However, relying on too many plugins can sometimes slow down your site, and compatibility issues can arise.
* **Code:** Implementing the login form manually using code offers more control and customization. You can tailor the form’s appearance and functionality to perfectly match your website’s design. This method requires some familiarity with HTML, CSS, and PHP, but it can result in a more optimized and efficient solution.
Let’s explore both methods in detail.
Method 1: Using a WordPress Plugin
Numerous WordPress plugins simplify the process of adding a login form to your sidebar. Here are a few popular options:
* **Sidebar Login:** A straightforward and easy-to-use plugin that allows you to add a basic login form to your sidebar. It offers minimal customization options but is a good choice for simple implementations.
* **LoginPress:** A feature-rich plugin that not only adds a sidebar login form but also allows you to customize the default WordPress login page. It provides extensive styling options and security features.
* **Theme My Login:** A powerful plugin that lets you create custom login, registration, and password reset pages. While not solely focused on sidebar login forms, it offers widgets that can be placed in the sidebar.
* **WooCommerce Login Widget (If using WooCommerce):** If your site uses WooCommerce, it automatically includes a login widget that can be added to the sidebar.
Here’s a step-by-step guide to adding a login form using the “Sidebar Login” plugin:
1. **Install and Activate the Plugin:**
* Go to your WordPress dashboard.
* Navigate to “Plugins” > “Add New.”
* Search for “Sidebar Login.”
* Click “Install Now” and then “Activate.”
2. **Add the Widget to Your Sidebar:**
* Go to “Appearance” > “Widgets.”
* Locate the “Sidebar Login” widget.
* Drag the widget to your desired sidebar (e.g., “Sidebar,” “Right Sidebar,” etc.).
3. **Configure the Widget (Optional):**
* Expand the widget in the Widgets area.
* You can customize the title of the widget (e.g., “Member Login”).
* Save the widget settings.
4. **Test the Login Form:**
* Visit your website and check the sidebar where you placed the widget.
* The login form should be visible.
* Test the form by logging in with a valid user account.
The steps for using other plugins will be similar: install the plugin, activate it, find the appropriate widget or settings page, and configure it according to your preferences.
Method 2: Manually Coding a Login Form
For those who prefer a more hands-on approach and want greater control over the form’s appearance and functionality, manually coding the login form is an excellent option. This method requires modifying your theme’s `functions.php` file and creating a custom widget. **Important: Always back up your theme’s `functions.php` file before making any changes.**
Here’s how to do it:
1. **Create a Custom Widget Class:**
* Open your theme’s `functions.php` file (Appearance > Theme Editor). If you are using a child theme, you can edit the `functions.php` file there; otherwise, create one.
* Add the following code to define a custom widget class:
“`php
__(‘Displays a login form in the sidebar’, ‘textdomain’), ) // Args
);
}
public function widget( $args, $instance ) {
$title = apply_filters( ‘widget_title’, $instance[‘title’] );
echo $args[‘before_widget’];
if ( ! empty( $title ) ) {
echo $args[‘before_title’] . $title . $args[‘after_title’];
}
if ( is_user_logged_in() ) {
global $current_user;
wp_get_current_user();
echo ‘
Welcome, ‘ . $current_user->display_name . ‘!
‘;
echo ‘
- ‘;
- Edit Profile
- Logout
echo ‘
‘;
echo ‘
‘;
echo ‘
‘;
} else {
echo ‘
‘;
echo ‘
- ‘;
- Register
- Lost Password?
echo ‘
‘;
echo ‘
‘;
echo ‘
‘;
}
echo $args[‘after_widget’];
}
public function form( $instance ) {
if ( isset( $instance[ ‘title’ ] ) ) {
$title = $instance[ ‘title’ ];
}
else {
$title = __( ‘Member Login’, ‘textdomain’ );
}
?>