
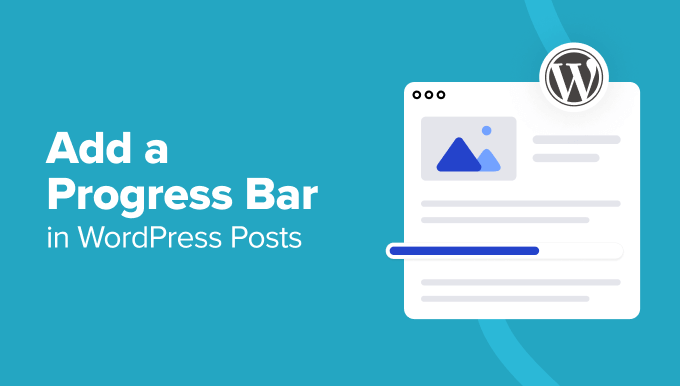
How to Add a Progress Bar in Your WordPress Posts (The Easy Way)
“`html
Why Use a Progress Bar in Your WordPress Posts?
- Enhances user engagement: A visual progress indicator keeps readers interested and motivates them to continue reading.
- Improves readability: Breaking up long articles with visual elements like progress bars makes the content less intimidating and easier to digest.
- Offers a sense of accomplishment: As readers see the progress bar fill up, they feel a sense of accomplishment, encouraging them to finish the article.
- Highlights key sections: Strategically placed progress bars can draw attention to important points or transitions within the content.
- Provides a better user experience: A progress bar offers a clear indication of how much time the reader needs to invest, leading to a more satisfying experience.
- Can increase time on page: Engaged readers are more likely to stay on the page longer, which can improve your website’s SEO.
- Modern and professional look: A well-designed progress bar can add a touch of sophistication and professionalism to your website.
Choosing the Right Method: Plugins vs. Manual Coding
There are two primary ways to add progress bars to your WordPress posts: using plugins or manually coding them. Each approach has its own advantages and disadvantages.
- Plugins: The Easy and Quick Solution
- Pros: User-friendly, requires no coding knowledge, often offers customization options, readily available and easy to install.
- Cons: Can potentially slow down your website if the plugin is poorly coded, reliance on third-party developers for updates and support, may include features you don’t need, potential compatibility issues with other plugins or themes.
- Manual Coding: The Custom and Flexible Approach
- Pros: Full control over the appearance and functionality of the progress bar, avoids relying on third-party plugins, can be optimized for performance.
- Cons: Requires coding knowledge (HTML, CSS, and potentially JavaScript), can be time-consuming to implement and maintain, requires careful testing to ensure compatibility and responsiveness.
For most users, especially those without coding experience, using a plugin is the easier and more practical option. This article will primarily focus on using plugins to add progress bars.
Top WordPress Progress Bar Plugins
Several excellent WordPress plugins can help you easily add progress bars to your posts. Here are some of the most popular and highly-rated options:
- Reading Position Indicator
- Features: Simple and lightweight, displays a progress bar at the top of the screen, customizable colors and thickness.
- Ideal for: Users who want a basic and unobtrusive progress bar without complex features.
- Worth The Read
- Features: Offers multiple progress bar styles (top, bottom, fixed), customizable colors, and a reading time indicator.
- Ideal for: Users who want more control over the appearance and placement of their progress bar.
- Progress Bar (by ShapePress)
- Features: Highly customizable, allows you to create multiple progress bars with different styles and triggers, can be used for various purposes (e.g., page load progress, video progress).
- Ideal for: Developers and users who need advanced customization options and want to use progress bars for different functionalities.
- Visual CSS Style Editor (for its Progress Bar features)
- Features: While primarily a CSS editor, it includes a progress bar feature that can be styled with custom CSS.
- Ideal for: Users comfortable with CSS who want precise control over the appearance of their progress bar.
- Elementor/Divi (Page Builders with Progress Bar Widgets)
- Features: If you’re using Elementor or Divi, you can use their built-in progress bar widgets to add progress bars to specific sections of your page.
- Ideal for: Users who are already using Elementor or Divi and want to integrate progress bars seamlessly into their page layouts.
This article will use the “Reading Position Indicator” plugin as an example due to its simplicity and ease of use. However, the general principles apply to most other progress bar plugins as well.
Step-by-Step Guide: Adding a Progress Bar with “Reading Position Indicator”
Follow these steps to add a progress bar to your WordPress posts using the “Reading Position Indicator” plugin:
- Install and Activate the Plugin:
- Go to your WordPress dashboard.
- Navigate to “Plugins” -> “Add New”.
- Search for “Reading Position Indicator”.
- Click “Install Now”.
- After installation, click “Activate”.
- Configure the Plugin Settings (Optional):
- Go to “Settings” -> “Reading Position Indicator”.
- Here, you can customize the following settings:
- Color: Choose the color of the progress bar.
- Height: Adjust the thickness of the progress bar.
- Position: Choose whether to display the progress bar at the top or bottom of the screen (some plugins may offer this).
- Click “Save Changes” to save your settings.
- That’s it! The progress bar will now automatically appear at the top (or bottom, depending on your settings) of all your WordPress posts and pages.
Customizing Your Progress Bar
While the default settings of most progress bar plugins are often sufficient, you may want to customize the appearance and behavior of your progress bar to better match your website’s design.
- Color: Choose a color that complements your website’s color scheme. Consider using your brand’s primary or secondary color.
- Thickness: Adjust the thickness of the progress bar to make it more or less noticeable. A thinner progress bar is often more subtle and elegant, while a thicker one is more prominent and eye-catching.
- Position: Experiment with different positions (top, bottom, fixed) to see which one works best for your website’s layout.
- Animation: Some plugins offer animation options, such as a smooth transition effect as the progress bar fills up.
- Custom CSS: For advanced customization, you can use custom CSS to further style the progress bar. You can usually add custom CSS in your theme’s customizer or using a plugin like “Simple Custom CSS”.
To customize the “Reading Position Indicator” using CSS, you would typically target the following CSS selectors:
“`css
/* Change the progress bar color */
#reading-position-indicator {
background-color: #007bff; /* Example: Blue */
}
/* Change the progress bar height */
#reading-position-indicator {
height: 5px; /* Example: 5 pixels */
}
“`
Remember to replace `#007bff` and `5px` with your desired color and height values.
Troubleshooting Common Issues
While using progress bar plugins is generally straightforward, you may encounter some issues. Here are some common problems and their solutions:
- Progress bar not appearing:
- Make sure the plugin is activated.
- Check the plugin settings to ensure the progress bar is enabled.
- Clear your browser’s cache and cookies.
- Check for plugin conflicts by deactivating other plugins one by one.
- Progress bar not filling up correctly:
- Ensure the plugin is compatible with your WordPress version and theme.
- Check for JavaScript errors in your browser’s console.
- Try a different progress bar plugin.
- Progress bar overlapping with other elements:
- Adjust the position of the progress bar in the plugin settings.
- Use custom CSS to adjust the positioning and z-index of the progress bar.
- Website slowing down:
- Choose a lightweight and well-coded progress bar plugin.
- Optimize your website’s performance by compressing images, enabling caching, and using a content delivery network (CDN).
Advanced Techniques: Conditional Progress Bars
In some cases, you may want to display a progress bar only on specific posts or pages, or under certain conditions. This can be achieved using conditional logic in your theme’s `functions.php` file or by using a plugin that supports conditional display rules.
Here’s an example of how to display a progress bar only on single posts using conditional logic in your `functions.php` file (this requires modifying your theme’s files, which is best done in a child theme):
“`php
function enqueue_custom_scripts() {
if ( is_single() ) {
// Enqueue CSS for the progress bar (replace ‘your-progress-bar-style.css’ with the actual path)
wp_enqueue_style( ‘progress-bar-style’, get_stylesheet_directory_uri() . ‘/your-progress-bar-style.css’ );
// Enqueue JavaScript for the progress bar (replace ‘your-progress-bar-script.js’ with the actual path)
wp_enqueue_script( ‘progress-bar-script’, get_stylesheet_directory_uri() . ‘/your-progress-bar-script.js’, array( ‘jquery’ ), ‘1.0’, true );
}
}
add_action( ‘wp_enqueue_scripts’, ‘enqueue_custom_scripts’ );
“`
This code snippet checks if the current page is a single post (`is_single()`) and, if so, enqueues the necessary CSS and JavaScript files for the progress bar. You would then need to create the `your-progress-bar-style.css` and `your-progress-bar-script.js` files and add the appropriate code to implement the progress bar functionality. This is a more advanced technique that requires coding knowledge.
Some plugins, like “Conditional Blocks,” allow you to control the visibility of blocks (including blocks that display a progress bar) based on various conditions, such as the user’s role, the post type, or the page template.
Conclusion
Adding a progress bar to your WordPress posts is a simple yet effective way to enhance user engagement, improve readability, and provide a better user experience. By following the steps outlined in this article, you can easily add a progress bar to your website and customize it to match your specific needs and preferences. Remember to choose a plugin that is lightweight, well-coded, and compatible with your WordPress version and theme. With a little bit of effort, you can transform your website into a more engaging and user-friendly platform for your readers.
“`
- How to Create a Local WordPress Site Using XAMPP
- How to Add a Search Toggle Effect in WordPress
- How to Easily Style Tags in WordPress (With Examples)
- Beginner’s Guide: How to Use WordPress Block Patterns
- How to Enforce One Category Per Post in WordPress
- How to Add Your Plugin to the WordPress Plugin Directory
- How to Allow PHP in WordPress Posts and Pages (Easy Tutorial)