
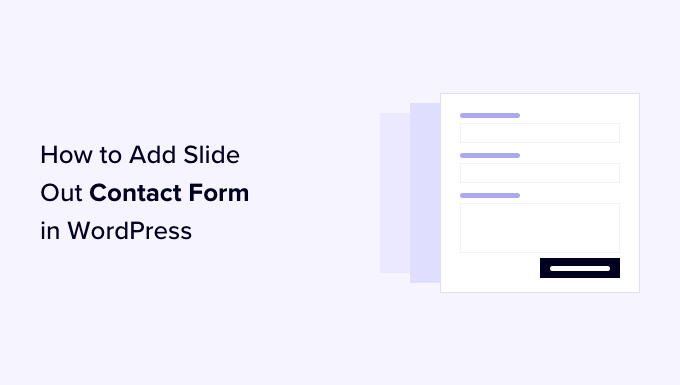
How to Add Slide Out Contact Form in WordPress (Easy Tutorial)
Understanding the Need for a Slide-Out Contact Form
A slide-out contact form offers a non-intrusive yet readily accessible way for website visitors to reach out to you. Unlike a static contact page, a slide-out form remains hidden until triggered, providing a smoother user experience. It allows users to contact you from any page without navigating away from the content they’re currently viewing, increasing the likelihood of them reaching out. This feature can significantly improve lead generation, customer service, and overall user engagement on your WordPress website.
Choosing the Right Plugin: Essential Features to Consider
Before diving into the installation process, it’s crucial to select a WordPress plugin that aligns with your needs and technical skills. Several plugins offer slide-out contact form functionality, each with its own set of features and complexities. Consider these key features:
- Customization Options: The ability to tailor the form’s appearance, including colors, fonts, and button styles, to match your website’s branding.
- Form Fields: Support for various field types, such as text fields, email fields, dropdown menus, and checkboxes, to collect the necessary information from users.
- Responsiveness: Ensures the form looks and functions correctly on all devices, including desktops, tablets, and smartphones.
- Email Integration: Seamless integration with your email provider to ensure that submitted forms are delivered to your inbox without any issues.
- Spam Protection: Built-in spam filters or integration with reCAPTCHA to prevent unwanted submissions.
- Trigger Options: Customizable triggers, such as button clicks, scroll depth, or exit intent, to control when the form appears.
- Ease of Use: A user-friendly interface that allows you to create and manage forms without requiring advanced coding skills.
- Performance: Lightweight code that doesn’t slow down your website’s loading speed.
Popular plugins that offer slide-out contact form functionality include:
- Contact Form 7 (with a slide-out plugin): A highly customizable and widely used plugin that requires an additional plugin for the slide-out effect.
- Ninja Forms: A user-friendly drag-and-drop form builder with various add-ons, including options for slide-out forms.
- Gravity Forms: A powerful and feature-rich plugin with advanced form-building capabilities and support for slide-out forms (requires developer license).
- WPForms: Another popular drag-and-drop form builder with a dedicated slide-out form add-on.
- Formidable Forms: A versatile plugin that allows you to create complex forms, including slide-out forms.
For this tutorial, we’ll focus on Contact Form 7 combined with a dedicated slide-out plugin because it offers a good balance of customizability, functionality, and affordability.
Step-by-Step Guide: Installing and Configuring Contact Form 7 and a Slide-Out Plugin
Follow these steps to install Contact Form 7 and a compatible slide-out plugin:
- Install Contact Form 7: Navigate to your WordPress dashboard, go to “Plugins” > “Add New,” search for “Contact Form 7,” and click “Install Now” followed by “Activate.”
- Install a Slide-Out Plugin for Contact Form 7: Search for a plugin specifically designed to add slide-out functionality to Contact Form 7. Options include “Slide Contact Form,” “Contact Form 7 – Slide In,” or similar. Choose one based on reviews, ratings, and compatibility. Install and activate the selected plugin.
Configuring Contact Form 7
Now that you have both plugins installed, let’s configure Contact Form 7 to create your contact form:
- Create a New Form: In your WordPress dashboard, go to “Contact” > “Add New.” This will open the Contact Form 7 form editor.
- Customize the Form Fields: Contact Form 7 provides a default form template. You can customize the fields by adding, removing, or modifying the existing code. Use the buttons above the form editor to insert various field types, such as text fields, email fields, text areas, and dropdown menus.
- Understand the Form Code: The form code uses HTML-like tags enclosed in square brackets. For example:
- `` creates a required text field for the user’s name.
- `` creates a required email field.
- `` creates a text field for the subject.
- `` creates a text area for the message.
Adjust these tags and labels to suit your specific needs.
- Configure the Mail Settings: Click on the “Mail” tab. This section allows you to configure the email settings for the form.
- To: Enter the email address where you want to receive the form submissions.
- From: This should be a valid email address from your domain (e.g., wordpress@yourdomain.com). Using a third-party email address may cause deliverability issues.
- Subject: Enter the subject line for the email.
- Message Body: This is the content of the email. Use the tags from your form fields (e.g., `[your-name]`, `[your-email]`, `[your-message]`) to display the submitted information.
- Save the Form: Once you’ve customized the form and configured the mail settings, click “Save.”
- Copy the Shortcode: After saving, Contact Form 7 will generate a shortcode for your form. Copy this shortcode, as you’ll need it in the next step.
Configuring the Slide-Out Plugin
Now, let’s configure the slide-out plugin to display your Contact Form 7 form as a slide-out element:
- Access the Plugin Settings: Locate the settings page for your chosen slide-out plugin. This is usually found under the “Settings” or “Appearance” menu in your WordPress dashboard. The name and location will vary depending on the plugin you selected.
- Paste the Contact Form 7 Shortcode: Within the plugin’s settings, you should find a field where you can paste the Contact Form 7 shortcode you copied earlier. Paste the shortcode into this field.
- Customize the Trigger Element: The slide-out plugin will likely offer options to customize the trigger element that activates the form. This could be a button, a tab, or an icon.
- Trigger Text/Icon: Choose the text or icon that will be displayed on the trigger element (e.g., “Contact Us,” “Feedback,” a chat icon).
- Trigger Position: Select the position of the trigger element on the screen (e.g., left, right, top, bottom).
- Trigger Style: Customize the appearance of the trigger element, including its color, font, and size.
- Customize the Slide-Out Form Appearance: The plugin may also offer options to customize the appearance of the slide-out form itself.
- Background Color: Choose the background color of the form.
- Text Color: Choose the text color for the form.
- Border Style: Customize the border around the form.
- Animation: Select the animation effect for the slide-out (e.g., slide from left, slide from right, fade in).
- Set Display Rules: Some plugins allow you to control where the slide-out form is displayed on your website. You can typically choose to display it on all pages, specific pages, or posts.
- Save the Settings: After configuring the plugin to your liking, click “Save” or “Update” to save your changes.
Testing and Troubleshooting
After configuring the plugins, it’s essential to test the slide-out contact form to ensure it’s working correctly:
- Visit Your Website: Open your website in a web browser and navigate to a page where the slide-out form should be visible.
- Trigger the Form: Click on the trigger element (e.g., the “Contact Us” button) to activate the slide-out form.
- Test the Form Fields: Fill out all the required fields in the form and submit it.
- Check Your Email: Verify that you receive the form submission in your email inbox. Also, check your spam folder in case the email was misidentified.
- Inspect the Form’s Appearance: Make sure the form looks and functions correctly on different devices (desktops, tablets, and smartphones).
If you encounter any issues, consider the following troubleshooting steps:
- Verify the Shortcode: Double-check that you pasted the correct Contact Form 7 shortcode into the slide-out plugin’s settings.
- Check Email Settings: Ensure that the email settings in Contact Form 7 are configured correctly, especially the “To” and “From” addresses.
- Deactivate Plugin Conflicts: Temporarily deactivate other plugins to see if any conflicts are interfering with the slide-out form.
- Check for JavaScript Errors: Use your browser’s developer console to check for any JavaScript errors that might be preventing the form from working.
- Consult Plugin Documentation: Refer to the documentation for both Contact Form 7 and the slide-out plugin for troubleshooting tips and solutions.
Advanced Customization Options
Once you have the basic slide-out contact form working, you can explore advanced customization options to further enhance its functionality and appearance. These options may vary depending on the plugins you’re using:
- Conditional Logic: Use conditional logic to show or hide certain form fields based on user input. For example, you could display different fields depending on the subject selected by the user.
- Custom CSS: Add custom CSS code to further customize the appearance of the form and trigger element. This allows you to fine-tune the design beyond the options provided by the plugin’s settings.
- Integration with CRM: Integrate the form with a CRM (Customer Relationship Management) system to automatically add new leads to your sales pipeline.
- Analytics Tracking: Track form submissions using Google Analytics or other analytics platforms to measure the effectiveness of your contact form.
- A/B Testing: Experiment with different versions of the form and trigger element to see which performs best in terms of conversions.
By leveraging these advanced customization options, you can create a highly effective and engaging slide-out contact form that helps you connect with your website visitors and generate more leads.
- How to Create an IDX Real Estate Website Using WordPress
- How to Host a Virtual Event in WordPress
- How to Add a Request to Callback Form in WordPress
- How to Add a Search Toggle Effect in WordPress
- How to Generate and Add QR Codes in WordPress (Easy Tutorial)
- What is the Hello Dolly WordPress Plugin? Should You Delete it?
- How to Create a Recent Comments Page in WordPress (2 Ways)