
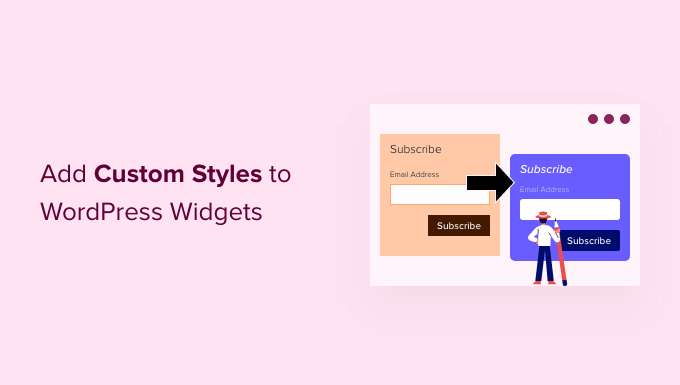
How to Add Custom Styles to WordPress Widgets (2 Ways)
Understanding WordPress Widgets and Styling
WordPress widgets are small, self-contained modules that add specific features or content to designated areas of your website, typically the sidebar, footer, or other widget-ready locations. While WordPress provides a default set of widgets and many plugins offer more, their default styling often doesn’t perfectly align with your overall website design. Customizing widget styles is crucial for maintaining a consistent and professional look and feel.
There are several reasons why you might want to add custom styles to your WordPress widgets:
- To match the widget appearance to your theme’s color scheme and typography.
- To highlight important information within the widget.
- To improve the widget’s usability and readability.
- To create unique and branded widgets that stand out.
- To ensure responsiveness and adaptability across different screen sizes.
This article will explore two primary methods for adding custom styles to WordPress widgets: using the Customizer’s Additional CSS and creating a custom CSS file for your theme (or child theme).
Method 1: Using the WordPress Customizer’s Additional CSS
The WordPress Customizer provides a user-friendly interface for customizing various aspects of your website, including adding custom CSS. This is a convenient and relatively straightforward method for making minor style adjustments to widgets without directly modifying theme files.
Accessing the Customizer
1. Log in to your WordPress dashboard.
2. Navigate to Appearance > Customize.
3. The WordPress Customizer will open, displaying a preview of your website alongside various customization options.
Locating the “Additional CSS” Section
Within the Customizer, scroll down the options panel until you find the “Additional CSS” section. Click on it to open a text editor where you can enter your custom CSS code.
Identifying Widget Selectors
Before you can write any CSS, you need to identify the correct CSS selectors for the widget elements you want to style. This involves inspecting the HTML structure of the widget using your browser’s developer tools.
1. **Open your website in a new tab or window.**
2. **Right-click on the widget element you want to style and select “Inspect” or “Inspect Element” from the context menu.** This will open your browser’s developer tools.
3. **Examine the HTML code to identify the CSS classes and IDs associated with the widget and its elements.** Pay attention to any unique classes or IDs that can help you target the specific widget you want to modify. Common HTML elements within widgets include `
`, `
` to `
`, `
`, `
- `, and ``. Common classes might include `widget`, `widget-title`, or classes defined by the widget plugin itself.
For example, a standard text widget might have the following HTML structure:
“`html
“`
In this example, you could use the following selectors to target different elements:
* `#text-2`: Targets the entire widget using its unique ID. Note that the number (in this case, “2”) might change depending on the order in which the widget was added.
* `.widget_text`: Targets all text widgets using the widget’s class.
* `.widget-title`: Targets the title of all widgets with this class.
* `.textwidget`: Targets the content area of the text widget.
* `#text-2 .widget-title`: Targets the title of the specific text widget with ID “text-2”.
Writing Custom CSS
Once you have identified the correct CSS selectors, you can write your custom CSS code in the “Additional CSS” section of the Customizer.
For example, to change the background color and text color of the widget title in the example above, you could use the following CSS:
“`css
.widget-title {
background-color: #3498db;
color: #ffffff;
padding: 10px;
}
“`
This CSS code will:
* Set the background color of all elements with the class `widget-title` to a blue color (#3498db).
* Set the text color of all elements with the class `widget-title` to white (#ffffff).
* Add 10 pixels of padding around the text within the title.
To target only the title of the text widget with the ID `text-2`, you could use the following CSS:
“`css
#text-2 .widget-title {
background-color: #e74c3c;
color: #ffffff;
}
“`
This will only affect the title of that specific widget.
Previewing and Publishing Changes
As you type your CSS code in the “Additional CSS” section, the Customizer will automatically update the preview of your website to reflect the changes. This allows you to see the results of your styling in real-time.
Once you are satisfied with the changes, click the “Publish” button at the top of the Customizer to save your custom CSS code and make it live on your website.
Advantages of Using the Customizer
* **Easy to use:** The Customizer provides a simple and intuitive interface for adding custom CSS.
* **Real-time preview:** You can see the results of your styling changes instantly.
* **No need to edit theme files:** This prevents accidental damage to your theme’s core files.
* **Ideal for minor styling adjustments:** Quick and efficient for small tweaks and refinements.
Disadvantages of Using the Customizer
* **Can become cluttered:** For extensive styling changes, the “Additional CSS” section can become disorganized.
* **Less control over file organization:** All CSS is stored in one place, making it harder to manage large stylesheets.
* **Not ideal for complex styling:** For more advanced customization, using a dedicated CSS file is recommended.
Method 2: Creating a Custom CSS File for Your Theme (or Child Theme)
Creating a custom CSS file and linking it to your WordPress theme (or, better, a child theme) is a more structured and organized approach to styling widgets. This method provides more control over your CSS code and is better suited for more extensive customizations. It also helps keep your theme files clean and organized.
Creating a Child Theme (Recommended)
Before making any modifications to your theme’s files, it’s highly recommended to create a child theme. A child theme inherits the styles and functionality of the parent theme but allows you to make changes without affecting the original theme files. This is important because when the parent theme is updated, your customizations will not be overwritten.
1. **Create a new folder in the `/wp-content/themes/` directory.** Name the folder something descriptive, like `your-theme-child` (replace `your-theme` with the name of your parent theme).
2. **Create a `style.css` file inside the child theme folder.**
3. **Add the following code to the `style.css` file:**
“`css
/*
Theme Name: Your Theme Child
Theme URI: http://example.com/your-theme-child/
Description: Child theme for Your Theme
Author: Your Name
Author URI: http://example.com
Template: your-theme //Important: Replace with the name of your parent theme’s folder
Version: 1.0.0
*/
@import url(“../your-theme/style.css”); /* Imports the parent theme’s styles */
/* Add your custom styles below this line */
“`
Replace `Your Theme Child`, `http://example.com/your-theme-child/`, `Description`, `Your Name`, `http://example.com`, and `your-theme` with your own details. **Crucially, ensure the `Template:` line matches the *folder name* of your parent theme.**
4. **Activate the child theme.** Go to Appearance > Themes in your WordPress dashboard and activate the child theme.
Creating a Custom CSS File
If you are using a child theme (as recommended), the `style.css` file in your child theme folder is the ideal place to add your custom widget styles. If you are not using a child theme (not recommended), you can create a new CSS file within your theme’s folder or a dedicated “css” subdirectory. Name the file something descriptive, such as `widget-styles.css`.
Linking the CSS File to Your Theme
Once you have created your custom CSS file, you need to link it to your WordPress theme so that the styles are applied to your website. The recommended method is to use the `wp_enqueue_scripts` action hook in your theme’s `functions.php` file (or, if using a child theme, the child theme’s `functions.php`).
1. **Open your theme’s (or child theme’s) `functions.php` file.**
2. **Add the following code to the `functions.php` file:**
“`php
get(‘Version’)
);
wp_enqueue_style( ‘custom-widget-styles’, get_stylesheet_directory_uri() . ‘/widget-styles.css’, array(), ‘1.0’ );
}
add_action( ‘wp_enqueue_scripts’, ‘my_theme_enqueue_styles’ );
“`
This code does the following:
* Defines a function called `my_theme_enqueue_styles`. You can choose a different name for the function, but make sure it’s unique.
* Uses `wp_enqueue_style` to register and enqueue the CSS file.
* The first argument (`custom-widget-styles`) is a unique handle for the stylesheet.
* The second argument (`get_stylesheet_directory_uri() . ‘/widget-styles.css’`) specifies the path to your CSS file. `get_stylesheet_directory_uri()` is used because this could be the parent theme or child theme directory. Replace `widget-styles.css` with the actual name of your custom CSS file if you named it differently.
* The third argument (`array()`) is an array of dependencies. In this case, we are not specifying any dependencies, so it’s an empty array. If your custom styles depend on your theme’s main stylesheet, you could add the handle of the parent theme’s stylesheet here.
* The fourth argument (`’1.0’`) is the version number of the stylesheet. This is useful for cache busting when you make changes to the CSS file.
* Uses `add_action` to hook the `my_theme_enqueue_styles` function to the `wp_enqueue_scripts` action. This ensures that the CSS file is loaded when WordPress enqueues scripts and styles.
If your custom CSS is within the `css` subdirectory, you would change the path to:
“`php
wp_enqueue_style( ‘custom-widget-styles’, get_stylesheet_directory_uri() . ‘/css/widget-styles.css’, array(), ‘1.0’ );
“`
Remember to adjust the file path accordingly.
Adding Custom CSS to the File
Now that you have linked your custom CSS file to your theme, you can add your widget styles to the file. Use the same process of identifying widget selectors as described in Method 1 (using your browser’s developer tools).
For example, to style all widgets with a specific class, you could add the following CSS to your `widget-styles.css` file:
“`css
.my-custom-widget {
background-color: #f2f2f2;
border: 1px solid #ddd;
padding: 15px;
margin-bottom: 20px;
}
.my-custom-widget h2.widget-title {
font-size: 1.2em;
font-weight: bold;
margin-bottom: 10px;
}
“`
Saving and Testing Changes
After adding your custom CSS to the file, save the file and refresh your website in your browser. The widget styles should now be applied. If the changes are not visible, try clearing your browser’s cache or hard-refreshing the page (usually Ctrl+Shift+R or Cmd+Shift+R).
Advantages of Using a Custom CSS File
* **Organized and structured:** Keeps your CSS code separate from the theme’s core files.
* **More control over file organization:** You can create multiple CSS files and organize them logically.
* **Better for complex styling:** Ideal for extensive customizations and advanced styling techniques.
* **Cache-friendly:** Version numbers can be used for cache busting.
* **Child theme compatibility:** Changes are preserved during theme updates when using a child theme.
Disadvantages of Using a Custom CSS File
* **Requires some technical knowledge:** Involves editing theme files and using PHP.
* **Slightly more complex than the Customizer:** Requires more steps to set up.
* **Potential for errors:** Incorrect code can break your website.
Choosing the Right Method
The best method for adding custom styles to WordPress widgets depends on the complexity of your customization needs and your technical skills.
* **Use the Customizer’s Additional CSS for:**
* Simple styling adjustments, such as changing colors, fonts, or padding.
* Quick and easy modifications without editing theme files.
* When you are comfortable with CSS but want a user-friendly interface.
* **Use a Custom CSS File for:**
* More extensive and complex styling changes.
* Creating a well-organized and maintainable stylesheet.
* When you need to use advanced CSS techniques.
* When you are comfortable editing theme files and using PHP.
* If you are making changes to a client’s website. This approach prevents CSS bloat in the customizer.
Remember to always create a child theme before making any modifications to your theme’s files. This will ensure that your customizations are preserved during theme updates. Regardless of the method you choose, always test your changes thoroughly to ensure they are working as expected and that they don’t break your website.
Related Topics by Tag
- How to Create a Local WordPress Site Using XAMPP
- How to Remove the Sidebar in WordPress (6 Easy Methods)
- How to Set A Fallback Featured Image Based on Post Category in WordPress
- How to Create a Custom Page in WordPress
- How to: Related Posts with Thumbnails in WordPress without Plugins
- WordPress Widgets vs Blocks – What’s the Difference? (Explained)
- How to Add Custom Fields to Comments Form in WordPress
- `, `
- `, and ``. Common classes might include `widget`, `widget-title`, or classes defined by the widget plugin itself.
For example, a standard text widget might have the following HTML structure:
“`html
“`
In this example, you could use the following selectors to target different elements:
* `#text-2`: Targets the entire widget using its unique ID. Note that the number (in this case, “2”) might change depending on the order in which the widget was added.
* `.widget_text`: Targets all text widgets using the widget’s class.
* `.widget-title`: Targets the title of all widgets with this class.
* `.textwidget`: Targets the content area of the text widget.
* `#text-2 .widget-title`: Targets the title of the specific text widget with ID “text-2”.Writing Custom CSS
Once you have identified the correct CSS selectors, you can write your custom CSS code in the “Additional CSS” section of the Customizer.
For example, to change the background color and text color of the widget title in the example above, you could use the following CSS:
“`css
.widget-title {
background-color: #3498db;
color: #ffffff;
padding: 10px;
}
“`This CSS code will:
* Set the background color of all elements with the class `widget-title` to a blue color (#3498db).
* Set the text color of all elements with the class `widget-title` to white (#ffffff).
* Add 10 pixels of padding around the text within the title.To target only the title of the text widget with the ID `text-2`, you could use the following CSS:
“`css
#text-2 .widget-title {
background-color: #e74c3c;
color: #ffffff;
}
“`This will only affect the title of that specific widget.
Previewing and Publishing Changes
As you type your CSS code in the “Additional CSS” section, the Customizer will automatically update the preview of your website to reflect the changes. This allows you to see the results of your styling in real-time.
Once you are satisfied with the changes, click the “Publish” button at the top of the Customizer to save your custom CSS code and make it live on your website.
Advantages of Using the Customizer
* **Easy to use:** The Customizer provides a simple and intuitive interface for adding custom CSS.
* **Real-time preview:** You can see the results of your styling changes instantly.
* **No need to edit theme files:** This prevents accidental damage to your theme’s core files.
* **Ideal for minor styling adjustments:** Quick and efficient for small tweaks and refinements.Disadvantages of Using the Customizer
* **Can become cluttered:** For extensive styling changes, the “Additional CSS” section can become disorganized.
* **Less control over file organization:** All CSS is stored in one place, making it harder to manage large stylesheets.
* **Not ideal for complex styling:** For more advanced customization, using a dedicated CSS file is recommended.Method 2: Creating a Custom CSS File for Your Theme (or Child Theme)
Creating a custom CSS file and linking it to your WordPress theme (or, better, a child theme) is a more structured and organized approach to styling widgets. This method provides more control over your CSS code and is better suited for more extensive customizations. It also helps keep your theme files clean and organized.
Creating a Child Theme (Recommended)
Before making any modifications to your theme’s files, it’s highly recommended to create a child theme. A child theme inherits the styles and functionality of the parent theme but allows you to make changes without affecting the original theme files. This is important because when the parent theme is updated, your customizations will not be overwritten.
1. **Create a new folder in the `/wp-content/themes/` directory.** Name the folder something descriptive, like `your-theme-child` (replace `your-theme` with the name of your parent theme).
2. **Create a `style.css` file inside the child theme folder.**
3. **Add the following code to the `style.css` file:**“`css
/*
Theme Name: Your Theme Child
Theme URI: http://example.com/your-theme-child/
Description: Child theme for Your Theme
Author: Your Name
Author URI: http://example.com
Template: your-theme //Important: Replace with the name of your parent theme’s folder
Version: 1.0.0
*/@import url(“../your-theme/style.css”); /* Imports the parent theme’s styles */
/* Add your custom styles below this line */
“`Replace `Your Theme Child`, `http://example.com/your-theme-child/`, `Description`, `Your Name`, `http://example.com`, and `your-theme` with your own details. **Crucially, ensure the `Template:` line matches the *folder name* of your parent theme.**
4. **Activate the child theme.** Go to Appearance > Themes in your WordPress dashboard and activate the child theme.
Creating a Custom CSS File
If you are using a child theme (as recommended), the `style.css` file in your child theme folder is the ideal place to add your custom widget styles. If you are not using a child theme (not recommended), you can create a new CSS file within your theme’s folder or a dedicated “css” subdirectory. Name the file something descriptive, such as `widget-styles.css`.
Linking the CSS File to Your Theme
Once you have created your custom CSS file, you need to link it to your WordPress theme so that the styles are applied to your website. The recommended method is to use the `wp_enqueue_scripts` action hook in your theme’s `functions.php` file (or, if using a child theme, the child theme’s `functions.php`).
1. **Open your theme’s (or child theme’s) `functions.php` file.**
2. **Add the following code to the `functions.php` file:**“`php
get(‘Version’)
);wp_enqueue_style( ‘custom-widget-styles’, get_stylesheet_directory_uri() . ‘/widget-styles.css’, array(), ‘1.0’ );
}
add_action( ‘wp_enqueue_scripts’, ‘my_theme_enqueue_styles’ );
“`This code does the following:
* Defines a function called `my_theme_enqueue_styles`. You can choose a different name for the function, but make sure it’s unique.
* Uses `wp_enqueue_style` to register and enqueue the CSS file.
* The first argument (`custom-widget-styles`) is a unique handle for the stylesheet.
* The second argument (`get_stylesheet_directory_uri() . ‘/widget-styles.css’`) specifies the path to your CSS file. `get_stylesheet_directory_uri()` is used because this could be the parent theme or child theme directory. Replace `widget-styles.css` with the actual name of your custom CSS file if you named it differently.
* The third argument (`array()`) is an array of dependencies. In this case, we are not specifying any dependencies, so it’s an empty array. If your custom styles depend on your theme’s main stylesheet, you could add the handle of the parent theme’s stylesheet here.
* The fourth argument (`’1.0’`) is the version number of the stylesheet. This is useful for cache busting when you make changes to the CSS file.* Uses `add_action` to hook the `my_theme_enqueue_styles` function to the `wp_enqueue_scripts` action. This ensures that the CSS file is loaded when WordPress enqueues scripts and styles.
If your custom CSS is within the `css` subdirectory, you would change the path to:
“`php
wp_enqueue_style( ‘custom-widget-styles’, get_stylesheet_directory_uri() . ‘/css/widget-styles.css’, array(), ‘1.0’ );
“`Remember to adjust the file path accordingly.
Adding Custom CSS to the File
Now that you have linked your custom CSS file to your theme, you can add your widget styles to the file. Use the same process of identifying widget selectors as described in Method 1 (using your browser’s developer tools).
For example, to style all widgets with a specific class, you could add the following CSS to your `widget-styles.css` file:
“`css
.my-custom-widget {
background-color: #f2f2f2;
border: 1px solid #ddd;
padding: 15px;
margin-bottom: 20px;
}.my-custom-widget h2.widget-title {
font-size: 1.2em;
font-weight: bold;
margin-bottom: 10px;
}
“`Saving and Testing Changes
After adding your custom CSS to the file, save the file and refresh your website in your browser. The widget styles should now be applied. If the changes are not visible, try clearing your browser’s cache or hard-refreshing the page (usually Ctrl+Shift+R or Cmd+Shift+R).
Advantages of Using a Custom CSS File
* **Organized and structured:** Keeps your CSS code separate from the theme’s core files.
* **More control over file organization:** You can create multiple CSS files and organize them logically.
* **Better for complex styling:** Ideal for extensive customizations and advanced styling techniques.
* **Cache-friendly:** Version numbers can be used for cache busting.
* **Child theme compatibility:** Changes are preserved during theme updates when using a child theme.Disadvantages of Using a Custom CSS File
* **Requires some technical knowledge:** Involves editing theme files and using PHP.
* **Slightly more complex than the Customizer:** Requires more steps to set up.
* **Potential for errors:** Incorrect code can break your website.Choosing the Right Method
The best method for adding custom styles to WordPress widgets depends on the complexity of your customization needs and your technical skills.
* **Use the Customizer’s Additional CSS for:**
* Simple styling adjustments, such as changing colors, fonts, or padding.
* Quick and easy modifications without editing theme files.
* When you are comfortable with CSS but want a user-friendly interface.* **Use a Custom CSS File for:**
* More extensive and complex styling changes.
* Creating a well-organized and maintainable stylesheet.
* When you need to use advanced CSS techniques.
* When you are comfortable editing theme files and using PHP.
* If you are making changes to a client’s website. This approach prevents CSS bloat in the customizer.Remember to always create a child theme before making any modifications to your theme’s files. This will ensure that your customizations are preserved during theme updates. Regardless of the method you choose, always test your changes thoroughly to ensure they are working as expected and that they don’t break your website.
Related Topics by Tag- How to Create a Local WordPress Site Using XAMPP
- How to Remove the Sidebar in WordPress (6 Easy Methods)
- How to Set A Fallback Featured Image Based on Post Category in WordPress
- How to Create a Custom Page in WordPress
- How to: Related Posts with Thumbnails in WordPress without Plugins
- WordPress Widgets vs Blocks – What’s the Difference? (Explained)
- How to Add Custom Fields to Comments Form in WordPress