
How to Add Event Schema in WordPress (Step by Step)
Understanding Event Schema Markup
Event Schema markup, also known as Event Schema.org, is structured data that you add to your website to help search engines like Google understand the specifics of your events. It provides key information such as the event name, date, time, location, description, and ticketing details in a format that search engines can easily interpret. This allows search engines to display richer search results for your events, potentially leading to increased visibility and attendance.
Think of it as a translator that speaks the language of search engines. Instead of relying solely on the content of your page to understand an event, you explicitly tell them: “This section is about an event called ‘Summer Music Festival’ which takes place on July 15th, 2024, at Central Park.”
The benefits of implementing Event Schema markup are numerous:
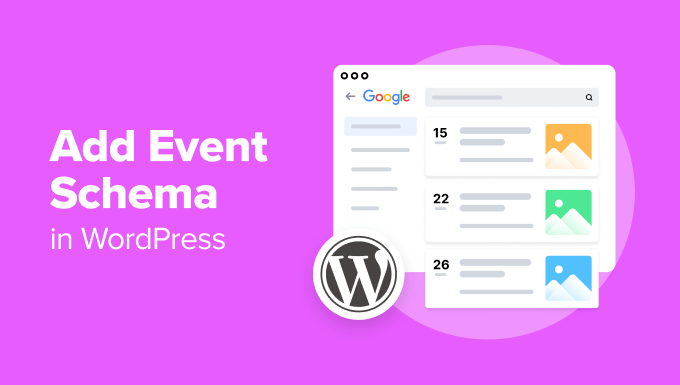
- Enhanced Search Engine Visibility: Your events are more likely to appear in rich snippets, carousels, and other special search features.
- Increased Click-Through Rate (CTR): Rich snippets are more visually appealing and informative, which can entice users to click on your event listing.
- Improved SEO Ranking: While not a direct ranking factor, schema markup helps search engines better understand your content, which can indirectly improve your overall SEO.
- Better User Experience: Clear and concise event information in search results makes it easier for users to find what they’re looking for.
Choosing the Right Implementation Method
There are several ways to add Event Schema markup to your WordPress website. The best method for you will depend on your technical skills, the complexity of your events, and your preferred workflow. Here are the most common approaches:
- Manual Implementation (JSON-LD): This involves manually adding JSON-LD (JavaScript Object Notation for Linked Data) code to your website’s header or event pages. This method offers the most control and flexibility but requires some coding knowledge.
- WordPress Plugins: Many WordPress plugins are designed to simplify the process of adding schema markup, including Event Schema. They often provide a user-friendly interface where you can input event details, and the plugin will automatically generate the necessary code.
- Schema Markup Generators: Online tools can generate the JSON-LD code for you based on the information you provide. You can then copy and paste this code into your website’s header or event pages.
For beginners, using a WordPress plugin is often the easiest and most efficient option. However, for more advanced users or those who need greater control, manual implementation might be preferable.
Using a WordPress Plugin for Event Schema
This section focuses on using a plugin, as it is the most accessible method for most WordPress users. We’ll use a popular and well-regarded plugin as an example. While the exact steps may vary slightly depending on the plugin you choose, the general principles remain the same.
Here’s a step-by-step guide:
Step 1: Install and Activate a Schema Plugin
- Go to your WordPress dashboard and navigate to **Plugins > Add New**.
- Search for a suitable schema markup plugin. Some popular choices include “Schema Pro”, “Rank Math SEO”, “Yoast SEO”, and “All in One SEO Pack”. For this example, let’s assume you’re using “Schema Pro” (note that Schema Pro is a premium plugin).
- Click **Install Now** and then **Activate** the plugin.
Step 2: Configure the Plugin (If Necessary)
Some schema plugins, like Rank Math or Yoast SEO, require initial configuration. Schema Pro is more direct. Follow the plugin’s setup wizard or documentation to configure its settings. This may involve connecting the plugin to your Google account or specifying default schema types.
Step 3: Create a New Event (or Edit an Existing One)
- Navigate to the page or post where you want to add the Event Schema markup. This could be a dedicated event page, a blog post announcing an event, or any other relevant page.
- Open the page/post in the WordPress editor.
Step 4: Add Event Schema Using the Plugin’s Interface
This is where the specific steps will vary depending on the plugin you’re using. Here’s how it might work with Schema Pro:
- Locate the Schema Pro metabox (usually found below the main content editor).
- Click the “New Schema” button (or similar).
- Choose “Event” as the schema type.
- A form will appear with fields for various event details. Fill in all the required information, including:
- Event Name: The official name of the event.
- Description: A concise and engaging description of the event.
- Start Date: The date and time the event begins.
- End Date: The date and time the event ends.
- Location: The name and address of the event venue.
- Event Attendance Mode: OnlineOnly, OfflineOnly, MixedEventAttendanceMode (if available in your plugin).
- Event Status: EventScheduled, EventCancelled, EventRescheduled (if available).
- Image: A high-quality image representing the event.
- Offer: Information about ticketing, pricing, and availability.
- Price: The price of admission (if applicable).
- Price Currency: The currency of the price (e.g., USD, EUR).
- Availability: InStock, OutOfStock, etc. (if applicable).
- URL: The URL where users can purchase tickets.
- Performer: Information about the performers or speakers at the event.
- Organizer: Information about the event organizer.
- Once you’ve filled in all the relevant information, click **Save Schema** (or a similar button).
If you are using Rank Math or Yoast SEO, look for a Schema tab within the post editor. These plugins typically offer a structured interface for adding schema markup to your content. You would select “Event” as the schema type and then fill in the required fields.
Step 5: Update/Publish Your Page/Post
Click the **Update** or **Publish** button to save your changes and make the event schema live on your website.
Manual Implementation of Event Schema (JSON-LD)
For those comfortable with code, manual implementation using JSON-LD offers the greatest flexibility and control.
Step 1: Understand the JSON-LD Structure
JSON-LD is a structured data format that uses JavaScript Object Notation (JSON) to organize information. Here’s a basic example of Event Schema markup in JSON-LD:
“`json
{
“@context”: “https://schema.org”,
“@type”: “Event”,
“name”: “Summer Music Festival”,
“description”: “A weekend of live music, food, and fun in the sun.”,
“startDate”: “2024-07-15T10:00:00-07:00”,
“endDate”: “2024-07-17T22:00:00-07:00”,
“location”: {
“@type”: “Place”,
“name”: “Central Park”,
“address”: {
“@type”: “PostalAddress”,
“streetAddress”: “123 Main Street”,
“addressLocality”: “Anytown”,
“addressRegion”: “CA”,
“postalCode”: “91234”,
“addressCountry”: “US”
}
},
“image”: [
“https://example.com/images/summer-music-festival-1.jpg”,
“https://example.com/images/summer-music-festival-2.jpg”
],
“offers”: {
“@type”: “Offer”,
“url”: “https://example.com/tickets”,
“price”: “50.00”,
“priceCurrency”: “USD”,
“availability”: “https://schema.org/InStock”,
“validFrom”: “2024-05-01T00:00:00-07:00”
},
“performer”: [
{
“@type”: “PerformingGroup”,
“name”: “The Awesome Band”
},
{
“@type”: “Person”,
“name”: “Jane Doe”
}
],
“eventAttendanceMode”: “https://schema.org/OfflineEventAttendanceMode”,
“eventStatus”: “https://schema.org/EventScheduled”
}
“`
Step 2: Customize the JSON-LD Code
Modify the JSON-LD code above to match the specifics of your event. Pay close attention to the following:
- Replace placeholder values with your actual event details.
- Ensure the `startDate` and `endDate` are in ISO 8601 format (YYYY-MM-DDTHH:mm:ss-TZD). The TZD (Time Zone Designator) is important.
- Provide accurate and descriptive information for all properties.
- If your event is free, you can omit the `offers` property or set the `price` to “0.00”.
- Include multiple images for better visual appeal.
- Consider adding more detailed information, such as `organizer`, `sponsor`, and `potentialAction`.
Step 3: Add the JSON-LD Code to Your WordPress Page
You have two options for adding the JSON-LD code to your WordPress page:
- Directly into the page/post content using a code block.
- Into the `` section of your page using a plugin or by editing your theme’s `header.php` file. This is the preferred method.
**Option 1: Code Block in Content (Less Recommended)**
- In the WordPress editor, add a “Custom HTML” block (or similar code block).
- Paste the customized JSON-LD code into the code block.
- Update/Publish your page/post.
**Option 2: `
` Section (Recommended)**- **Using a Plugin:** Install and activate a plugin like “Insert Headers and Footers” or “WPCode”.
- Go to the plugin’s settings page.
- Paste the JSON-LD code into the “Scripts in header” section. Remember to enclose the JSON-LD code within `` tags.
- Save the changes.
**Alternatively, Editing `header.php` (Advanced Users Only)**
- Navigate to **Appearance > Theme Editor** in your WordPress dashboard. **Caution: Editing theme files directly can break your site. It’s highly recommended to use a child theme.**
- Locate the `header.php` file.
- Insert the JSON-LD code within `` tags just before the closing `` tag.
- Click **Update File**.
Testing and Validating Your Event Schema
After implementing Event Schema markup, it’s crucial to test and validate your code to ensure it’s working correctly. Google provides a free tool called the Rich Results Test.
Step 1: Access the Rich Results Test
Go to the Google Rich Results Test website.
Step 2: Enter Your URL or Code Snippet
You have two options:
- Enter the URL of the page where you added the Event Schema markup.
- Paste the JSON-LD code directly into the code snippet field.
Step 3: Run the Test
Click the “Test URL” or “Test Code” button.
Step 4: Analyze the Results
The Rich Results Test will analyze your page or code and display any detected schema markup.
- If the test detects your Event Schema markup and shows no errors, congratulations! Your implementation is likely correct.
- If the test detects errors or warnings, review the code and correct any mistakes. Common errors include missing required properties, invalid data formats, and syntax errors.
Troubleshooting Common Issues
Here are some common issues you might encounter when implementing Event Schema markup and how to troubleshoot them:
- **Schema Markup Not Detected:** Double-check that you’ve added the code correctly and that it’s in the correct location (either within the `` section or using a code block). Clear your website’s cache and try testing again.
- **Errors in the Rich Results Test:** Carefully review the error messages provided by the Rich Results Test. These messages will often indicate the specific property or value that is causing the problem.
- **Incorrect Date/Time Format:** Ensure that your `startDate` and `endDate` values are in the correct ISO 8601 format (YYYY-MM-DDTHH:mm:ss-TZD). The Time Zone Designator (TZD) is crucial.
- **Missing Required Properties:** The Event Schema type has several required properties, such as `name`, `startDate`, and `location`. Make sure you’ve included all of these properties in your code.
- **Conflicting Schema Markup:** If you’re using multiple schema plugins or have manually added schema markup in the past, there might be conflicts. Disable any conflicting plugins or remove the old schema markup.
By following these steps and carefully testing your implementation, you can effectively add Event Schema markup to your WordPress website and improve the visibility of your events in search results.
- How to Add the Ultimate SEO Dashboard in WordPress
- 11 Things You Should Do When Inheriting a WordPress Site
- How to Add Schema Markup in WordPress and WooCommerce
- How to Get a Google Featured Snippet with Your WordPress Site
- How to Improve Your 404 Page Template in WordPress (2 Ways)
- How to Avoid Duplicate Post Display With Multiple Loops in WordPress
- How to Add Your WordPress Site to Google Search Console