
How to Add Old Post Notification on Your WordPress Blog
Why Add Old Post Notifications to Your WordPress Blog?
Adding an old post notification to your WordPress blog might seem counterintuitive. After all, aren’t you trying to drive traffic to your newest content? While that’s certainly a priority, dusting off older articles can significantly benefit your blog in several ways:
- Increased Engagement: Not all your readers have been following you from day one. An old post notification exposes older, valuable content to a new audience, increasing engagement in the form of comments, shares, and time spent on site.
- Improved SEO: Google values fresh and relevant content. Reviving older posts, even with a simple notification, signals to search engines that your blog is active and that you’re keeping your content up-to-date. This can boost your overall SEO ranking.
- Reduced Bounce Rate: When users land on an older post and realize it might contain outdated information, they’re more likely to bounce. An old post notification manages expectations, reducing bounce rate by informing visitors that the post is older.
- Showcase of Evergreen Content: Many blogs contain “evergreen” content – articles that remain relevant regardless of their publication date. An old post notification helps distinguish these gems from time-sensitive pieces, reassuring readers that the information is still valuable.
- Content Recycling: It’s a form of content recycling. Instead of constantly creating new content, you are maximizing the value of existing posts and saving time and resources.
- Establish Authority: A well-maintained archive of content demonstrates your expertise and establishes you as an authority in your niche. Showing that you are aware of the age of your content adds to the perception of professionalism.
Methods for Adding Old Post Notifications in WordPress
There are several ways to implement old post notifications on your WordPress blog, each with its own advantages and disadvantages. The best method for you will depend on your technical skills, the level of customization you desire, and your budget. Here’s a breakdown of the most common approaches:
Using a WordPress Plugin
This is often the easiest and most beginner-friendly approach. Many plugins are specifically designed to add old post notifications with minimal coding required.
Recommended Plugins:
- **Old Post Notifier:** This is a simple plugin that allows you to display a notification above or below old posts, warning readers about the age of the content. It’s highly customizable, allowing you to change the message, the age threshold, and the appearance.
- **WP Old Post Date Alert:** Another easy-to-use plugin that adds a notification to older posts. It offers basic customization options and is a great choice for users who want a straightforward solution.
- **Content Aware Sidebars:** While not specifically for old post notifications, this powerful plugin allows you to create dynamic sidebars that appear based on various conditions, including post age. You can use it to display a custom message on older posts. This requires a bit more configuration, but offers great flexibility.
- **Yoast SEO Premium (Internal Linking Suggestions):** Though not a direct old post notification, Yoast SEO Premium suggests internal links to older relevant content, effectively bringing them to the forefront again. This indirectly tackles the same problem by increasing visibility.
Steps for Using a Plugin (Example: Old Post Notifier):
1. **Install and Activate the Plugin:** From your WordPress dashboard, go to “Plugins” > “Add New.” Search for “Old Post Notifier,” install the plugin, and then activate it.
2. **Configure the Plugin:** Go to “Settings” > “Old Post Notifier” to access the plugin’s settings page.
3. **Set the Age Threshold:** Define the age (in days) after which a post should be considered “old.” For example, you might set the threshold to 365 days (one year).
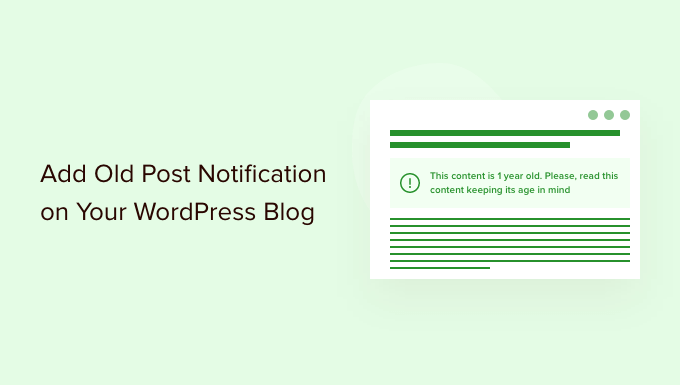
4. **Customize the Message:** Write the message you want to display on old posts. You can use HTML to style the message and include dynamic elements like the post’s published date. Example: “This post was published over a year ago. Some of the information may be outdated.”
5. **Choose the Location:** Select where you want the notification to appear (e.g., above the content, below the content).
6. **Styling (Optional):** Many plugins allow you to customize the appearance of the notification with CSS.
7. **Save Changes:** Click the “Save Changes” button to apply your settings.
Adding Code to Your Theme’s `functions.php` File
This method requires some familiarity with PHP and WordPress theme files. It offers more control over the notification’s appearance and behavior but can be risky if done incorrectly. *Always back up your theme before making any changes to the `functions.php` file.*
Steps:
1. **Access Your Theme’s `functions.php` File:** You can access the `functions.php` file through your WordPress dashboard by going to “Appearance” > “Theme Editor.” *Alternatively, you can access it via FTP or your hosting control panel’s file manager.*
2. **Add the Following Code:** Copy and paste the following PHP code into your `functions.php` file.
“`php
function old_post_notification() {
$threshold = 365; // Age in days after which to display the notification
$post_age = time() – get_the_time(‘U’);
$days_old = floor($post_age / (60 * 60 * 24));
if ($days_old > $threshold && !is_admin()) {
$date = get_the_date();
$message = ‘
‘;
echo $message;
}
}
add_action(‘the_content’, ‘old_post_notification’);
“`
3. **Customize the Code:**
* **`$threshold = 365;`:** Change this value to adjust the age threshold in days.
* **`$message = …`:** Modify the HTML within the `$message` variable to change the notification’s text and appearance. You can add CSS classes to style the notification.
* **`’the_content’`:** This specifies where the notification will be displayed. ‘the_content’ adds the notification before the post’s content. To place it after the content, change it to `’the_content’, 11` (the ’11’ increases the priority so it runs after the main content filtering).
4. **Add CSS Styling (Optional):** To style the notification, add CSS code to your theme’s `style.css` file or using the WordPress Customizer (Appearance > Customize > Additional CSS). For example:
“`css
.old-post-notification {
background-color: #f8d7da;
border: 1px solid #f5c6cb;
color: #721c24;
padding: 10px;
margin-bottom: 20px;
}
“`
5. **Save Changes:** Click the “Update File” button to save your changes to the `functions.php` file.
Explanation of the Code:
* **`old_post_notification()`:** This is the function that generates the old post notification.
* **`$threshold = 365;`:** Sets the age threshold to 365 days.
* **`$post_age = time() – get_the_time(‘U’);`:** Calculates the age of the post in seconds.
* **`$days_old = floor($post_age / (60 * 60 * 24));`:** Converts the post age from seconds to days.
* **`if ($days_old > $threshold && !is_admin()) { … }`:** Checks if the post is older than the threshold and if the user is not logged in as an administrator (to avoid displaying the notification to admins).
* **`$date = get_the_date();`:** Retrieves the post’s publication date.
* **`$message = …`:** Constructs the HTML message to be displayed.
* **`echo $message;`:** Prints the HTML message.
* **`add_action(‘the_content’, ‘old_post_notification’);`:** Hooks the `old_post_notification()` function to the `the_content` filter, which means the function will be executed whenever the post content is displayed.
Using a Child Theme (Recommended for Code Modifications)
Modifying your theme’s `functions.php` file directly is generally discouraged because any changes you make will be overwritten when you update the theme. The best practice is to create a child theme. A child theme inherits all the features and styling of the parent theme but allows you to make modifications without affecting the original theme files.
Steps:
1. **Create a Child Theme:** Create a new folder in the `wp-content/themes/` directory for your child theme. The folder name should follow the format `parent-theme-name-child` (e.g., `twentytwentythree-child`).
2. **Create a `style.css` File:** Inside the child theme folder, create a `style.css` file and add the following code:
“`css
/*
Theme Name: Your Parent Theme Name Child
Theme URI: http://example.com/your-parent-theme-child/
Description: Child theme for Your Parent Theme Name
Author: Your Name
Author URI: http://example.com
Template: your-parent-theme-name
Version: 1.0.0
*/
@import url(“../your-parent-theme-name/style.css”);
/*
Add your custom styles here
*/
“`
Replace `”Your Parent Theme Name”`, `”http://example.com/your-parent-theme-child/”`, `”Your Name”`, `”http://example.com”` and `”your-parent-theme-name”` with your actual theme name and details. The `Template:` line is crucial; it tells WordPress which theme is the parent theme.
3. **Create a `functions.php` File:** Create a `functions.php` file in your child theme folder. Add the following code:
“`php
get(‘Version’)
);
}
add_action( ‘wp_enqueue_scripts’, ‘my_theme_enqueue_styles’ );
// Include the old post notification function here
function old_post_notification() {
$threshold = 365; // Age in days after which to display the notification
$post_age = time() – get_the_time(‘U’);
$days_old = floor($post_age / (60 * 60 * 24));
if ($days_old > $threshold && !is_admin()) {
$date = get_the_date();
$message = ‘
‘;
echo $message;
}
}
add_action(‘the_content’, ‘old_post_notification’);
?>
“`
4. **Activate the Child Theme:** Go to “Appearance” > “Themes” in your WordPress dashboard and activate your child theme.
5. **Add Code to the Child Theme’s `functions.php`:** Now you can add the old post notification code (from the previous section) to your child theme’s `functions.php` file. This will ensure that your changes are preserved even when you update the parent theme.
6. **Customize and Style:** Customize the code and add CSS styles to your child theme’s `style.css` file as needed.
Customizing the Old Post Notification
Regardless of the method you choose, you’ll likely want to customize the appearance and behavior of the old post notification to match your blog’s design and branding. Here are some ways to do that:
- Message Text: Craft a message that is informative and reassuring. For example, instead of simply saying “This is an old post,” you could say “This article was originally published on [date]. While the core concepts remain relevant, some details might be outdated. Please verify the information before relying on it.”
- Age Threshold: Experiment with different age thresholds to find the sweet spot. A shorter threshold might be appropriate for rapidly evolving topics, while a longer threshold might be suitable for evergreen content.
- Placement: Consider where the notification will be most effective. Above the content is often a good choice because it’s immediately visible. However, placing it below the content might be less intrusive.
- Styling: Use CSS to style the notification to match your blog’s design. Choose colors, fonts, and borders that complement your theme. Make the notification visually distinct but not jarring.
- Conditional Display: You might want to display the notification only on certain types of posts or pages. For example, you could exclude it from the homepage or from category archive pages. This requires more advanced coding and might involve using conditional tags in WordPress.
- Translation: If your blog is multilingual, make sure to translate the notification message into all the languages you support.
- Consider User Experience (UX): The goal is to inform users without annoying them. Avoid using overly aggressive colors or animations. Keep the message concise and easy to understand.
Important Considerations
* **Backup Your Website:** Before making any changes to your theme files or installing plugins, always back up your website. This will allow you to restore your site if something goes wrong.
* **Test Thoroughly:** After implementing the old post notification, test it thoroughly on different browsers and devices to ensure it displays correctly.
* **Monitor User Feedback:** Pay attention to user feedback to see how people are responding to the notification. If you receive complaints, consider making adjustments to the message or the age threshold.
* **Keep Plugins Updated:** If you’re using a plugin, keep it updated to ensure compatibility with the latest version of WordPress and to benefit from bug fixes and security updates.
* **Accessibility:** Ensure your old post notification is accessible to users with disabilities. Use appropriate ARIA attributes and ensure the contrast between the text and background colors is sufficient.
* **Mobile Responsiveness:** Make sure the notification looks good on mobile devices. Use responsive CSS to ensure it adapts to different screen sizes.
By implementing old post notifications thoughtfully, you can improve user experience, boost SEO, and breathe new life into your older content.
- How to Create a Sticky Floating Navigation Menu in WordPress
- 30 Proven Ways to Make Money Online Blogging with WordPress
- How to Limit Purchase Quantity in WordPress (Step by Step)
- How to Add RSS Sitemap in WordPress (The Easy Way)
- Beginners Guide on How to Add Twitter Cards in WordPress
- How to Set a Minimum Word Count for WordPress Posts
- How to Add Odd/Even Class to Your Post in WordPress Themes