
How to Add a Font Resizer in WordPress for Accessibility
Understanding the Importance of Font Resizers for Accessibility
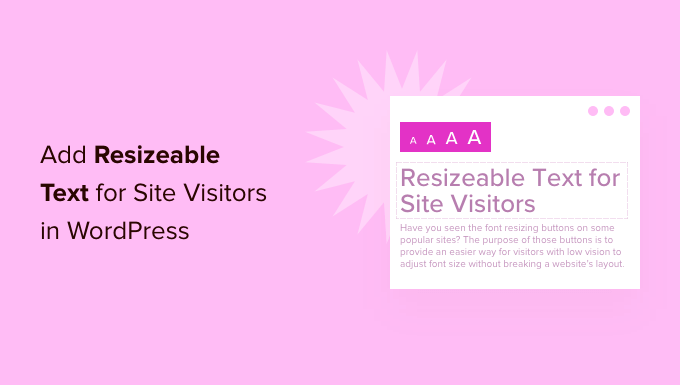
Web accessibility is paramount for creating an inclusive online experience. One crucial aspect of accessibility is ensuring that users can adjust text size to meet their individual needs. Individuals with visual impairments, learning disabilities, or even temporary situational limitations (like using a mobile device in bright sunlight) may require larger font sizes to comfortably read your content. A font resizer provides a simple, yet powerful, solution to cater to these diverse needs.
By implementing a font resizer on your WordPress website, you are:
- Improving readability for users with visual impairments.
- Enhancing the user experience for individuals with dyslexia or other learning differences.
- Providing a more comfortable reading experience on various devices.
- Demonstrating a commitment to inclusivity and accessibility best practices.
- Potentially improving your website’s SEO, as search engines favor accessible websites.
Failing to provide adjustable text sizes can exclude a significant portion of your audience, leading to frustration and ultimately, a negative impact on your website’s usability and reach. Therefore, integrating a font resizer is not merely a technical consideration, but a fundamental aspect of responsible web design.
Methods for Adding a Font Resizer in WordPress
Several methods can be used to add a font resizer to your WordPress website, each with its own advantages and disadvantages. These methods include:
- Using a dedicated WordPress plugin.
- Implementing custom code using HTML, CSS, and JavaScript.
- Utilizing theme options, if your theme provides a built-in font resizer functionality.
The best approach depends on your technical skills, the specific features you require, and the overall design and functionality of your website. Let’s explore each method in detail.
Using a WordPress Plugin
This is often the easiest and most recommended method for most users, especially those without extensive coding knowledge. Numerous plugins are available in the WordPress repository that offer font resizing capabilities.
Popular Font Resizer Plugins
Some of the popular and well-regarded font resizer plugins include:
- Accessibility Suite by WPPOOL: This plugin offers a comprehensive suite of accessibility features, including font resizing, contrast adjustment, keyboard navigation, and more.
- One Click Accessibility: This plugin is known for its ease of use and provides a simple font resizer along with other basic accessibility features.
- WP Accessibility Helper: This plugin focuses on providing a wide range of accessibility tools, including font resizing, link underlining, and focus indicators.
- AccessiBe: This is a more comprehensive solution that automates many aspects of web accessibility, including font resizing. It’s a paid service.
Steps to Install and Configure a Plugin (Example: Accessibility Suite)
Let’s use the “Accessibility Suite” plugin as an example to illustrate the installation and configuration process:
-
Installation:
- Log in to your WordPress admin dashboard.
- Navigate to “Plugins” -> “Add New”.
- Search for “Accessibility Suite by WPPOOL”.
- Click “Install Now” and then “Activate”.
-
Configuration:
- After activating the plugin, you’ll typically find a new menu item in your WordPress admin dashboard, often labeled “Accessibility Suite” or similar. Click on it.
- The plugin’s settings page will allow you to configure various options, including the appearance and placement of the font resizer buttons.
- Customize the settings to your preferences. Typically, you’ll be able to choose the increment/decrement size for the font, the types of elements the resizer applies to (e.g., body, paragraphs, headings), and the position of the font resize icons (e.g., top left, top right, floating).
- Save your changes.
-
Testing:
- Visit your website’s front-end and locate the font resizer buttons.
- Test the functionality by clicking the buttons to increase and decrease the font size.
- Ensure that the font resizer is working as expected and that the changes are visually appealing.
Advantages of Using a Plugin
- Ease of installation and configuration.
- Often includes other accessibility features besides font resizing.
- Typically comes with user-friendly interfaces for customization.
- Provides ongoing support and updates from the plugin developer.
Disadvantages of Using a Plugin
- Potential for plugin conflicts with other plugins or themes.
- Can add extra code and potentially slow down your website (though well-coded plugins minimize this).
- May not offer the exact level of customization you desire.
Implementing Custom Code
For users with coding experience, creating a custom font resizer offers greater control and flexibility. This approach involves using HTML, CSS, and JavaScript to build the font resizing functionality from scratch.
HTML Structure
First, you’ll need to add the HTML elements that will serve as the font resizer buttons. These are usually simple links or buttons with specific IDs or classes.
“`html
“`
This code creates three links: one to decrease the font size (A-), one to reset the font size to the default (A), and one to increase the font size (A+).
CSS Styling
Next, you’ll need to style the font resizer buttons using CSS. This includes setting their appearance, position, and responsiveness.
“`css
#font-resizer {
position: fixed; /* Or absolute, depending on your design */
top: 20px;
right: 20px;
z-index: 999; /* Ensure it’s above other elements */
}
#font-resizer a {
display: inline-block;
padding: 5px 10px;
background-color: #eee;
border: 1px solid #ccc;
text-decoration: none;
color: #333;
margin: 0 5px;
cursor: pointer;
}
#font-resizer a:hover {
background-color: #ddd;
}
“`
This CSS code styles the font resizer buttons to be positioned in the top right corner of the screen, with a simple gray background and a border. Adjust the positioning, colors, and styles to match your website’s design.
JavaScript Functionality
Finally, you’ll need to use JavaScript to handle the font resizing logic. This involves capturing the click events on the buttons and adjusting the font size of the target element (usually the `body` or a specific content area).
“`javascript
jQuery(document).ready(function($) {
var defaultFontSize = parseInt($(‘body’).css(‘font-size’));
$(‘#font-increase’).click(function(e) {
e.preventDefault();
var currentFontSize = parseInt($(‘body’).css(‘font-size’));
if (currentFontSize < 24) { // Set a maximum font size
$('body').css('font-size', currentFontSize + 2 + 'px');
}
});
$('#font-decrease').click(function(e) {
e.preventDefault();
var currentFontSize = parseInt($('body').css('font-size'));
if (currentFontSize > 12) { // Set a minimum font size
$(‘body’).css(‘font-size’, currentFontSize – 2 + ‘px’);
}
});
$(‘#font-reset’).click(function(e) {
e.preventDefault();
$(‘body’).css(‘font-size’, defaultFontSize + ‘px’);
});
});
“`
This JavaScript code uses jQuery (which is included in WordPress by default) to:
- Get the default font size of the `body` element.
- Attach click event listeners to the “increase,” “decrease,” and “reset” buttons.
- Increase or decrease the font size of the `body` element by 2 pixels each time a button is clicked.
- Reset the font size to the default value when the “reset” button is clicked.
- Sets minimum and maximum font size limits.
Implementation Steps
- Add the HTML: Place the HTML code snippet within your theme’s `header.php` file or a similar location where you want the font resizer to appear. Alternatively, you can create a custom widget and add the HTML to the widget area.
- Add the CSS: Add the CSS code to your theme’s `style.css` file or a custom CSS file.
-
Add the JavaScript: Add the JavaScript code to your theme’s `functions.php` file or a separate JavaScript file. If adding to `functions.php`, wrap the code within a function and hook it to the `wp_enqueue_scripts` action:
“`php
function my_custom_scripts() {
wp_enqueue_script( ‘font-resizer’, get_stylesheet_directory_uri() . ‘/js/font-resizer.js’, array( ‘jquery’ ), ‘1.0’, true );
}
add_action( ‘wp_enqueue_scripts’, ‘my_custom_scripts’ );
“`
Advantages of Using Custom Code
- Complete control over the appearance and functionality.
- No reliance on third-party plugins.
- Can be optimized for performance.
Disadvantages of Using Custom Code
- Requires coding knowledge.
- More time-consuming to implement and maintain.
- Potential for errors if not implemented correctly.
Utilizing Theme Options
Some WordPress themes, especially those designed with accessibility in mind, may offer a built-in font resizer functionality within their theme options.
Checking Your Theme Options
To determine if your theme has this feature, navigate to your WordPress admin dashboard and look for a “Theme Options” or “Customize” section. Examine the available settings for any options related to font resizing or accessibility.
Configuration
If your theme provides a built-in font resizer, the configuration process will vary depending on the theme. However, it typically involves enabling the feature and possibly customizing the appearance and behavior of the font resizer buttons.
Advantages of Using Theme Options
- Seamless integration with your theme’s design.
- No need to install additional plugins or write custom code.
- Often includes user-friendly interfaces for configuration.
Disadvantages of Using Theme Options
- Not all themes offer this feature.
- Limited customization options compared to custom code.
- Reliance on the theme developer for maintenance and updates.
Best Practices for Implementing a Font Resizer
Regardless of the method you choose, consider these best practices for implementing a font resizer on your WordPress website:
- Provide clear and visible buttons: The font resizer buttons should be easily identifiable and accessible to all users. Use clear labels like “A+”, “A-“, and “Reset” or icons that are universally understood.
- Ensure sufficient contrast: The buttons should have sufficient contrast against the background to be easily visible to users with low vision.
- Use semantic HTML: Use proper HTML elements (e.g., `
- Test on different devices and browsers: Thoroughly test the font resizer on various devices (desktops, tablets, smartphones) and browsers (Chrome, Firefox, Safari, Edge) to ensure that it works correctly across different platforms.
- Consider responsive design: Ensure that the font resizer remains visible and functional on smaller screens. Adjust the button placement or size as needed.
- Set reasonable font size limits: Set maximum and minimum font size limits to prevent users from making the text too large or too small to read.
- Consider user preferences: Implement a mechanism to save user preferences, so that the font size is remembered across different pages and sessions. This can be achieved using cookies or local storage.
- Provide a reset button: Always include a reset button to allow users to easily revert to the default font size.
- Inform users about the feature: Consider adding a brief explanation or tooltip to inform users about the font resizer and its purpose.
- Regularly test and update: Regularly test the font resizer to ensure that it continues to function correctly and update it as needed to address any issues or improve its functionality.
Conclusion
Adding a font resizer to your WordPress website is a vital step towards creating a more accessible and inclusive online experience. By implementing a font resizer, you empower users to customize the text size to meet their individual needs, thereby improving readability, enhancing user satisfaction, and demonstrating a commitment to accessibility best practices. Whether you choose to use a plugin, implement custom code, or utilize theme options, remember to follow best practices to ensure that your font resizer is user-friendly, functional, and accessible to all. Regularly test and update your font resizer to maintain its effectiveness and adapt to evolving web accessibility standards. By prioritizing accessibility, you can create a website that is truly welcoming and usable for everyone.
- How to Create an IDX Real Estate Website Using WordPress
- How to Host a Virtual Event in WordPress
- How to Add a Request to Callback Form in WordPress
- How to Add a Search Toggle Effect in WordPress
- How to Generate and Add QR Codes in WordPress (Easy Tutorial)
- What is the Hello Dolly WordPress Plugin? Should You Delete it?
- How to Create a Recent Comments Page in WordPress (2 Ways)