
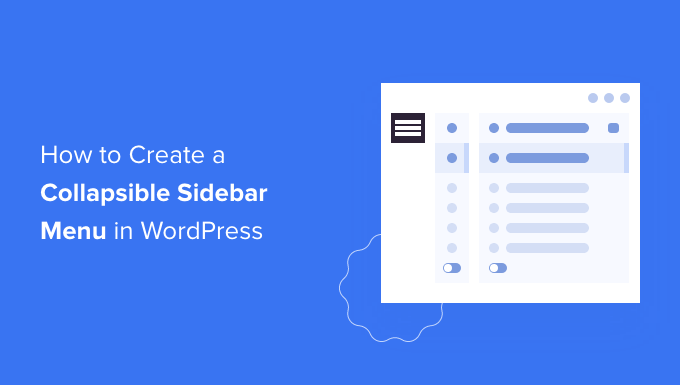
How to Create a Collapsible Sidebar Menu in WordPress (The Easy Way)
Introduction to Collapsible Sidebar Menus in WordPress
A well-designed sidebar is crucial for user experience on any WordPress website. It’s a place to showcase important information, navigation links, widgets, and more. A collapsible sidebar menu takes this functionality to the next level by allowing users to expand and collapse sections of the menu, reducing clutter and improving navigation. This is especially useful for websites with a large number of categories, pages, or custom content that would otherwise result in a long and overwhelming sidebar.
This article will guide you through the easy way to create a collapsible sidebar menu in WordPress, focusing on user-friendly methods that don’t require extensive coding knowledge. We’ll primarily utilize plugins, as they offer a simpler and more maintainable solution for most users.
Why Use a Collapsible Sidebar Menu?
Before diving into the “how,” let’s briefly outline why a collapsible sidebar menu is a worthwhile addition to your WordPress site:
- Improved User Experience: Collapsible menus make it easier for users to find what they’re looking for by breaking down large lists into smaller, manageable chunks.
- Reduced Clutter: A long sidebar can be visually overwhelming. Collapsible menus help to minimize the appearance of clutter, making your website look cleaner and more organized.
- Enhanced Navigation: By allowing users to quickly expand and collapse relevant sections, you improve the overall navigation of your website.
- Mobile Responsiveness: Collapsible menus are especially beneficial on mobile devices, where screen real estate is limited. They allow you to present a lot of information without overwhelming the user.
- Highlight Important Content: You can strategically use the expanded and collapsed states to highlight key categories or pages that you want users to focus on.
Method 1: Using the “Accordion Menu” Plugin
One of the easiest and most popular ways to create a collapsible sidebar menu is by using the “Accordion Menu” plugin. This plugin is user-friendly and offers a variety of customization options.
Installing and Activating the Plugin
1. Log in to your WordPress dashboard.
2. Go to “Plugins” -> “Add New.”
3. Search for “Accordion Menu.”
4. Find the plugin developed by ThemeIsle and click “Install Now.”
5. Once installed, click “Activate.”
Configuring the Accordion Menu
After activating the plugin, you’ll find a new “Accordion Menu” option in your WordPress dashboard menu. Let’s explore the configuration options:
- Menu Selection: The first step is to choose the WordPress menu you want to use as your accordion menu. The plugin pulls from existing WordPress menus created in “Appearance -> Menus”.
- Theme: The plugin often offers several pre-designed themes. Experiment with these to find one that best matches your website’s design.
- Expand Type: This option controls how the menu expands and collapses. Common options include:
- Multi Expand: Allows multiple sections of the menu to be expanded simultaneously.
- Single Expand: Only allows one section of the menu to be expanded at a time. When you expand a new section, the currently expanded section automatically collapses. This is generally preferred for sidebars to avoid them becoming too long.
- Expand Icon: Choose an icon to indicate whether a menu item is expandable or collapsible. The plugin usually provides a selection of common icons.
- Expand Icon Position: Decide whether the expand icon should appear to the left or right of the menu item text.
- Other Customization Options: The plugin may offer additional options, such as:
- Customizing colors and fonts.
- Adding custom CSS classes for more advanced styling.
- Controlling the animation speed of the accordion effect.
Adding the Accordion Menu to Your Sidebar
Once you’ve configured the plugin, the final step is to add the accordion menu to your sidebar. This is done using the WordPress widget system:
1. Go to “Appearance” -> “Widgets.”
2. Find the “Accordion Menu” widget in the list of available widgets.
3. Drag the “Accordion Menu” widget to the desired sidebar area.
4. In the widget settings, select the menu you configured in the plugin settings. You might also have options to set a title for the widget and further customize its appearance.
5. Click “Save.”
Now, visit your website and you should see your newly created collapsible sidebar menu in action.
Method 2: Using the “Responsive Menu” Plugin
Another excellent plugin for creating collapsible menus, including those suitable for sidebars, is “Responsive Menu.” While its primary purpose is to create mobile-friendly menus, it can also be effectively used to create collapsible sidebar menus for desktop views.
Installing and Activating the Plugin
1. Log in to your WordPress dashboard.
2. Go to “Plugins” -> “Add New.”
3. Search for “Responsive Menu.”
4. Find the plugin by Peter Featherstone and click “Install Now.”
5. Once installed, click “Activate.”
Configuring the Responsive Menu
After activating the plugin, you’ll find a new “Responsive Menu” option in your WordPress dashboard menu. This plugin offers extensive customization options to tailor the menu’s appearance and behavior.
- Menu Settings:
- Menu to Use: Select the WordPress menu you want to use for the collapsible menu. This is the same process as with the “Accordion Menu” plugin, selecting from menus created in “Appearance -> Menus.”
- Menu Title: Set a title for the menu that will be displayed at the top of the sidebar.
- Button Text: Since this plugin is designed for mobile, the “Button Text” setting may not be relevant for a sidebar menu on desktop.
- Appearance Settings: This section offers a wide range of options to customize the visual appearance of the menu:
- Menu Background Color: Set the background color of the menu.
- Menu Text Color: Set the color of the menu items.
- Menu Border Color: Set the color of the border around the menu.
- Menu Font Size: Adjust the font size of the menu items.
- Sub-menu Arrow: Customize the arrow icons used to indicate expandable sub-menus. You can choose from different arrow styles, sizes, and colors.
- Custom CSS: This section allows you to add custom CSS to further customize the menu’s appearance. This is useful for more advanced styling modifications.
- Behaviour Settings: This section controls how the menu behaves:
- Transition Speed: Adjust the speed of the animation when the menu expands and collapses.
- Close On Body Click: This setting, while primarily for mobile menus, *could* be adapted if you wanted the sidebar to collapse when users click outside of it. However, this is generally not desirable for a static sidebar.
- Advanced Settings: This section contains more advanced options, which may or may not be relevant for creating a sidebar menu:
- Disable Responsive Menu: This allows you to disable the plugin on specific pages or posts.
- Custom CSS: Another area to inject custom CSS, useful for specific styling needs.
Adding the Responsive Menu to Your Sidebar
Similar to the “Accordion Menu” plugin, you add the “Responsive Menu” to your sidebar using widgets:
1. Go to “Appearance” -> “Widgets.”
2. Find the “Responsive Menu” widget.
3. Drag the “Responsive Menu” widget to the desired sidebar area.
4. In the widget settings, you might have limited options since most configurations are handled in the plugin’s main settings panel. You’ll typically be able to set a title for the widget.
5. Click “Save.”
After adding the widget and configuring the plugin, check your website to see the collapsible sidebar menu in action.
Method 3: Using a Page Builder (Elementor, Beaver Builder, etc.)
If you’re already using a page builder like Elementor or Beaver Builder, you might be able to create a collapsible sidebar menu directly within the page builder’s interface. This approach offers greater control over the design and layout of the menu. The specific steps will vary depending on the page builder you’re using.
Elementor (Example)
Elementor doesn’t have a built-in “collapsible menu” widget specifically designed for sidebars. However, you can achieve a similar effect using the “Accordion” or “Toggle” widgets, combined with Elementor’s menu widget and some strategic styling.
1. Create a Sidebar Template: Designate an Elementor template specifically for your sidebar. This is typically done within the Elementor Theme Builder.
2. Add an “Accordion” or “Toggle” Widget: Drag and drop the “Accordion” or “Toggle” widget into your sidebar template. Each “item” within the accordion/toggle will represent a main menu category.
3. Add a Menu Widget within each Item: Inside each accordion/toggle item, drag and drop the standard Elementor “Menu” widget. Configure this menu widget to display the relevant sub-menu for that category. You’ll likely need to create separate WordPress menus for each main category if you haven’t already. (Appearance -> Menus).
4. Style the Widgets: Customize the appearance of the “Accordion” or “Toggle” widget to match your website’s design. Adjust the colors, fonts, and spacing to create a visually appealing and functional collapsible menu. Remove borders to make the individual toggle sections look more integrated.
5. Publish the Sidebar Template: Assign the sidebar template to the appropriate locations on your website (e.g., blog posts, pages) using Elementor’s Theme Builder settings.
This approach requires more manual configuration and styling compared to using a dedicated plugin, but it offers greater flexibility if you’re already comfortable working with Elementor.
Beaver Builder (Example)
Beaver Builder offers a similar approach to Elementor. You would use the “Accordion” module to create the collapsible structure and then place a menu module within each accordion panel.
1. Create a Sidebar: Beaver Builder’s theme or a plugin may offer a way to create custom sidebars. Alternatively, you can modify existing theme sidebars using Beaver Builder’s layout editing capabilities.
2. Add an “Accordion” Module: Drag and drop the “Accordion” module into your sidebar.
3. Add a Menu Module within each Panel: Within each accordion panel, add a Beaver Builder menu module and configure it to display the appropriate sub-menu for that section.
4. Style the Modules: Customize the appearance of the “Accordion” module and menu modules to match your website’s design.
5. Save and Publish: Save your changes and preview your website to see the collapsible sidebar menu in action.
The page builder method offers the most design flexibility, but requires more setup and knowledge of the specific page builder’s features.
Considerations for Choosing a Method
When selecting a method for creating a collapsible sidebar menu, consider the following factors:
- Ease of Use: How easy is the method to implement and maintain? Plugins are generally the easiest option for non-developers.
- Customization Options: How much control do you have over the appearance and behavior of the menu? Page builders offer the most customization options, followed by plugins.
- Performance: Does the method impact your website’s performance? Some plugins can be resource-intensive, so choose a lightweight and well-coded option.
- Compatibility: Is the method compatible with your WordPress theme and other plugins? Test thoroughly to ensure everything works together smoothly.
- Maintenance: How easy is it to update the plugin or page builder component as new versions are released? Make sure the method you choose is actively maintained.
Best Practices for Collapsible Sidebar Menus
Here are some best practices to keep in mind when creating a collapsible sidebar menu:
- Keep it Simple: Avoid overwhelming users with too many categories or sub-menus. Focus on the most important navigation links.
- Use Clear and Concise Labels: Use clear and concise labels for your menu items so users can easily understand what each section contains.
- Maintain a Consistent Design: Ensure the design of your collapsible menu is consistent with the overall design of your website.
- Test on Different Devices: Test your menu on different devices (desktop, mobile, tablet) to ensure it’s responsive and user-friendly.
- Consider Accessibility: Make sure your collapsible menu is accessible to users with disabilities. Use appropriate ARIA attributes to provide semantic information to assistive technologies.
- Monitor User Engagement: Use analytics tools to monitor how users are interacting with your collapsible menu. This can help you identify areas for improvement.
- How to Remove the Sidebar in WordPress (6 Easy Methods)
- How to Hide a Mobile Menu in WordPress (Beginner’s Guide)
- How to Display Your Top Commenters in WordPress Sidebar
- How to Create a Sticky Floating Sidebar Widget in WordPress
- How to Display Different Sidebar for Each Post and Page in WordPress
- How to Change the Sidebar Side in WordPress (4 Methods)