
How to Create a Visual Sitemap in WordPress (The Easy Way)
Understanding Visual Sitemaps and Their Importance
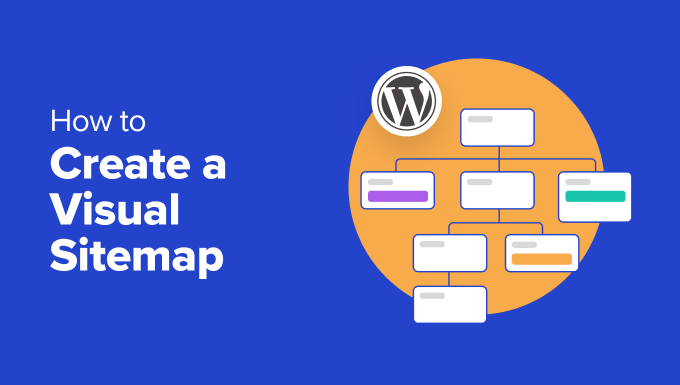
A visual sitemap is essentially a flowchart or diagram that illustrates the structure of your website. Instead of just listing URLs, it shows the hierarchical relationships between pages, helping you (and your visitors) understand how content is organized and accessed.
Why are visual sitemaps important for WordPress websites? There are several compelling reasons:
- Improved Website Navigation: A clear visual sitemap helps users quickly find the information they need, leading to a better user experience.
- Enhanced SEO: Search engines like Google use sitemaps to crawl and index your website more effectively. A visual sitemap complements a traditional XML sitemap by offering a human-readable overview.
- Content Planning and Organization: Before building a website or adding new content, a visual sitemap can help you plan the structure and ensure logical organization.
- Easier Collaboration: When working with a team (developers, designers, content creators), a visual sitemap provides a shared understanding of the website’s architecture.
- Identifying Problem Areas: Visual sitemaps can quickly reveal areas where navigation is confusing, pages are orphaned, or content is poorly linked.
While XML sitemaps are crucial for search engines, visual sitemaps cater to human understanding, making them a valuable tool for website management.
Traditional vs. Automated Visual Sitemap Creation
There are two main approaches to creating visual sitemaps: traditional manual creation and automated generation.
Traditional (Manual) Creation:
This involves using software like:
- Mind mapping tools (e.g., MindManager, XMind)
- Diagramming tools (e.g., Lucidchart, Draw.io)
- Graphic design software (e.g., Adobe Illustrator, Figma)
With these tools, you manually draw the sitemap, connecting pages with arrows to represent their relationships.
Advantages of Manual Creation:
- Complete Customization: You have full control over the design, layout, and details included in the sitemap.
- Flexibility: You can easily add annotations, notes, and custom elements to the diagram.
- Suitable for Small Websites: For very small websites with simple structures, manual creation can be quick and efficient.
Disadvantages of Manual Creation:
- Time-Consuming: Manually drawing a sitemap, especially for large websites, can take a significant amount of time and effort.
- Maintenance Overhead: Each time you update your website’s structure, you need to manually update the sitemap.
- Risk of Errors: Manual input increases the chance of introducing errors or inconsistencies.
Automated Generation:
Automated visual sitemap generation uses plugins or online tools that automatically crawl your website and create a sitemap based on its existing structure.
Advantages of Automated Generation:
- Time-Saving: The sitemap is generated automatically, saving you a lot of time and effort.
- Accuracy: The sitemap is based on the actual website structure, reducing the risk of errors.
- Easy Updates: Some tools can automatically update the sitemap whenever your website changes.
- Suitable for Large Websites: Automated generation is essential for managing large and complex websites.
Disadvantages of Automated Generation:
- Limited Customization: You typically have less control over the design and layout of the sitemap.
- Potential Inaccuracies: The tool might misinterpret certain elements of your website’s structure.
- Reliance on Third-Party Tools: You depend on the plugin or online tool to function correctly and remain compatible with your WordPress version.
Using a WordPress Plugin for Visual Sitemap Creation
For WordPress websites, the easiest way to create a visual sitemap is typically through a plugin. Several plugins offer this functionality, with varying features and pricing. We’ll focus on a popular and user-friendly option: the “Visual Site Mapper” plugin (or similar plugins with similar functionality using “sitemap” and “visual” in the search terms).
Step 1: Installing and Activating the Plugin
1. Log in to your WordPress dashboard.
2. Go to “Plugins” -> “Add New.”
3. Search for “Visual Site Mapper” (or a similar plugin based on search terms and positive reviews).
4. Click “Install Now” next to the plugin.
5. Once installed, click “Activate.”
Step 2: Configuring the Plugin Settings
After activation, the plugin will typically add a new menu item in your WordPress dashboard (e.g., “Visual Sitemap,” or it might be located under “Tools” or “Settings”). Navigate to the plugin’s settings page.
The settings page will usually provide options to customize the sitemap:
- Depth: Set the maximum level of nesting to display in the sitemap (e.g., show all pages, or only the first two levels).
- Post Types: Choose which post types to include (e.g., pages, posts, custom post types).
- Exclude Pages: Specify pages to exclude from the sitemap (e.g., privacy policy, terms of service).
- Display Options: Customize the appearance of the sitemap (e.g., colors, fonts, icons). Some plugins offer different sitemap styles (e.g., flowchart, tree diagram).
Configure these settings according to your needs. A good starting point is to include all pages and posts and limit the depth to a reasonable level to avoid overwhelming the sitemap.
Step 3: Generating the Visual Sitemap
Most visual sitemap plugins offer a shortcode or a Gutenberg block that you can use to embed the sitemap on a page or post.
*Using a Shortcode:*
1. Create a new page (or edit an existing one).
2. Add a “Shortcode” block to the page.
3. Insert the plugin’s shortcode into the block (e.g., `[visual_sitemap]`). The exact shortcode will be provided by the plugin.
4. Publish the page.
*Using a Gutenberg Block:*
1. Create a new page (or edit an existing one).
2. Click the “+” icon to add a new block.
3. Search for the plugin’s block (e.g., “Visual Sitemap”).
4. Select the block and configure any options within the block settings (if available).
5. Publish the page.
Once you publish the page, the visual sitemap should be displayed on the page.
Step 4: Customizing and Refining the Sitemap
After generating the initial sitemap, you might need to refine it further.
- Adjust Settings: Revisit the plugin settings to fine-tune the sitemap’s appearance and content.
- Page Titles: Ensure that your page titles are clear and descriptive, as these will be used in the sitemap.
- Menu Structure: A well-organized menu structure will significantly improve the clarity of the visual sitemap. Ensure your pages are properly assigned to menus.
- CSS Styling: Some plugins allow you to add custom CSS to further customize the sitemap’s appearance.
Alternatives to WordPress Plugins
While plugins are generally the easiest option, you can also use online visual sitemap generators. These tools typically require you to enter your website’s URL, and they will then crawl the site and generate a sitemap.
Online Visual Sitemap Generators:
Examples of online tools include:
- Slickplan
- XML-Sitemaps.com (some features are paid)
- WriteMaps
How to Use Online Generators:
1. Visit the website of the chosen online tool.
2. Enter your website’s URL.
3. Initiate the sitemap generation process.
4. The tool will crawl your site and create a sitemap.
5. Depending on the tool, you might be able to customize the sitemap and export it in various formats (e.g., PNG, PDF).
Integrating Online Generator Output into WordPress:
Since these tools generate a static image or file, you’ll need to manually embed it into your WordPress website:
1. Download the sitemap image or file.
2. Upload the image to your WordPress media library.
3. Create a new page or edit an existing one.
4. Insert an “Image” block and select the uploaded sitemap image. Alternatively, if the tool provides an embed code, use an “HTML” block to paste the code.
Best Practices for Visual Sitemap Design
A visual sitemap should be clear, concise, and easy to understand. Here are some best practices to follow:
- Use a clear hierarchy: The sitemap should clearly show the parent-child relationships between pages.
- Limit the depth: Avoid creating a sitemap that is too deep or complex. Aim for a maximum of 3-4 levels.
- Use consistent formatting: Maintain consistent font sizes, colors, and spacing throughout the sitemap.
- Use descriptive labels: Use clear and descriptive page titles in the sitemap.
- Consider your audience: Tailor the sitemap to the needs of your target audience.
- Update regularly: Keep the sitemap up-to-date as you add or modify content on your website.
- Keep it simple: Avoid cluttering the sitemap with unnecessary details.
- Test on different devices: Ensure that the sitemap is responsive and displays correctly on different screen sizes.
Troubleshooting Common Issues
Sometimes, you might encounter issues when creating a visual sitemap. Here are some common problems and their solutions:
- Sitemap is incomplete: Ensure that the plugin is configured to include all relevant post types and pages. Check the plugin settings for exclusion options.
- Sitemap is too large: Limit the depth of the sitemap to reduce its size and complexity. Consider excluding less important pages.
- Sitemap is not displaying correctly: Clear your browser cache and try again. If you are using a caching plugin, clear the plugin’s cache as well. Check for plugin conflicts by temporarily deactivating other plugins.
- Sitemap is outdated: If using a plugin, check if it offers automatic updates or requires manual regeneration of the sitemap after changes.
- Plugin is not working: Ensure that the plugin is compatible with your WordPress version. Contact the plugin developer for support.
By following these tips and troubleshooting steps, you can effectively create and maintain a visual sitemap that enhances the user experience and SEO of your WordPress website. Remember to choose the method that best suits your needs and technical skills, and always prioritize clarity and accuracy in your sitemap design.
- What Is an XML Sitemap? How to Create a Sitemap in WordPress
- How to Add a Button in Your WordPress Header Menu
- How to Add Next / Previous Links in WordPress (Ultimate Guide)
- What Everybody Ought to Know about the WordPress Admin Bar
- How to Add an HTML Sitemap Page in WordPress (2 Ways)
- How to Easily Disable the Default WordPress Sitemap
- How to Properly Use Heading Tags in WordPress (H1-H6 Explained)