
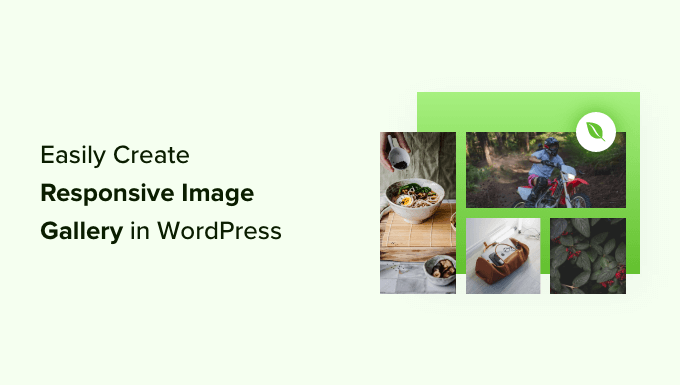
How to Easily Create Responsive WordPress Image Galleries with Envira
## How to Easily Create Responsive WordPress Image Galleries with Envira
Envira Gallery is a popular WordPress plugin designed to make creating beautiful, responsive image galleries a breeze. It offers a user-friendly interface, a wide range of customization options, and powerful features that can enhance your website’s visual appeal. This article will guide you through the process of creating stunning, responsive image galleries using Envira Gallery, from installation to advanced customization.
## Installing and Activating Envira Gallery
The first step is to install and activate the Envira Gallery plugin.
1. **Purchase and Download the Plugin:**
* Navigate to the Envira Gallery website (enviragallery.com) and purchase the license that best suits your needs. They offer various plans with different features and support levels.
* Download the plugin .zip file from your Envira Gallery account.
2. **Upload and Install the Plugin:**
* Log in to your WordPress dashboard.
* Go to Plugins > Add New.
* Click on the “Upload Plugin” button.
* Choose the Envira Gallery .zip file you downloaded and click “Install Now.”
3. **Activate the Plugin:**
* Once the plugin is installed, click the “Activate Plugin” button.
4. **Enter Your License Key:**
* After activation, you’ll be prompted to enter your license key. This ensures you receive updates and support.
* Navigate to the Envira Gallery settings in your WordPress dashboard.
* Enter your license key in the designated field and click “Verify License.”
## Creating Your First Image Gallery
With Envira Gallery installed and activated, you can now create your first image gallery.
1. **Navigate to Envira Gallery:**
* In your WordPress dashboard, you’ll find a new menu item labeled “Envira Gallery.” Click on it.
2. **Click on “Add New”:**
* On the Envira Gallery page, click the “Add New” button to start creating a new gallery.
3. **Enter a Gallery Title:**
* Provide a descriptive title for your gallery in the “Title” field. This will help you identify the gallery later.
4. **Upload Your Images:**
* You have several options for adding images to your gallery:
* **Select Images From Computer:** Click the “Select Files from Computer” button to upload images directly from your computer.
* **Select Images From Media Library:** Click the “Select Files from Other Sources” button to choose images already uploaded to your WordPress Media Library.
* **Drag and Drop Images:** You can also drag and drop images directly into the designated area.
5. **Add Image Details (Optional):**
* After uploading your images, you can add details like titles, captions, and alt text to each image. This is important for SEO and accessibility.
* Click on an individual image to edit its details.
6. **Configure Gallery Settings:**
* Envira Gallery offers numerous settings to customize your gallery’s appearance and behavior. We’ll explore these in more detail in the next section.
7. **Publish Your Gallery:**
* Once you’ve configured your gallery settings and added your images, click the “Publish” button to make your gallery live.
## Configuring Gallery Settings
Envira Gallery offers a wide range of settings to customize your image galleries. Here’s a breakdown of the key settings:
**General Settings:**
* **Number of Columns:** Control the number of columns in your gallery. Options typically range from 1 to 6 columns, or you can choose “Automatic” for a dynamic layout.
* **Column Width:** Specify the width of each column in pixels. This allows you to fine-tune the gallery’s layout.
* **Margins:** Adjust the spacing between images in your gallery, both horizontally and vertically.
* **Image Size:** Choose the image size to display in the gallery. Envira Gallery supports various WordPress image sizes (thumbnail, medium, large, full) and also allows you to specify a custom size.
* **Lazy Loading:** Enable lazy loading to improve page load times. Images will only be loaded as the user scrolls down the page.
* **Automatic Image Resizing:** Envira will attempt to automatically resize your images.
* **Gallery Theme:** Select a pre-designed gallery theme to quickly style your gallery.
* **Enable Gallery Title:** Choose whether to display the gallery title above the gallery.
**Lightbox Settings:**
* **Enable Lightbox:** Enable the lightbox feature, which allows users to click on an image to view it in a larger, full-screen overlay.
* **Lightbox Theme:** Select a lightbox theme to style the appearance of the lightbox.
* **Lightbox Title:** Choose whether to display the image title in the lightbox.
* **Lightbox Caption:** Choose whether to display the image caption in the lightbox.
* **Lightbox Arrows:** Enable or disable the navigation arrows in the lightbox.
* **Lightbox Counter:** Display a counter that shows the current image number and the total number of images in the gallery.
* **Lightbox Social Sharing:** Add social sharing buttons to the lightbox, allowing users to easily share images on social media platforms.
* **Lightbox Keyboard Navigation:** Enable keyboard navigation for the lightbox, allowing users to navigate between images using the arrow keys.
**Thumbnails Settings:**
* **Enable Thumbnails:** Enable or disable the display of thumbnails below the main gallery images.
* **Thumbnail Width:** Set the width of the thumbnails in pixels.
* **Thumbnail Height:** Set the height of the thumbnails in pixels.
* **Position:** Choose whether to display the thumbnails above or below the main gallery images.
**Pagination Settings:**
* **Enable Pagination:** Enable pagination for galleries with a large number of images.
* **Number of Images Per Page:** Specify the number of images to display per page.
* **Pagination Type:** Choose between different pagination types, such as numbered pages or “Load More” buttons.
* **Pagination Style:** Customize the appearance of the pagination controls.
**Miscellaneous Settings:**
* **CSS Classes:** Add custom CSS classes to the gallery container for advanced styling.
* **Disable Right Click:** Disable right-clicking on images to prevent users from downloading them.
* **Import/Export:** Import or export gallery settings for easy duplication or backup.
## Displaying Your Gallery on Your Website
Once you’ve created and configured your gallery, you need to display it on your website. Envira Gallery provides several options for doing so.
1. **Using the Shortcode:**
* Envira Gallery generates a unique shortcode for each gallery. You can find this shortcode on the gallery edit screen.
* Copy the shortcode and paste it into any WordPress post, page, or widget area.
2. **Using the WordPress Block Editor (Gutenberg):**
* In the WordPress Block Editor, search for the “Envira Gallery” block.
* Select the gallery you want to display from the dropdown menu.
3. **Using a Theme Template:**
* For advanced users, you can directly embed the gallery into your theme’s template files using PHP code. The Envira Gallery documentation provides code snippets for this purpose.
## Advanced Features and Addons
Envira Gallery offers a range of advanced features and addons that can further enhance your image galleries.
* **Watermarking:** Protect your images by adding a custom watermark.
* **Password Protection:** Restrict access to your galleries by requiring a password.
* **Social Sharing:** Integrate social sharing buttons into your galleries and lightboxes.
* **Videos:** Embed videos from platforms like YouTube and Vimeo into your galleries.
* **WooCommerce Integration:** Create product galleries for your WooCommerce store.
* **Albums:** Organize your galleries into albums for easier navigation.
* **Fullscreen:** Enable a fullscreen mode for your galleries.
* **Featured Content:** Highlight specific images or videos in your galleries.
* **Dynamic Galleries:** Connect Envira Gallery to external data sources to create dynamic galleries.
## Troubleshooting Common Issues
While Envira Gallery is generally user-friendly, you may encounter some common issues. Here are some troubleshooting tips:
* **Images Not Displaying:**
* Check that the images have been uploaded correctly and that the file paths are valid.
* Verify that the image size settings are appropriate.
* Ensure that the gallery is published.
* **Gallery Not Responsive:**
* Make sure that your theme is responsive and that it doesn’t conflict with Envira Gallery’s styling.
* Check the column width and margins settings.
* Ensure that you are using the latest version of Envira Gallery.
* **Lightbox Not Working:**
* Ensure that the lightbox is enabled in the gallery settings.
* Check for JavaScript errors that may be interfering with the lightbox functionality.
* Try a different lightbox theme.
* **Plugin Conflicts:**
* Deactivate other plugins one by one to identify any conflicting plugins.
* Contact Envira Gallery support for assistance.
## Best Practices for Creating Stunning Image Galleries
To create truly stunning image galleries with Envira Gallery, consider these best practices:
* **Choose High-Quality Images:** Use high-resolution images that are visually appealing and relevant to your content.
* **Optimize Images for the Web:** Compress your images to reduce file size and improve page load times. Tools like TinyPNG or ImageOptim can help.
* **Use Descriptive Alt Text:** Add descriptive alt text to your images for SEO and accessibility.
* **Maintain Consistent Styling:** Use a consistent color scheme, font, and layout throughout your galleries.
* **Consider User Experience:** Design your galleries with the user in mind. Make them easy to navigate and visually appealing.
* **Test on Different Devices:** Ensure that your galleries look great on all devices, including desktops, tablets, and smartphones.
* **Use Captions Wisely:** Add captions to provide context and information about your images.
* **Take Advantage of Addons:** Explore the available addons to extend Envira Gallery’s functionality and create unique galleries.
* **Regularly Update the Plugin:** Keep Envira Gallery updated to the latest version to ensure compatibility and security.
* **Backup Your Galleries:** Regularly back up your gallery settings and images to prevent data loss.
By following these guidelines, you can create beautiful, responsive, and engaging image galleries that enhance your website and captivate your audience. Envira Gallery makes the process straightforward, allowing you to focus on the creative aspects of showcasing your visual content.