
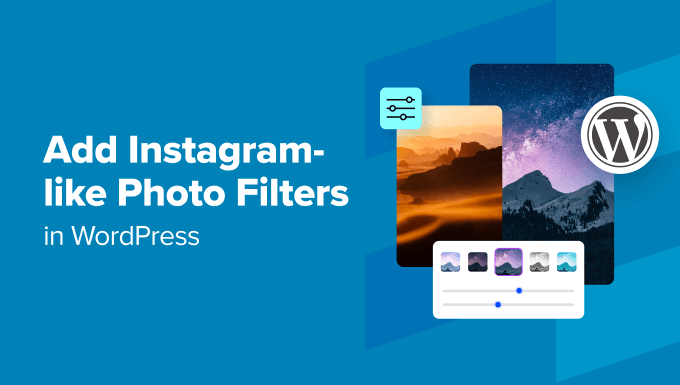
How to Add Instagram-like Photo Filters in WordPress (Step by Step)
Introduction: Transforming Your WordPress Images with Instagram-Style Filters
Images are crucial for engaging your WordPress audience. Visually appealing content grabs attention and communicates your message more effectively. While simply uploading photos is sufficient, adding filters, similar to those found on Instagram, can significantly enhance their impact and give your website a polished, professional look. This article will guide you through several methods, from simple CSS-based solutions to more complex plugin-based approaches, to add Instagram-like photo filters directly within your WordPress environment.
Understanding the Basics: CSS Filters
Before diving into plugins, let’s explore how to use CSS filters. These are built-in browser features that allow you to apply various visual effects to elements, including images. While not as extensive as Instagram’s filters, CSS filters offer a quick and relatively simple way to enhance your photos.
Adding CSS Filters Directly to Your Images
The most straightforward approach involves adding inline styles directly to your `` tags. This is suitable for specific images where you want to apply a unique filter.
Here’s an example:
“`html

“`
This code snippet applies a grayscale filter to the image. Replace “your-image.jpg” with the actual URL of your image.
Common CSS Filter Properties
Here are some of the most useful CSS filter properties:
- `grayscale(percentage)`: Converts the image to grayscale. `100%` is completely grayscale, while `0%` leaves the image unchanged.
- `sepia(percentage)`: Applies a sepia tone to the image, giving it an aged look. `100%` is fully sepia, `0%` is no sepia.
- `blur(pixels)`: Blurs the image. Increase the pixel value to increase the blur intensity.
- `brightness(percentage)`: Adjusts the brightness of the image. `100%` is the original brightness, `0%` is completely black, and values above `100%` increase brightness.
- `contrast(percentage)`: Adjusts the contrast of the image. `100%` is the original contrast, `0%` is no contrast, and values above `100%` increase contrast.
- `hue-rotate(degrees)`: Rotates the hue of the image. Use a value between `0deg` and `360deg`.
- `invert(percentage)`: Inverts the colors of the image. `100%` is completely inverted, `0%` is no inversion.
- `opacity(percentage)`: Adjusts the opacity of the image. `100%` is fully opaque, `0%` is completely transparent.
- `saturate(percentage)`: Adjusts the saturation of the image. `100%` is the original saturation, `0%` is no saturation, and values above `100%` increase saturation.
- `drop-shadow(horizontal vertical blur color)`: Adds a shadow to the image.
Combining CSS Filters
You can combine multiple CSS filters to create more complex effects:
“`html
“`
This example combines grayscale, brightness, and contrast filters.
Adding CSS Filters via WordPress Theme Customization
For a more organized approach, you can add CSS filters through your WordPress theme’s customizer. This allows you to define CSS classes for specific filters and apply them to images throughout your site.
1. Go to **Appearance > Customize** in your WordPress dashboard.
2. Click on **Additional CSS**.
3. Add your CSS rules:
“`css
.filter-grayscale {
filter: grayscale(100%);
}
.filter-sepia {
filter: sepia(80%);
}
.filter-bright {
filter: brightness(120%);
}
“`
Now, you can apply these classes to your images:
“`html

“`
Pros and Cons of Using CSS Filters
**Pros:**
- Simple and straightforward for basic effects.
- No need for plugins.
- Fast loading times as the filters are applied client-side.
**Cons:**
- Limited range of filters compared to dedicated plugins.
- Requires some knowledge of CSS.
- Can become cumbersome to manage for a large number of images or complex filters.
Using WordPress Plugins for Instagram-Like Filters
For more advanced filter options and easier management, consider using a WordPress plugin. Several plugins are available that provide Instagram-like filters and editing tools.
Popular WordPress Filter Plugins
Here are a few popular plugins to consider:
- **Image Effects by WowStrap:** Offers a range of filters, image adjustments, and styling options. It’s known for its ease of use and variety of effects.
- **Meow Gallery:** While primarily a gallery plugin, Meow Gallery includes filter options and integrates well with the WordPress media library.
- **Envira Gallery:** Another gallery plugin with filtering capabilities. Envira Gallery is known for its performance and SEO-friendly features. You’ll likely need a premium version for advanced filter capabilities.
Step-by-Step Guide: Using the “Image Effects by WowStrap” Plugin
This section will provide a detailed guide on using the “Image Effects by WowStrap” plugin.
1. **Installation and Activation:**
* Go to **Plugins > Add New** in your WordPress dashboard.
* Search for “Image Effects by WowStrap.”
* Click **Install Now** and then **Activate**.
2. **Accessing the Image Effects Panel:**
After activation, you’ll typically find a new menu item in your WordPress dashboard or an option within the Media Library. The plugin often integrates directly into the WordPress image editor.
3. **Applying Filters to Images:**
* Go to your Media Library (**Media > Library**).
* Click on the image you want to edit.
* You should see a new section or tab related to “Image Effects by WowStrap” within the image details panel.
* This panel will likely provide a visual interface with various filter options. You can usually select from a list of pre-defined filters (e.g., Sepia, Grayscale, Vintage, etc.).
* Some plugins provide sliders or input fields to adjust the intensity or other parameters of the selected filter.
4. **Customization Options:**
Most filter plugins offer customization options beyond just applying pre-set filters. Look for controls to adjust:
* Brightness
* Contrast
* Saturation
* Hue
* Blur
* Opacity
These controls allow you to fine-tune the filters and create unique effects.
5. **Saving and Applying Changes:**
Once you’re satisfied with the filter, look for a “Save” or “Apply” button. The plugin will then process the image and save the changes. Be aware that some plugins might create a new copy of the image, while others might overwrite the original. Choose the option that best suits your workflow.
6. **Using Filtered Images in Posts and Pages:**
After saving the filtered image, you can use it in your posts and pages just like any other image in your Media Library. The filtered version will be displayed in the front-end.
Pros and Cons of Using WordPress Filter Plugins
**Pros:**
- Wide range of filters and editing tools.
- User-friendly interface for applying and customizing filters.
- Easy to manage filters for multiple images.
- Often includes features like batch processing.
**Cons:**
- Can add to your website’s load time, especially with poorly optimized plugins.
- May require a premium subscription for advanced features.
- Potential compatibility issues with other plugins or themes.
- Some plugins might modify the original image files, so always back up your media library.
Server-Side Image Manipulation: Considerations
While CSS filters are applied client-side (in the user’s browser), some plugins (and more advanced techniques) perform image manipulation on the server. Understanding the implications of server-side processing is crucial.
Image Optimization
Server-side image processing often involves re-encoding images. Ensure the plugin or method you choose optimizes images for web use. This includes:
- **Compression:** Reducing the file size without significant loss of quality.
- **Resizing:** Scaling images to appropriate dimensions for their intended use.
- **WebP Conversion:** Converting images to the WebP format, which offers superior compression compared to JPEG and PNG.
Performance Impact
Server-side image processing can consume server resources, especially when dealing with large images or high traffic. Monitor your website’s performance after implementing such solutions.
- **CPU Usage:** Image processing can be CPU-intensive.
- **Memory Consumption:** Large images require more memory to process.
- **Caching:** Implement caching mechanisms to reduce the need to re-process images repeatedly.
Backup and Storage
Always back up your media library before making significant changes to your images. Consider using a separate storage solution (e.g., Amazon S3, Google Cloud Storage) for your media files, especially if you have a large number of images. This can improve performance and scalability.
Choosing the Right Approach
The best approach for adding Instagram-like filters to your WordPress images depends on your needs and technical skills.
Simple CSS Filters:
Choose this method if:
- You only need basic filters like grayscale, sepia, or brightness adjustments.
- You are comfortable working with CSS.
- You want a lightweight solution that doesn’t require plugins.
WordPress Filter Plugins:
Choose this method if:
- You need a wider range of filters and editing tools.
- You prefer a user-friendly interface.
- You need to manage filters for multiple images.
Server-Side Image Manipulation (Advanced):
Choose this method if:
- You require more sophisticated image processing capabilities beyond basic filters.
- You have the technical expertise to implement and manage server-side image processing.
- You need to optimize images for performance and storage.
By carefully considering your needs and the trade-offs of each approach, you can effectively enhance your WordPress images with Instagram-like filters and create a visually appealing website that engages your audience. Remember to prioritize image optimization and performance to ensure a smooth user experience.