
How to Display the Last Updated Date of Your Posts in WordPress
Understanding the Importance of Displaying Last Updated Dates
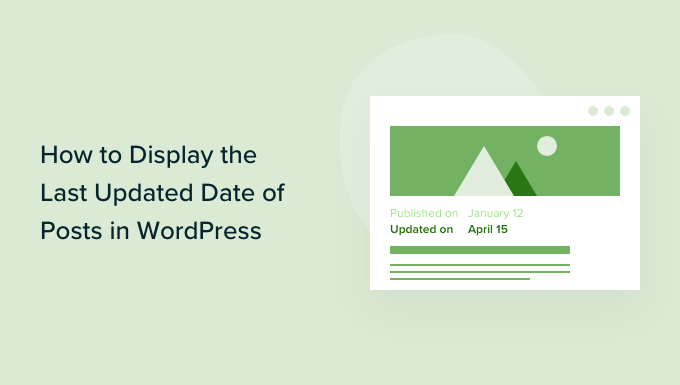
Displaying the “last updated” date on your WordPress posts is a crucial element in maintaining a credible and user-friendly website. While the original publish date remains important for context, the “last updated” date provides visitors with valuable information about the freshness and accuracy of the content. Here’s why it matters:
- Improved User Experience: Visitors appreciate knowing that the information they’re consuming is current and relevant. Seeing a recent “last updated” date instills confidence in the accuracy of the content.
- Enhanced SEO: Search engines favor regularly updated content. Displaying the “last updated” date signals to search engines that your website is actively maintained and the information is kept up-to-date. This can contribute to improved search rankings.
- Increased Transparency: Showing when a post was last modified fosters transparency and builds trust with your audience. It demonstrates a commitment to providing accurate and reliable information.
- Reduced Bounce Rate: If users see an old publish date without a corresponding “last updated” date, they might assume the information is outdated and leave your site. Displaying the “last updated” date can encourage them to stay and engage with your content.
- Relevance for Time-Sensitive Content: For topics that change rapidly (e.g., technology, finance, current events), the “last updated” date is particularly important. It helps users determine if the information is still relevant to their needs.
Methods for Displaying the Last Updated Date
There are several ways to display the last updated date of your WordPress posts. The best method for you will depend on your technical skills, theme customization options, and personal preferences. We’ll explore the most common approaches:
1. Using Theme Options (If Available)
Many modern WordPress themes come with built-in options to display the last updated date. This is often the easiest and most straightforward method.
- Check Your Theme Documentation: The first step is to consult your theme’s documentation or settings panel. Look for options related to “date display,” “post meta,” or “content settings.”
- Customize Theme Settings: Navigate to the WordPress admin dashboard, then to “Appearance” -> “Customize.” Explore the various customization options to see if there’s a setting for displaying the last updated date. Some themes might provide checkboxes or dropdown menus to enable or disable this feature.
- Example: Some themes might allow you to choose between displaying only the publish date, only the last updated date, or both. They might also offer options to customize the format of the date.
If your theme offers this functionality, enabling it is typically a simple process that requires no coding.
2. Using a WordPress Plugin
If your theme doesn’t have built-in support for displaying the last updated date, a WordPress plugin is a great alternative. Several plugins are specifically designed for this purpose.
- Search for Relevant Plugins: In the WordPress admin dashboard, go to “Plugins” -> “Add New.” Search for keywords like “last updated date,” “updated date,” or “post date.”
- Popular Plugins: Some popular and well-regarded plugins include:
- “Last Modified Info”
- “WP Last Modified Date”
- “PublishPress Revisions” (offers extensive revision control and updated date functionality)
- Install and Activate: Choose a plugin that suits your needs and install it. Then, activate the plugin to enable its functionality.
- Configure Plugin Settings: Most plugins have settings pages where you can customize the appearance and placement of the last updated date. Common settings include:
- Date Format: Choose the desired format for displaying the date (e.g., “Month Day, Year,” “Day/Month/Year”).
- Placement: Specify where the date should be displayed (e.g., before the content, after the content, above the title).
- Text Customization: Customize the text that precedes the date (e.g., “Last Updated:”, “Updated On:”).
- Conditional Display: Some plugins allow you to display the last updated date only if the post has been modified after a certain date.
Using a plugin is a relatively easy and non-technical way to add the last updated date to your posts. Remember to choose a plugin that is regularly updated and has good reviews.
3. Manually Editing Theme Files (Requires Coding Knowledge)
For those comfortable with coding, manually editing the theme files offers the most control over the appearance and placement of the last updated date. This method involves modifying the PHP code of your theme. **Caution: Always back up your theme files before making any changes, as incorrect modifications can break your website.**
- Identify the Relevant Theme Files: The files you need to edit will depend on your theme’s structure. Common files to check include:
- `single.php`: For displaying single posts.
- `page.php`: For displaying pages.
- `content.php`: Often used to display post content in various contexts.
- `functions.php`: For adding custom functions.
- Locate the Appropriate Location: Determine where you want the last updated date to appear on your posts (e.g., below the title, above the content, in the footer).
- Add the PHP Code: Insert the following PHP code snippet into the appropriate location in your theme file:
“`php
= $u_time + 86400) {
echo “Last updated on “;
the_modified_date();
echo ““;
}
?>
“`This code snippet checks if the last modified time is different than the post time (by at least 24 hours) before showing the last updated date. This is useful to prevent showing a last updated date if you’ve only made minor changes right after posting.
Alternatively, to always show the updated date (if different from the published date), you can use:
“`php
Last updated on “;
the_modified_date();
echo ““;
}
?>
“`To *always* show the last updated date (regardless of whether it’s the same as the published date), you can use:
“`php
Last updated on
“`
- Customize the Output (Optional): You can customize the HTML and text surrounding the date to match your theme’s design. For example, you can add CSS classes to the `
` tag to style the date. You can also customize the date format using the `date()` function in PHP (e.g., `the_modified_date(‘F j, Y’);` for “Month Day, Year”).
- Alternative Approach: Using `functions.php`
Another approach is to add a function to your `functions.php` file and then call that function in your theme template files. This keeps your template files cleaner and more organized.
First, add this function to your `functions.php` file:
“`php
function display_last_updated_date() {
$u_time = get_the_time(‘U’);
$u_modified_time = get_the_modified_time(‘U’);
if ($u_modified_time >= $u_time + 86400) {
echo ‘Last updated on ‘;
the_modified_date();
echo ‘‘;
}
}
“`Then, in your template files (e.g., `single.php`), you can call this function:
“`php
“`This approach is more modular and easier to maintain. Remember to style the `.last-updated` class in your theme’s CSS file to match your design.
Editing theme files requires a good understanding of PHP and WordPress theme structure. If you’re not comfortable with coding, it’s best to use a plugin or consult with a WordPress developer.
4. Using Shortcodes (if enabled by your theme or a plugin)
Some themes or plugins might offer shortcodes to display the last updated date. Shortcodes are simple tags that you can insert into your posts or pages to execute specific functions.
- Check Theme/Plugin Documentation: Look for documentation that describes the available shortcodes and their usage.
- Insert the Shortcode: If a shortcode is available, simply insert it into your post content where you want the last updated date to appear. For example: `[last_updated_date]`.
- Customize (if possible): Some shortcodes might offer options to customize the date format or the text surrounding the date.
Shortcodes provide a convenient way to add dynamic content without directly editing theme files, but they rely on your theme or a plugin providing the necessary functionality.
Choosing the Right Method
The best method for displaying the last updated date depends on several factors:
- Technical Skill Level: If you’re not comfortable with coding, using a theme option or a plugin is the easiest and safest approach.
- Theme Features: If your theme already has built-in support for displaying the last updated date, use that option. It’s often the most integrated and optimized solution.
- Customization Needs: If you need fine-grained control over the appearance and placement of the date, manually editing theme files might be necessary.
- Plugin Quality: If you choose to use a plugin, select one that is well-maintained, regularly updated, and has good reviews.
- Performance Considerations: While most methods have minimal impact on performance, avoid using overly complex or resource-intensive plugins.
Best Practices and Considerations
Regardless of the method you choose, keep these best practices in mind:
- Be Consistent: Use the same date format and placement for all your posts to maintain a consistent user experience.
- Consider Conditional Display: In some cases, it might be appropriate to only display the last updated date if the post has been significantly modified. This prevents displaying the date for minor edits like typos.
- Use Clear and Concise Language: Use clear and concise language to indicate that the date represents the last time the post was updated (e.g., “Last Updated:”, “Updated On:”).
- Test Thoroughly: After implementing any changes, test your website to ensure that the last updated date is displayed correctly on all posts.
- Monitor Performance: Keep an eye on your website’s performance after adding the last updated date. If you notice any slowdowns, investigate the cause and optimize your implementation.
- Consider Accessibility: Ensure the text displaying the date is accessible to users with disabilities. Use semantic HTML and appropriate ARIA attributes to improve accessibility.
- How to Create a Local WordPress Site Using XAMPP
- How to Add a Search Toggle Effect in WordPress
- How to Easily Style Tags in WordPress (With Examples)
- Beginner’s Guide: How to Use WordPress Block Patterns
- How to Enforce One Category Per Post in WordPress
- How to Add Your Plugin to the WordPress Plugin Directory
- How to Allow PHP in WordPress Posts and Pages (Easy Tutorial)