
How to Change the Color of Address Bar in Mobile Browser to Match Your WordPress Site
Introduction: Branding Beyond the Browser Tab
In the competitive digital landscape, consistent branding is crucial for establishing a strong online presence. While website design focuses heavily on visual elements within the browser window, often overlooked is the address bar—the small but significant strip at the top of the mobile browser. Customizing its color to match your WordPress site’s theme can create a seamless and professional user experience, subtly reinforcing your brand identity and leaving a lasting impression on visitors. This article explores the various methods you can use to achieve this, covering different techniques and considerations for ensuring optimal results across various mobile platforms.
Understanding the Meta Tags: The Key to Color Customization
The ability to change the address bar color in mobile browsers hinges on the use of specific meta tags within your website’s HTML. These tags, placed in the `
` section of your pages, instruct the browser on how to render certain aspects of the user interface, including the address bar. There are distinct meta tags for different mobile operating systems, primarily Android and iOS.Android: Leveraging the `theme-color` Meta Tag
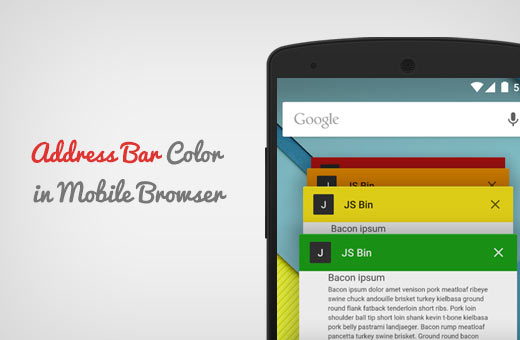
For Android devices running Chrome (and other Chromium-based browsers), the `theme-color` meta tag is the standard method for customizing the address bar color. This tag specifies a hexadecimal color code that the browser will use to tint the address bar.
Implementing the `theme-color` Meta Tag in WordPress
There are several ways to implement the `theme-color` meta tag in your WordPress site:
- Directly Editing the Theme’s `header.php` File: This involves manually adding the meta tag to the `` section of your theme’s `header.php` file. While straightforward, this method requires caution as directly editing theme files can lead to issues if not done correctly. It’s also important to note that theme updates will overwrite these changes, so you’ll need to re-add the code after each update.
- Navigate to your WordPress dashboard.
- Go to Appearance > Theme Editor.
- Locate the `header.php` file (usually under Theme Header).
- Add the following line of code within the `` section: `` Replace `#YOUR_HEX_COLOR_CODE` with the actual hexadecimal color code you want to use (e.g., `#ffffff` for white, `#000000` for black, `#3498db` for a specific blue).
- Click “Update File” to save your changes.
- Using a WordPress Plugin: This is the recommended and safest approach, as it avoids directly modifying theme files and ensures that the changes persist even after theme updates. Numerous plugins are available that allow you to easily add meta tags to your site.
- Go to your WordPress dashboard.
- Go to Plugins > Add New.
- Search for a plugin that allows you to add custom meta tags to your site’s header (e.g., “Insert Headers and Footers”, “Meta Tag Manager”).
- Install and activate the plugin.
- Follow the plugin’s instructions to add the following meta tag: `` Replace `#YOUR_HEX_COLOR_CODE` with your desired color.
- Save your changes within the plugin.
- Utilizing Your Theme’s Customization Options (if available): Some WordPress themes offer built-in options to customize the address bar color directly within the theme’s settings. This is the most convenient option if your theme supports it.
- Go to your WordPress dashboard.
- Go to Appearance > Customize.
- Look for options related to “Site Identity,” “Theme Options,” or “Header Settings.”
- Check if there’s an option to set the “Theme Color,” “Address Bar Color,” or something similar.
- Enter the hexadecimal color code you want to use.
- Click “Publish” to save your changes.
Choosing the Right Color
Selecting the appropriate color for your address bar is crucial for achieving the desired branding effect. Consider the following:
- Match Your Site’s Primary Color: The most common and effective approach is to choose the dominant color from your website’s design, logo, or branding guidelines. This creates a cohesive and unified visual experience.
- Consider Contrast: Ensure that the address bar color provides sufficient contrast with the text and icons displayed within it. Poor contrast can make it difficult for users to read the information in the address bar.
- Test Across Different Devices: Colors can appear differently on various screens. It’s essential to test your chosen color on multiple mobile devices to ensure it looks consistent and visually appealing.
iOS: Using the `apple-mobile-web-app-status-bar-style` Meta Tag
While the `theme-color` meta tag is primarily for Android, iOS uses a different meta tag called `apple-mobile-web-app-status-bar-style` to control the appearance of the status bar (which is closely related to the address bar) when a website is added to the home screen as a web app. This tag offers three options:
- `default`: The status bar appears in its default style, typically with a white background and black text.
- `black`: The status bar appears with a black background and white text.
- `black-translucent`: The status bar appears with a black translucent background, allowing the website content to show through. This option can be visually appealing but may affect readability if the underlying content is too busy.
Implementing the `apple-mobile-web-app-status-bar-style` Meta Tag
Similar to the `theme-color` tag, you can implement this tag using various methods:
- Directly Editing the Theme’s `header.php` File: This method involves adding the meta tag to the `` section of your theme’s `header.php` file. Remember the risks associated with directly editing theme files.
- Navigate to your WordPress dashboard.
- Go to Appearance > Theme Editor.
- Locate the `header.php` file.
- Add the following line of code within the `` section: `` (or `default` or `black-translucent`).
- Click “Update File” to save your changes.
- Using a WordPress Plugin: Using a plugin is the recommended approach.
- Go to your WordPress dashboard.
- Go to Plugins > Add New.
- Search for a plugin that allows you to add custom meta tags.
- Install and activate the plugin.
- Follow the plugin’s instructions to add the following meta tag: `` (or `default` or `black-translucent`).
- Save your changes within the plugin.
- Utilizing Your Theme’s Customization Options (if available): Check if your theme offers built-in options to customize this setting.
- Go to your WordPress dashboard.
- Go to Appearance > Customize.
- Look for options related to “Site Identity,” “Theme Options,” or “Header Settings.”
- Check if there’s an option to set the “Apple Status Bar Style” or something similar.
- Select your desired style (default, black, or black-translucent).
- Click “Publish” to save your changes.
Important Considerations for iOS
It’s crucial to note that the `apple-mobile-web-app-status-bar-style` meta tag only affects the appearance of the status bar when a user adds your website to their home screen as a web app. It does not change the color of the address bar in the Safari browser itself. Additionally, for this meta tag to work, you must also include the following meta tag:
``
This tag tells iOS that your website is a web app and should be displayed in full-screen mode when launched from the home screen.
Combining Android and iOS Meta Tags
To ensure optimal coverage across both Android and iOS devices, it’s recommended to include both the `theme-color` and `apple-mobile-web-app-status-bar-style` meta tags in your website’s `
` section. This will provide a customized experience for users on both platforms.For example:
“`html
“`
Remember to replace `#YOUR_ANDROID_COLOR_CODE` with your desired hexadecimal color code for Android.
Testing and Troubleshooting
After implementing the meta tags, it’s essential to test your website on various mobile devices and browsers to ensure the address bar color is displaying correctly. Here are some troubleshooting tips:
- Clear Browser Cache: Sometimes, browser cache can interfere with the display of the new meta tags. Clear your browser cache and cookies and try again.
- Test on Multiple Devices: Colors and display settings can vary across different devices. Test your website on multiple devices to ensure consistency.
- Check for Typos: Double-check your meta tag code for any typos or errors. Even a small mistake can prevent the tag from working correctly.
- Verify Meta Tag Placement: Ensure that the meta tags are placed within the `` section of your HTML code.
- Use Browser Developer Tools: Use your browser’s developer tools (usually accessed by pressing F12) to inspect the HTML code and verify that the meta tags are present and correctly formatted.
Conclusion: Enhancing User Experience and Brand Recognition
Customizing the address bar color in mobile browsers is a simple yet effective way to enhance your website’s branding and create a more immersive user experience. By leveraging the `theme-color` meta tag for Android and the `apple-mobile-web-app-status-bar-style` meta tag for iOS, you can subtly reinforce your brand identity and leave a lasting impression on your visitors. Remember to test your changes thoroughly and consider the visual impact of your chosen colors to ensure optimal results.