
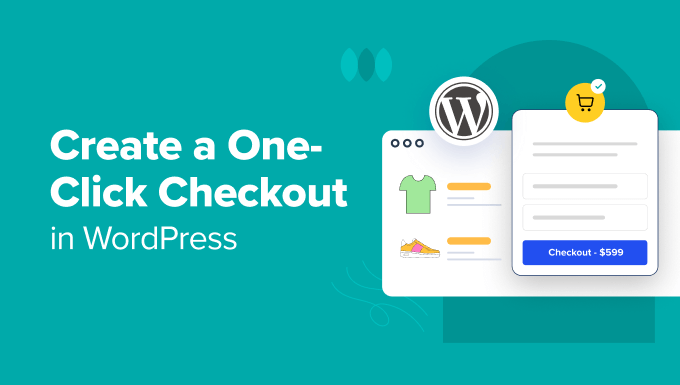
How to Create a One-Click Checkout in WordPress (5 Ways)
How to Create a One-Click Checkout in WordPress (5 Ways)
WordPress, while powerful, doesn’t inherently offer a one-click checkout experience. Streamlining the checkout process can significantly boost conversion rates and reduce cart abandonment. A one-click checkout eliminates multiple steps, making it easier for customers to purchase quickly. This article explores five different methods to implement this feature in your WordPress store, each with its own advantages and disadvantages.
1. Using WooCommerce Extensions (Dedicated One-Click Checkout Plugins)
The most direct route to implementing a one-click checkout is using a dedicated WooCommerce extension. These plugins are specifically designed to simplify the process and often offer a range of customizable features.
- Benefits:
- Typically easy to install and configure.
- Often includes features like address auto-fill, saved payment methods, and customizable buttons.
- Good support and documentation from the plugin developer.
- Can integrate smoothly with existing WooCommerce setup.
- Considerations:
- Cost: Premium plugins can range from $50 to over $100 annually.
- Plugin bloat: Choosing a well-optimized plugin is essential to avoid slowing down your site.
- Compatibility: Ensure the plugin is compatible with your theme and other installed plugins.
Examples of WooCommerce One-Click Checkout Plugins:
* WooCommerce One Page Checkout: This plugin allows you to display the product selection, cart, and checkout on a single page, effectively creating a faster checkout experience. While not strictly “one-click,” it significantly shortens the process.
* YITH WooCommerce One-Click Checkout: This plugin is a dedicated one-click solution, allowing users to bypass the traditional cart and checkout pages and directly purchase products.
* Direct Checkout for WooCommerce: Similar to One Page Checkout, this plugin focuses on streamlining the process by redirecting users directly to the checkout page after adding a product to the cart. It can be configured to pre-fill certain fields, creating a near one-click experience.
How to Implement:
1. Purchase and download the plugin of your choice.
2. Upload and install the plugin through your WordPress admin panel (Plugins -> Add New -> Upload Plugin).
3. Activate the plugin.
4. Navigate to the plugin’s settings page (usually under WooCommerce or a dedicated menu item).
5. Configure the plugin according to your preferences, such as button text, placement, and allowed payment methods.
6. Test the checkout process thoroughly to ensure it functions correctly.
2. Using Payment Gateway Features (e.g., Stripe, PayPal)
Some payment gateways, like Stripe and PayPal, offer features that can contribute to a smoother, faster checkout experience, sometimes mimicking one-click functionality. These often involve storing payment information securely on their servers, allowing customers to quickly repurchase without re-entering their details.
- Benefits:
- Leverages existing payment gateway integration, reducing the need for additional plugins.
- Secure payment processing handled by reputable providers.
- Customers appreciate the convenience of stored payment information.
- Considerations:
- Requires a suitable payment gateway that offers these features.
- Limited customization compared to dedicated one-click checkout plugins.
- Relies on customers opting in to save their payment information.
Stripe’s Payment Request Button (Apple Pay & Google Pay):
Stripe offers a “Payment Request Button” (formerly known as Apple Pay and Google Pay integration) that displays Apple Pay and Google Pay buttons directly on your product pages. This allows customers to checkout with a single click (or tap) using their stored payment information within their respective wallets.
PayPal One Touch:
PayPal One Touch allows customers to stay logged into their PayPal account and make purchases without re-entering their credentials for each transaction. This significantly speeds up the checkout process for returning customers.
How to Implement:
1. Ensure you have a Stripe or PayPal Business account (or other supported payment gateway).
2. Install and configure the official WooCommerce Stripe or PayPal plugin.
3. Enable the Payment Request Button (Stripe) or PayPal One Touch (PayPal) feature within the plugin settings. The specific configuration will vary depending on the plugin.
4. Customize the appearance of the buttons to match your website’s design.
5. Test the checkout process with different payment methods to ensure everything works correctly.
3. Combining Plugins (Cart Abandonment + Express Checkout)
A clever approach is to combine plugins that address different aspects of the checkout process to create a near one-click experience. For example, you can use a cart abandonment plugin to capture customer information and then pair it with an express checkout plugin to speed up the final purchase.
- Benefits:
- More flexibility in choosing specific features.
- Can optimize different parts of the checkout process.
- Potentially lower cost compared to a single all-in-one solution.
- Considerations:
- Requires careful selection of compatible plugins.
- More complex setup and configuration.
- Potential for conflicts between plugins.
Example Plugin Combination:
* Cart Abandonment Plugin (e.g., Retainful, Metrilo): These plugins track abandoned carts and can send automated emails to remind customers to complete their purchase. They often collect customer information (email address, name) during the initial checkout steps.
* Express Checkout Plugin (e.g., WooCommerce Direct Checkout): These plugins streamline the checkout process by redirecting users directly to the checkout page or pre-filling fields with saved information.
How to Implement:
1. Install and configure your chosen cart abandonment plugin. Ensure it captures the necessary customer information.
2. Install and configure your chosen express checkout plugin.
3. Configure the express checkout plugin to pre-fill fields with the information captured by the cart abandonment plugin. This may require some custom coding or integration depending on the specific plugins.
4. Test the entire process to ensure a seamless experience.
4. Custom Code Implementation (Advanced)
For developers or those comfortable with coding, a custom-coded solution offers the most flexibility and control over the one-click checkout process. This approach involves modifying the WooCommerce checkout templates and adding custom JavaScript and PHP code.
- Benefits:
- Maximum flexibility and customization.
- No reliance on third-party plugins.
- Can create a truly unique and tailored checkout experience.
- Considerations:
- Requires significant coding knowledge and experience.
- More time-consuming and complex to implement.
- Requires ongoing maintenance and updates.
- Higher risk of introducing errors or security vulnerabilities.
General Steps for Custom Code Implementation:
1. Child Theme: Always work within a child theme to avoid losing your changes when updating the parent theme.
2. Checkout Template Overrides: Override the WooCommerce checkout templates (e.g., `checkout/form-checkout.php`) by copying them to your child theme and modifying them.
3. JavaScript: Use JavaScript to handle the “one-click” action, such as submitting the form or redirecting to the payment gateway.
4. PHP: Use PHP to process the order and handle payment processing.
5. Security: Implement robust security measures to protect customer data and prevent vulnerabilities.
Example Snippet (Conceptual):
This is a simplified example and requires further development for a fully functional solution.
“`php
// Add a “Buy Now” button to the product page
add_action( ‘woocommerce_after_shop_loop_item’, ‘add_buy_now_button’, 15 );
add_action( ‘woocommerce_single_product_summary’, ‘add_buy_now_button’, 31 );
function add_buy_now_button() {
global $product;
$product_id = $product->get_id();
$buy_now_url = add_query_arg( ‘add-to-cart’, $product_id, wc_get_checkout_url() );
echo ‘Buy Now‘;
}
// Redirect to checkout with the product in the cart
add_filter( ‘template_redirect’, ‘redirect_to_checkout_on_buy_now’ );
function redirect_to_checkout_on_buy_now() {
if ( isset( $_GET[‘add-to-cart’] ) ) {
wc_clear_cart(); // Clear the cart before adding the new product.
$product_id = absint( $_GET[‘add-to-cart’] );
WC()->cart->add_product( $product_id );
wp_safe_redirect( wc_get_checkout_url() );
exit;
}
}
“`
This example creates a “Buy Now” button that redirects to the checkout page with the product already in the cart. Further customization is required to handle payment processing and other checkout functionalities.
5. Using Form Builders with WooCommerce Integration
Some advanced form builder plugins offer integrations with WooCommerce that can be used to create a custom checkout flow, including a simplified, near one-click experience. These plugins allow you to design custom forms that capture necessary customer information and then pass that data to WooCommerce to create an order.
- Benefits:
- Highly customizable form design.
- Conditional logic and advanced field types.
- Can integrate with other services and platforms.
- Considerations:
- Requires a form builder plugin with robust WooCommerce integration.
- More complex setup than using a dedicated one-click checkout plugin.
- May require custom coding to handle advanced features.
Examples of Form Builder Plugins:
* Gravity Forms: A popular and powerful form builder plugin with a WooCommerce add-on.
* WPForms: Another widely used form builder plugin with similar capabilities.
How to Implement:
1. Install and activate a form builder plugin with WooCommerce integration.
2. Create a custom form that captures the necessary customer information (name, address, email, etc.).
3. Use the form builder’s WooCommerce integration to map the form fields to WooCommerce order fields.
4. Implement a “Buy Now” button that submits the form and triggers the WooCommerce order creation process.
5. Configure a payment gateway to process the payment.
6. Test the entire process thoroughly.
Creating a one-click checkout experience involves careful planning and implementation. Assess your technical skills, budget, and desired level of customization to choose the method that best suits your needs. Remember to prioritize security and user experience throughout the process.