
How to Easily Disable the Default WordPress Sitemap
Understanding the WordPress Default Sitemap
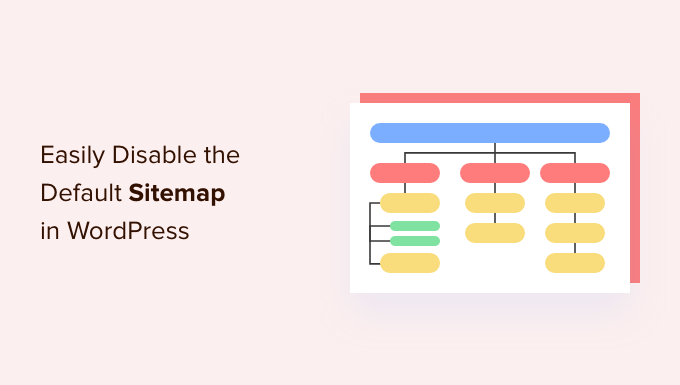
WordPress, since version 5.5, automatically generates a sitemap index file (`wp-sitemap.xml`). This is a beneficial feature for most users as it provides search engines with a structured overview of your website’s content, making it easier for them to crawl and index your pages and posts. A sitemap acts like a roadmap, guiding search engine bots through your website’s architecture. However, there are situations where you might want to disable this default sitemap. Perhaps you’re using a more comprehensive sitemap plugin like Yoast SEO or Rank Math, or you have a very specific site structure that the default sitemap doesn’t accurately reflect. Understanding why you might disable it is the first step in deciding if it’s right for your website.
The default sitemap covers post types, taxonomies, and author archives. It dynamically updates as you add, remove, or modify content on your website. This dynamic nature is usually a plus, but it also means you have less control over exactly what gets included. If you have custom post types, or highly customized taxonomies, the default sitemap might not represent them optimally.
Before disabling the default sitemap, consider the potential impact on your website’s search engine visibility. If you’re not replacing it with a better alternative, disabling it could negatively affect how search engines discover and index your content. Therefore, carefully weigh the pros and cons before proceeding.
Reasons to Disable the Default Sitemap
There are several legitimate reasons why you might choose to disable the default WordPress sitemap:
- You’re already using a plugin like Yoast SEO, Rank Math, or All in One SEO Pack that generates a more comprehensive and customizable sitemap.
- You want complete control over what’s included in your sitemap, and the default sitemap doesn’t offer enough customization options.
- You have a very specific website structure or custom post types that the default sitemap doesn’t handle correctly.
- You want to prevent search engines from indexing certain areas of your website, such as staging environments or private content.
- You encountered a conflict between the default sitemap and another plugin, causing errors or unexpected behavior.
- You are migrating from a different sitemap generation system and want to avoid duplicate sitemaps that could confuse search engines.
It is crucial to remember that disabling the default sitemap without a replacement could negatively impact SEO. A well-structured sitemap assists search engines in efficiently discovering and indexing your site’s content, leading to improved visibility and rankings.
Disabling the Sitemap using Code (functions.php)
This method involves adding a small snippet of code to your theme’s `functions.php` file or using a custom plugin. This is generally the recommended approach if you are comfortable working with code.
- Access your WordPress website’s files. You can do this through your hosting provider’s file manager or using an FTP client like FileZilla.
- Navigate to your theme’s folder. The path is typically `/wp-content/themes/your-theme-name/`. Remember to replace `your-theme-name` with the actual name of your active theme. If using a child theme, modify the child theme’s `functions.php` instead.
- Locate the `functions.php` file.
- Edit the `functions.php` file. Be extremely cautious when editing this file, as errors can break your website. Create a backup of the file before making any changes.
- Add the following code snippet to the end of the file:
“`php
add_filter( ‘wp_sitemaps_enabled’, ‘__return_false’ );
“`This code uses the `wp_sitemaps_enabled` filter to disable the sitemap functionality. The `__return_false` function simply returns `false`, effectively telling WordPress to not generate the sitemap.
- Save the changes to the `functions.php` file.
- Clear your website’s cache. If you’re using a caching plugin, be sure to clear the cache to ensure the changes take effect immediately.
- Verify that the sitemap is disabled by visiting the `wp-sitemap.xml` URL on your website (e.g., `yourdomain.com/wp-sitemap.xml`). You should see either a 404 error (Not Found) or a message indicating that the sitemap is disabled.
Important Considerations:
- Child Themes: If you’re using a custom theme, it’s strongly recommended to create a child theme and add the code to the child theme’s `functions.php` file. This prevents your changes from being overwritten when the parent theme is updated.
- Backup: Always back up your `functions.php` file before making any changes. This allows you to easily restore the file if something goes wrong.
- Syntax Errors: Ensure there are no syntax errors in your `functions.php` file. Even a small error can break your website. Use a code editor with syntax highlighting to help identify and correct any errors.
- Alternative: An alternative approach is to use a custom plugin for this code. This can be safer than modifying the theme files directly.
Disabling the Sitemap using a Plugin
If you’re not comfortable editing code, you can use a plugin to disable the default WordPress sitemap. There are several plugins available that offer this functionality, often as part of a larger suite of SEO tools. The process is generally straightforward: install the plugin, activate it, and then configure the settings to disable the sitemap.
- Log in to your WordPress admin dashboard.
- Navigate to “Plugins” > “Add New.”
- Search for a plugin that allows you to disable the default sitemap. Some popular options include:
- “Disable XML Sitemap” (specifically designed for this purpose)
- Yoast SEO (if you’re already using it, you can disable the default sitemap in the settings)
- Rank Math SEO (similar to Yoast SEO, offers sitemap control)
- All in One SEO Pack (another comprehensive SEO plugin with sitemap features)
- Install and activate the chosen plugin. For example, if you choose “Disable XML Sitemap,” click “Install Now” and then “Activate.”
- Configure the plugin settings. The exact steps will vary depending on the plugin you choose. For the “Disable XML Sitemap” plugin, there usually aren’t any settings to configure; simply activating the plugin disables the sitemap. For Yoast SEO or Rank Math, you’ll need to navigate to the plugin’s settings and look for the sitemap options. There should be a toggle or checkbox to disable the default WordPress sitemap. Make sure the plugin’s own sitemap is enabled if you’re using it.
- Clear your website’s cache. As with the code method, clear your cache to ensure the changes take effect.
- Verify that the sitemap is disabled by visiting the `wp-sitemap.xml` URL on your website.
Plugin Considerations:
- Plugin Choice: Select a reputable plugin with good reviews and active development. Outdated or poorly coded plugins can cause security vulnerabilities or compatibility issues.
- Plugin Conflicts: Be aware of potential conflicts between plugins. If you’re already using an SEO plugin with sitemap functionality, disabling the default sitemap through a separate plugin might cause unexpected behavior. Test thoroughly after installing and configuring any new plugin.
- Plugin Bloat: Using too many plugins can slow down your website. Consider the overall impact on performance when choosing a plugin. If you only need to disable the sitemap, a lightweight plugin designed specifically for that purpose might be a better option than a larger, more comprehensive plugin.
Verification After Disabling
After disabling the default WordPress sitemap using either the code or plugin method, it’s crucial to verify that the sitemap is indeed disabled. This ensures that search engines aren’t still accessing the default sitemap, potentially causing confusion or indexing issues.
- Visit the default sitemap URL in your web browser. The URL is typically `yourdomain.com/wp-sitemap.xml`. Replace `yourdomain.com` with your actual domain name.
- Check the HTTP status code. You should receive either a 404 (Not Found) error or a custom message indicating that the sitemap is disabled. If you’re still seeing the sitemap, it means the disabling process was not successful. Double-check your code or plugin settings.
- Use a tool to check the HTTP headers. Tools like the Chrome Developer Tools (accessible by pressing F12) or online HTTP header checkers can reveal the HTTP status code and other relevant information. Look for a 404 status code.
- Check your website’s `robots.txt` file. While not strictly necessary, you can add the following line to your `robots.txt` file to explicitly disallow search engines from accessing the default sitemap:
“`
Disallow: /wp-sitemap.xml
“`The `robots.txt` file is usually located at the root of your website. You can access it by visiting `yourdomain.com/robots.txt`.
- Monitor your search engine crawl reports (e.g., in Google Search Console). After disabling the sitemap, monitor your search engine crawl reports to ensure that search engines are no longer trying to access the `wp-sitemap.xml` URL. If you see errors related to the sitemap, it might indicate that the disabling process was not fully effective.
Verification is a critical step to confirm you’ve successfully disabled the default sitemap. This confirms to search engines the desired changes and optimizes their crawling of your website.
Alternative Solutions and Considerations
While disabling the default WordPress sitemap is a valid option in certain situations, there are alternative solutions and considerations that you should keep in mind:
- Customize the Default Sitemap: Instead of disabling the default sitemap entirely, you might be able to customize it using filters and actions. WordPress provides several hooks that allow you to modify the content and structure of the sitemap. This approach gives you more control over the sitemap without having to rely on a plugin or build your own sitemap from scratch.
- Use a Sitemap Index: If you have a large website with a lot of content, you might need to create a sitemap index file. This file acts as a table of contents for your individual sitemaps. You can use a plugin like Yoast SEO or Rank Math to automatically generate a sitemap index.
- Submit Your Sitemap to Search Engines: Once you have a sitemap (whether it’s the default sitemap, a customized sitemap, or a sitemap generated by a plugin), be sure to submit it to search engines like Google and Bing. This helps them discover and index your content more efficiently. You can submit your sitemap through Google Search Console and Bing Webmaster Tools.
- Regularly Update Your Sitemap: Keep your sitemap up to date as you add, remove, or modify content on your website. An outdated sitemap can lead to indexing issues and reduced search engine visibility. Most sitemap plugins automatically update the sitemap whenever you make changes to your website.
- Consider a Sitemap for Images and Videos: If your website includes a lot of images or videos, you might want to create separate sitemaps specifically for these types of content. This can help search engines better understand and index your multimedia assets. Many SEO plugins offer the option to create image and video sitemaps.
- Mobile Sitemap: For websites with a separate mobile version, consider creating a mobile sitemap to guide search engines to the mobile-optimized content.
Careful consideration of these alternatives allows you to make the best decision for your website, prioritizing both SEO and maintainability.
- How to Add the Ultimate SEO Dashboard in WordPress
- 11 Things You Should Do When Inheriting a WordPress Site
- How to Add Schema Markup in WordPress and WooCommerce
- How to Get a Google Featured Snippet with Your WordPress Site
- How to Improve Your 404 Page Template in WordPress (2 Ways)
- How to Avoid Duplicate Post Display With Multiple Loops in WordPress
- How to Add Your WordPress Site to Google Search Console