
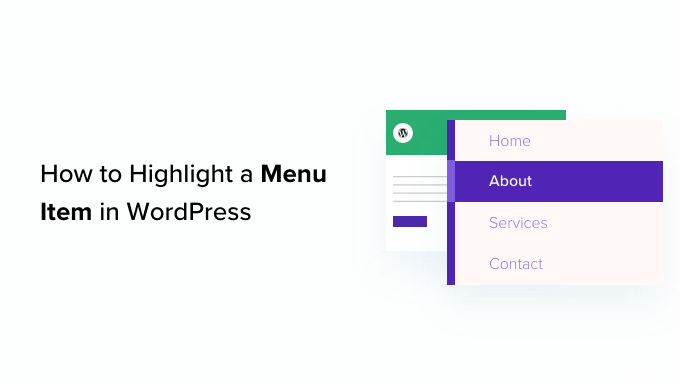
Introduction: Highlighting Menu Items in WordPress
A well-designed navigation menu is crucial for user experience on any WordPress website. Highlighting a specific menu item can draw attention to important pages, promotions, or current sections, guiding visitors and improving engagement. This article explores various methods for highlighting menu items in WordPress, ranging from simple CSS adjustments to plugin-based solutions.
Why Highlight Menu Items?
Highlighting menu items serves several key purposes:
- Directing User Attention: Emphasize specific pages, such as a landing page, a sale section, or a crucial information page.
- Improving Navigation: Visually indicate the user’s current location within the site, enhancing orientation.
- Promoting Special Offers: Draw attention to limited-time promotions or featured products.
- Encouraging Specific Actions: Highlight calls-to-action, such as “Contact Us” or “Sign Up.”
Method 1: Using Custom CSS
The simplest and most common method for highlighting menu items is using custom CSS. This involves adding CSS rules to your theme’s stylesheet or using the WordPress Customizer’s built-in CSS editor.
Finding the Menu Item’s CSS Class
First, you need to identify the CSS class or ID associated with the specific menu item you want to highlight. You can do this by inspecting the HTML of your website using your browser’s developer tools (usually accessed by right-clicking on the menu item and selecting “Inspect” or “Inspect Element”).
Look for a `
Adding the CSS in the WordPress Customizer
- Navigate to Appearance > Customize in your WordPress admin panel.
- Select Additional CSS.
- Enter your custom CSS code.
- Click Publish to save your changes.
Example CSS Code
Here are a few examples of CSS code you can use to highlight menu items:
Example 1: Changing the Background Color
 .menu-item-123 a {
  background-color: #f00; /* Red background */
  color: #fff; /* White text */
  padding: 10px;
 }
Example 2: Adding a Border
 .menu-item-123 a {
  border: 2px solid #00f; /* Blue border */
 }
Example 3: Changing the Font Weight
 .menu-item-123 a {
  font-weight: bold;
 }
Highlighting the Current Page (Active Menu Item)
To highlight the current page the user is viewing, you can use the `.current-menu-item` class. WordPress automatically adds this class to the `
 .current-menu-item a {
  background-color: #ddd; /* Light gray background */
 }
Method 2: Using a Plugin
For users who prefer a more user-friendly interface or need advanced highlighting options, several WordPress plugins can simplify the process.
Popular Menu Highlighting Plugins
- Highlight Menu Item: A dedicated plugin focusing solely on highlighting menu items.
- Max Mega Menu: A powerful menu plugin offering extensive customization options, including highlighting.
- UberMenu: Another popular mega menu plugin with advanced styling capabilities.
Installing and Configuring a Plugin
- Navigate to Plugins > Add New in your WordPress admin panel.
- Search for the desired menu highlighting plugin.
- Click Install Now and then Activate.
- Follow the plugin’s instructions to configure the highlighting settings. This usually involves selecting the menu item and choosing the desired highlight style (e.g., background color, text color, border).
Plugin Advantages and Disadvantages
Advantages:
- User-friendly interface.
- No coding required.
- Often offers advanced highlighting options (e.g., different styles for different menu items, time-based highlighting).
Disadvantages:
- Can add extra weight to your website if the plugin is not well-optimized.
- May require a paid subscription for advanced features.
- Potential compatibility issues with certain themes or other plugins.
Method 3: Editing Theme Files (Advanced)
This method involves directly modifying your theme’s template files. It’s more complex and requires a good understanding of PHP and WordPress theme structure. Caution: Always back up your theme files before making any changes.
Finding the Menu Template File
The location of the menu template file varies depending on your theme. Common locations include:
- `wp-content/themes/your-theme/header.php`
- `wp-content/themes/your-theme/template-parts/header/site-navigation.php`
- `wp-content/themes/your-theme/inc/template-tags.php` (often contains functions related to menus)
You can also use the WordPress Template Hierarchy to help you locate the correct template file.
Adding Custom Classes or Styles
Once you’ve located the menu template file, you can add custom classes or inline styles to the menu items. For example, you can add a conditional statement to check if the current menu item is the one you want to highlight and then add a specific class to it.
Example (Illustrative):
This example is simplified and may need to be adapted to your specific theme.
 <?php
 $menu_items = wp_get_nav_menu_items('Main Menu'); // Replace 'Main Menu' with your menu name

 if ($menu_items) {
  echo '<ul>';
  foreach ($menu_items as $menu_item) {
   $classes = array('menu-item');
   if ($menu_item->object_id == 123) { // Replace 123 with the ID of the page you want to highlight
    $classes[] = 'highlighted-menu-item';
   }
   echo '<li class="' . implode(' ', $classes) . '"><a href="' . $menu_item->url . '">' . $menu_item->title . '</a></li>';
  }
  echo '</ul>';
 }
 ?>
Then, you would add the CSS for the `highlighted-menu-item` class in your theme’s stylesheet.
Important Considerations:
- This method is highly theme-dependent. The code will vary significantly based on your theme’s structure.
- Using a child theme is crucial. Directly modifying the parent theme will cause your changes to be overwritten when the theme is updated.
- Thoroughly test your changes after implementation.
Conclusion
Highlighting menu items is a valuable technique for improving user experience and guiding visitors on your WordPress website. While custom CSS offers a straightforward solution for simple highlighting, plugins provide more advanced options and user-friendly interfaces. Editing theme files provides the most control but requires advanced technical skills. Choose the method that best suits your needs and technical expertise, and remember to always back up your website before making any significant changes.