
Moving Your Blog: From WordPress.com to WordPress.org – A Simplified Guide
So, you’ve decided to graduate from WordPress.com to the more powerful and flexible world of WordPress.org. Congratulations! This transition opens up a world of customization, plugins, themes, and monetization opportunities. While it might seem daunting, moving your blog doesn’t have to be a nightmare. This guide will break down the process into easily digestible steps, ensuring a smooth transition and minimal disruption to your online presence.
Why Move to WordPress.org?
Before we dive into the how-to, let’s quickly recap why moving to self-hosted WordPress.org is such a beneficial upgrade. WordPress.com is a great starting point, but it comes with limitations. WordPress.org, on the other hand, offers:
- Complete control over your website’s design and functionality.
- The ability to install custom themes and plugins.
- Monetization options, including advertising and affiliate marketing.
- Full ownership of your content and data.
- The freedom to choose your own domain name.
Prerequisites: What You Need Before You Begin
Before you start the migration process, you’ll need to gather a few essential resources:
- A Domain Name: This is your website’s address (e.g., www.yourblog.com). If you don’t already have one, you’ll need to purchase it from a registrar like GoDaddy or Namecheap.
- Web Hosting: This is where your website’s files will be stored. Choose a reliable hosting provider that offers WordPress-compatible hosting. Popular options include Bluehost, SiteGround, and DreamHost.
- A Fresh WordPress.org Installation: Most hosting providers offer a one-click WordPress installation, making this step incredibly easy.
Once you have these in place, you’re ready to begin the migration process.
Step 1: Exporting Your Content from WordPress.com
The first step is to export all your content from your WordPress.com blog. This includes your posts, pages, comments, and media files. WordPress.com provides a built-in export tool that makes this process relatively straightforward.
- Log in to your WordPress.com account.
- Go to your Dashboard.
- Navigate to Tools > Export.
- Choose the “All content” option.
- Click the “Download” button. This will download an XML file containing your blog’s content. Save this file to your computer.
Step 2: Installing WordPress on Your New Hosting Account
If you haven’t already, you’ll need to install WordPress on your new hosting account. As mentioned earlier, most hosting providers offer a simple one-click installation process. Look for a WordPress installer in your hosting control panel (usually cPanel or a similar interface).
Follow the on-screen instructions to install WordPress. You’ll need to choose a username, password, and a site title. Make sure to keep these details safe, as you’ll need them to log in to your new WordPress.org site.
Step 3: Importing Your Content into WordPress.org
Now it’s time to import the XML file you downloaded from WordPress.com into your new WordPress.org installation.
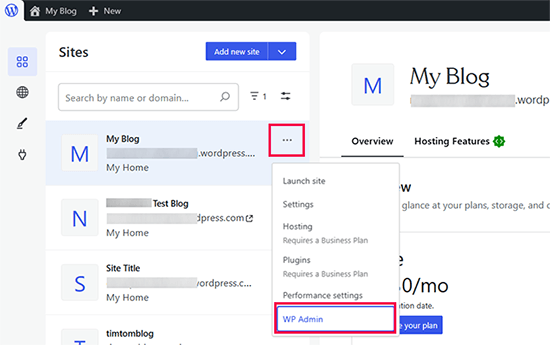
- Log in to your WordPress.org dashboard (e.g., www.yourblog.com/wp-admin).
- Go to Tools > Import.
- Find the “WordPress” importer in the list. If it’s not already installed, click “Install Now” and then “Activate Plugin & Run Importer”.
- Click “Choose File” and select the XML file you downloaded from WordPress.com.
- Click “Upload file and import”.
- You’ll be asked to assign authors for the imported content. You can create a new user or assign the content to an existing user.
- Check the box that says “Download and import file attachments” to import your images and other media files.
- Click “Submit”.
The import process may take a few minutes, depending on the size of your blog. Once it’s complete, you should see a confirmation message.
Step 4: Configuring Your Permalinks
Permalinks are the permanent URLs of your blog posts and pages. It’s important to configure them properly to maintain SEO and avoid broken links.
- In your WordPress.org dashboard, go to Settings > Permalinks.
- Choose a permalink structure that is search engine friendly. A common and recommended option is “Post name”.
- Click “Save Changes”.
Step 5: Choosing and Installing a Theme
One of the biggest advantages of WordPress.org is the ability to choose from thousands of themes. You can find free and premium themes in the WordPress theme directory or from third-party providers.
- In your WordPress.org dashboard, go to Appearance > Themes.
- Click “Add New”.
- You can browse the WordPress theme directory or upload a theme file if you have one.
- Once you find a theme you like, click “Install” and then “Activate”.
Step 6: Installing Essential Plugins
Plugins extend the functionality of your WordPress site. Here are some essential plugins you might want to consider:
- Yoast SEO: For search engine optimization.
- Akismet Anti-Spam: To protect your site from spam comments.
- Contact Form 7: To create contact forms.
- UpdraftPlus: For backing up your website.
To install a plugin:
- In your WordPress.org dashboard, go to Plugins > Add New.
- Search for the plugin you want to install.
- Click “Install Now” and then “Activate”.
Step 7: Setting Up Redirection (Optional but Recommended)
To ensure that visitors who type in your old WordPress.com address are automatically redirected to your new WordPress.org site, you’ll need to set up redirection. WordPress.com offers a paid “Site Redirect” feature for this purpose. While it’s not free, it’s the easiest way to ensure a seamless transition and avoid losing traffic.
Alternatively, you can explore other redirection plugins or methods, but these may be more technically challenging.
Step 8: Testing and Troubleshooting
Once you’ve completed the migration process, it’s crucial to thoroughly test your new WordPress.org site. Check the following:
- All your posts and pages are displaying correctly.
- Images and media files are loading properly.
- Permalinks are working as expected.
- Your theme and plugins are functioning correctly.
- Your contact form is working.
If you encounter any issues, consult the WordPress documentation or seek help from the WordPress community forums.
Step 9: Informing Your Audience
Let your readers know about your move! Announce your new website address on your social media channels and consider writing a blog post explaining the transition. This will help ensure that your audience continues to follow your content on your new platform.
Congratulations!
You’ve successfully moved your blog from WordPress.com to WordPress.org. Enjoy the freedom and flexibility that comes with self-hosting. Now you can explore all the exciting possibilities that WordPress.org has to offer!