
How to Remove the Date From WordPress URLs
Understanding WordPress Permalinks and the Date Structure
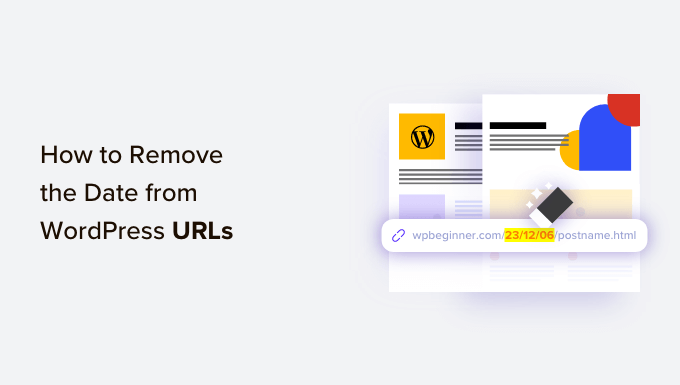
WordPress, by default, often includes the date (year, month, and day) in its URL structure, also known as permalinks. For example, a typical URL might look like this: `yourdomain.com/2023/10/27/your-post-title/`. While this structure can be helpful for organization and archiving, it can also have some drawbacks in terms of SEO and long-term URL strategy. Understanding the implications of using or removing the date is crucial before making any changes.
The default date-based permalink structure was originally chosen to create hierarchical URLs. This was thought to be beneficial for organization and search engine crawling. However, SEO best practices have evolved, and shorter, keyword-rich URLs are generally preferred.
Here are some reasons why you might want to remove the date from your WordPress URLs:
- Improved SEO: Shorter, more descriptive URLs tend to perform better in search engine rankings. Search engines can better understand the content of the page if the URL focuses on keywords rather than date information.
- Enhanced User Experience: Shorter URLs are easier to remember, share, and type. This can lead to a better overall user experience.
- Greater Flexibility: Removing the date allows you to update and republish content without affecting the URL. With a date-based structure, changing the publication date can break existing links.
- Brand Consistency: Cleaner, more concise URLs can contribute to a more professional and consistent brand image.
Before proceeding with any changes to your permalink structure, it’s crucial to understand the potential consequences, especially concerning existing content and SEO.
Potential Risks and Considerations Before Changing Permalinks
Changing your permalink structure can have significant implications for your website, particularly concerning SEO and existing content. It’s vital to proceed with caution and carefully consider the following risks:
- Broken Links: The most significant risk is broken links. When you change the URL structure, all existing links (both internal and external) pointing to your old URLs will become invalid. This can lead to a poor user experience and lost SEO value.
- SEO Impact: If not handled correctly, changing permalinks can negatively impact your search engine rankings. Search engines may take time to re-index your site, and you could temporarily lose traffic.
- Social Media Shares: Existing social media shares associated with your old URLs will no longer work. This means you could lose social proof and potential traffic from social media platforms.
- Backlink Loss: Similar to social media shares, backlinks from other websites pointing to your old URLs will become broken. This can significantly impact your domain authority and search engine rankings.
- 404 Errors: Visitors who try to access old URLs will encounter 404 (Not Found) errors, leading to a frustrating user experience.
- Complexity: Implementing the necessary redirects to avoid broken links and SEO penalties can be complex, especially for large websites with a lot of content.
To mitigate these risks, it’s essential to:
- Plan Carefully: Develop a detailed plan outlining the changes you’ll be making and the steps you’ll take to minimize disruption.
- Backup Your Website: Before making any changes, create a complete backup of your website, including your database and files. This will allow you to restore your site if something goes wrong.
- Implement 301 Redirects: Set up 301 redirects to redirect traffic from your old URLs to your new URLs. This is crucial for preserving SEO value and ensuring a seamless user experience.
- Monitor Your Website: After making the changes, carefully monitor your website for errors and broken links. Use tools like Google Search Console to identify and fix any issues.
Changing your permalinks is a serious undertaking that should be approached with careful planning and execution.
Step-by-Step Guide to Removing the Date from WordPress URLs
Here’s a detailed guide on how to remove the date from your WordPress URLs:
**Step 1: Backup Your Website**
Before making any changes, create a complete backup of your website. This includes your database and all your website files. You can use a plugin like UpdraftPlus, BackupBuddy, or BlogVault to create a backup. Store the backup in a safe location, such as a cloud storage service or an external hard drive.
**Step 2: Choose a New Permalink Structure**
Navigate to **Settings > Permalinks** in your WordPress dashboard. Here, you’ll see several options for your permalink structure. The most common and recommended option for removing the date is the “Post name” structure. This will create URLs that look like `yourdomain.com/your-post-title/`.
Other options include:
- Plain: This is the least SEO-friendly option and creates URLs like `yourdomain.com/?p=123`.
- Day and name: This includes the day, month, and year in the URL, similar to the default structure.
- Month and name: This includes the month and year in the URL.
- Numeric: This creates URLs based on the post ID.
- Custom Structure: This allows you to create a custom permalink structure using tags like `%postname%`, `%category%`, and `%author%`.
For optimal SEO and usability, choose the “Post name” option.
**Step 3: Update Your Permalink Settings**
Select the “Post name” option and click the “Save Changes” button. This will update your permalink structure and generate new URLs for all your posts and pages.
**Step 4: Implement 301 Redirects**
This is the most crucial step to avoid broken links and SEO penalties. You need to implement 301 redirects from your old URLs (with the date) to your new URLs (without the date). There are several ways to do this:
**Method 1: Using a WordPress Plugin (Recommended)**
Using a plugin is the easiest and most efficient way to manage 301 redirects. Several excellent plugins are available, including:
- Redirection: This is a popular and free plugin that allows you to easily create and manage redirects. It also monitors 404 errors and helps you identify broken links.
- Yoast SEO Premium: The premium version of Yoast SEO includes a powerful redirect manager. If you’re already using Yoast SEO, this is a convenient option.
- Rank Math SEO: Rank Math also includes a redirect manager that allows you to create and manage redirects directly from your WordPress dashboard.
- Safe Redirect Manager: A simple and lightweight plugin dedicated to managing redirects.
Here’s how to set up 301 redirects using the Redirection plugin:
1. Install and activate the Redirection plugin.
2. Go to **Tools > Redirection** in your WordPress dashboard.
3. You can configure the plugin settings.
4. Add a new redirect. In the “Source URL” field, enter the old URL pattern (e.g., `/2023/10/27/(.*)`). In the “Target URL” field, enter the new URL pattern (e.g., `/$1`). Ensure the redirect type is set to “301 – Moved Permanently”.
5. Click “Add Redirect”.
The Redirection plugin will automatically redirect any URL that matches the old pattern to the corresponding new URL.
**Method 2: Editing Your .htaccess File (Advanced)**
This method is more technical and requires editing your .htaccess file. Be extremely careful when editing this file, as incorrect changes can break your website.
1. Access your website’s files using an FTP client (e.g., FileZilla) or your hosting provider’s file manager.
2. Locate the .htaccess file in the root directory of your WordPress installation.
3. Download a backup copy of the .htaccess file to your computer before making any changes.
4. Open the .htaccess file in a text editor.
5. Add the following code to the top of the file:
“`
RewriteEngine On
RewriteBase /
RewriteRule ^([0-9]{4})/([0-9]{2})/([0-9]{2})/(.*)$ /$4? [R=301,L]
“`
6. Save the changes to the .htaccess file and upload it back to your server.
This code will redirect all URLs with the date structure to the corresponding URL without the date.
**Step 5: Test Your Redirects**
After implementing the redirects, thoroughly test them to ensure they are working correctly. Try accessing your old URLs and verify that you are automatically redirected to the new URLs. Use a browser extension like “Redirect Path” to check the redirect status.
**Step 6: Update Internal Links**
Update all internal links within your website to point to the new URLs. This will improve the user experience and ensure that search engines can easily crawl and index your site. You can use a plugin like “Better Search Replace” to quickly find and replace old URLs with new URLs throughout your website.
**Step 7: Update External Links (If Possible)**
If you have control over external websites that link to your site, update those links to point to the new URLs. This will ensure that you don’t lose any traffic or SEO value from those backlinks.
**Step 8: Monitor Your Website**
After making the changes, carefully monitor your website for errors and broken links. Use tools like Google Search Console to identify and fix any issues. Also, monitor your website’s traffic and search engine rankings to ensure that the changes haven’t negatively impacted your SEO.
Alternative Solutions and Plugins
Besides the methods described above, several other plugins and approaches can help you remove the date from your WordPress URLs:
- Custom Permalink Structure: You can use a custom permalink structure in the “Settings > Permalinks” section. For example, you could use `/%category%/%postname%/` to include the category and post name in the URL. This can be a good option if you want to maintain some level of organization in your URLs. However, it’s important to note that changing the category of a post will also change its URL.
- Permalink Manager Lite: This plugin provides more advanced control over your permalinks, allowing you to customize individual URLs and create custom redirect rules.
- WP Fastest Cache: This caching plugin can help improve your website’s performance after making permalink changes. Caching can reduce server load and improve page load times, which is especially important after a major change like this.
- Broken Link Checker: This plugin scans your website for broken links and helps you identify and fix them. This is a useful tool for monitoring your website after making permalink changes.
Best Practices and Tips for Maintaining SEO After the Change
To minimize any negative impact on your SEO and ensure a smooth transition, follow these best practices:
- Use 301 Redirects: As mentioned earlier, using 301 redirects is crucial for preserving SEO value and ensuring a seamless user experience.
- Update Your Sitemap: After making the changes, update your sitemap and submit it to search engines like Google and Bing. This will help search engines quickly discover and index your new URLs.
- Monitor Your Google Search Console: Regularly monitor your Google Search Console account for errors and crawl issues. This will help you identify and fix any problems that may arise after the permalink changes.
- Be Patient: It takes time for search engines to re-index your website after making permalink changes. Don’t expect to see immediate results. Be patient and continue to monitor your website’s performance.
- Consider a Staging Environment: For larger websites, consider making the permalink changes in a staging environment first. This will allow you to test the changes and identify any issues before deploying them to your live website.
- Communicate with Your Audience: If you have a large and engaged audience, consider communicating the changes to them. Let them know that you’re making improvements to the website and that some URLs may change.
Changing your permalink structure can be a beneficial step for improving your website’s SEO and user experience. However, it’s important to proceed with caution and carefully consider the potential risks. By following the steps outlined in this guide and adhering to best practices, you can successfully remove the date from your WordPress URLs without negatively impacting your website’s performance.
- How to Add the Ultimate SEO Dashboard in WordPress
- What is a SEO Friendly URL Structure in WordPress
- 11 Things You Should Do When Inheriting a WordPress Site
- How to Add Schema Markup in WordPress and WooCommerce
- How to Get a Google Featured Snippet with Your WordPress Site
- How to Improve Your 404 Page Template in WordPress (2 Ways)
- How to Avoid Duplicate Post Display With Multiple Loops in WordPress